
Your old school home decor was a stowaway on your journey from apartment to house.
Not totally sure how this happened. A touch of Walmart bargains here, and some Rooms-to-Go over there. Not-so-hipster hand-me-downs coupled with an overall aesthetic your bestie has dubbed “eclectic.”
Cohesive design is a must.
Your interior design game needs a little help. Or a lot of help. We’ve been there. Custom wood signage will add that touch of character and personality you’re hoping for.
Your walls, your built-in shelves and your mantle want a balance of colors, textures, words and shapes. Excessive expression of any of these four items will result in a lack of cohesiveness. A lack of balance. The vibe that “something is missing” or “it’s not quite right.”
Wood textures offer a warmth. A bit of cozy and calm. Text offers vibrancy and extends who you are and what you represent. Make it meaningful. Let the quote tell a story or prompt a quality conversation.
Behind the wood sign design.
Our built-ins are white. So we chose a mid-tone brown softened with a whitewashed haze to provide visual contrast.
Calligraphy feels personal, whimsical, friendly and lively. SunkissedScripts is our go-to pro-level calligrapher on Etsy.
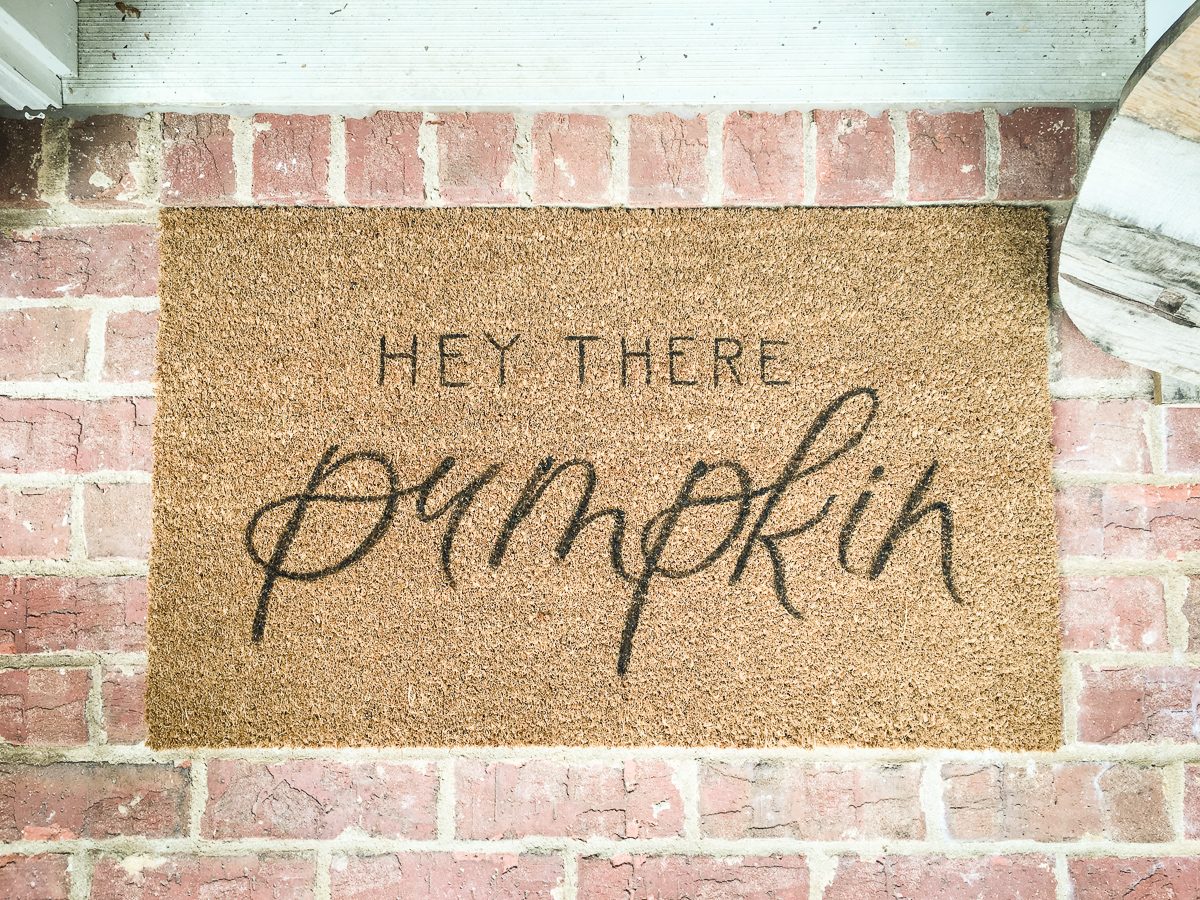
You noticed the Christmas song quote? Choose text based on the season. Or simply opt for text that stays relevant year round.
The black text stands out just enough to catch the eye as you scan our shelves. White text would’ve drawn the eye to the wood sign first. Most mid-tone text colors would remain hidden and too washed out to read.
Decide on the perfectly tailored design for your space and get after it. Build beautiful things until you can build no more.
How to build the wooden sign with your bare hands.
Materials.
- 1 – 1x10x8 common board for $12.18.
- Wood stain. We used Varathane Early American. Linked 2-pack (1 qt. each) for $15.96. Buy one can for $8.98.
- White paint. We chose a Benjamin Moore Simply White color match in a can of Behr base paint. 8 oz paint sample for $3.27. Or any leftover white paint that you like.
- Blue shop towels. Linked 6-pack for $11.98. 3-pack for $5.98.
- Nitrile gloves. 50 for $4.97.
- Wood glue. 8 oz for $3.97.
- Sandpaper sheets – to sand by hand. $5.28 for an assorted pack.
- 1-¼” pocket hole screws. $4.67 for a 100-pack.
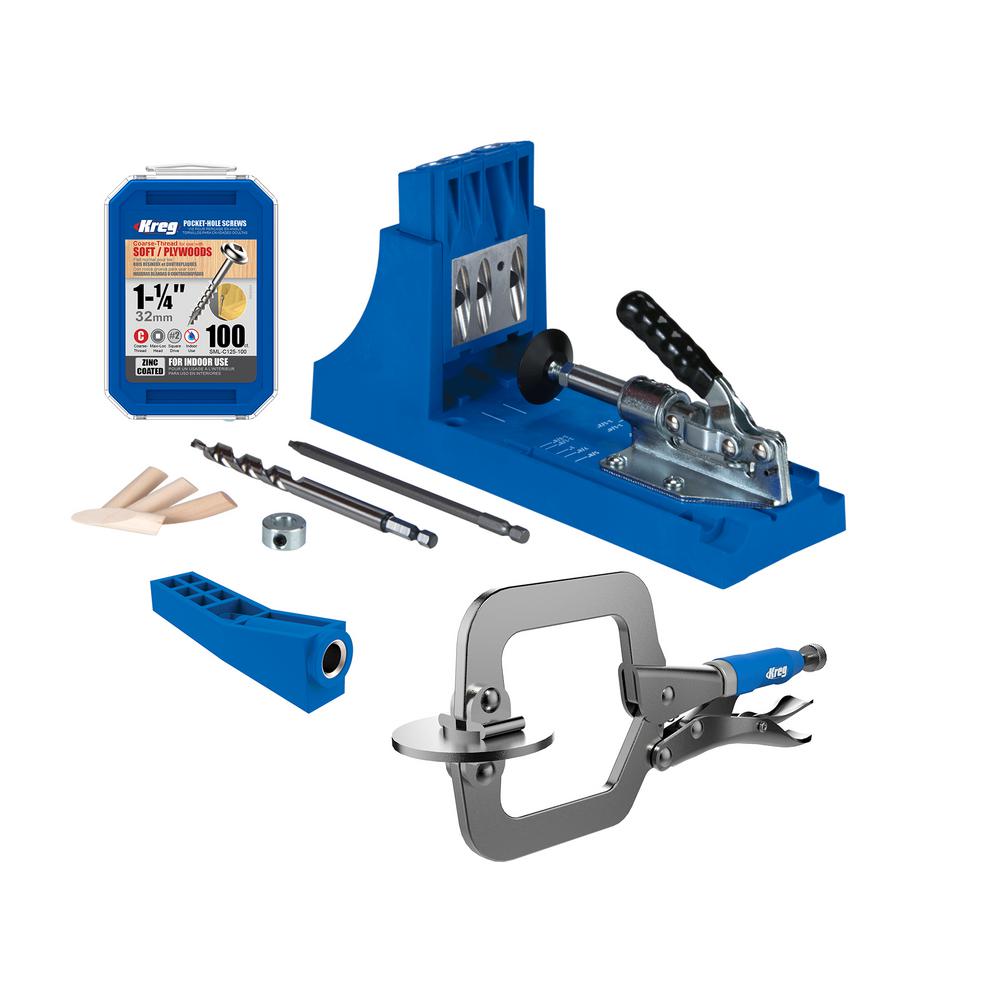
Tools.
- Kreg Jig System – to connect the boards with hidden pocket hole screws.
- Cordless drill / driver with clutch.
- Miter saw OR hand saw with miter box OR circular saw.
- Measuring tape.
- Pencil.
- Ear plugs.
- Safety glasses.
- (Optional) Table saw – to rip the board to the ideal width if necessary.
Budget.
- All Materials Cost = $49.30.
- All Materials Cost for DIY Regulars = $12.18.
-
- Save up to $37.12 if you already have stain, paint, shop towels, nitrile gloves, wood glue, sandpaper and 6 extra pocket hole screws.
Step 1. Measure the sign size you need.
- Choose your wood dimensions based on the space you’re decorating.
- The length of each board will be adjusted with a miter saw, circular saw or hand saw.
- The width of each board can only be adjusted with a table saw. No table saw? Choose the right width board to start with.
COMMON BOARD WIDTH GUIDE.
- Common board dimensions from Home Depot or Lowe’s are NOT actual measurements.
-
- “1x6x8” = ¾ inch x 5-½ inches x 8 feet.
- “1x8x8” = ¾ inch x 7-¼ inches x 8 feet.
- “1x10x8” = ¾ inch x 9-¼ inches x 8 feet.
- “1x12x8” = ¾ inch x 11-¼ inches x 8 feet.
- “2x4x8” = 1-½ inch x 3-½ inches x 8 feet.
- “4x4x8” = 3-½ inch x 3-½ inches x 8 feet.
Example 1: if you’re styling your wood sign with slats vertical, then the “width” of your sign will depend on the width of the common board you choose. 3 – 1x6s will yield a 16-½” wide sign. 3 – 1x8s will yield a 21-¾” wide sign.
Example 2: if you’re styling your wood sign with slats horizontal, then the “width” of your sign will depend on the length of the common board you choose. Miter them to right length. The visual “height” will depend on the true width of each common board. 3 – 1x10s will yield a 27-¾” tall sign. 3 – 1x12s will yield a 33-¾” tall sign.
OUR BUILD.
- 1x10x8 cut to 30” long pieces. This yields a 27-¾” by 30” wood sign. It’s almost square.
Step 2. Hit up your local Home Depot or Lowe’s.
- What’s a Kreg Jig? A means of predrilling angled holes into a piece of wood to inconspicuously join it to another board with screws. Otherwise you’ll see the head of the screw. Or you’ll attempt to guess the perfect angle and miss like the rest of us.
- Need a tutorial? Here’s our rundown on using the Kreg Jig.
- Not necessary. But glue does provide a MUCH stronger joint than pocket hole screws alone. If you’re using a ¾” thick common board like we did, then you’ll want to strongly consider adding glue right before installing pocket hole screws.
CORDLESS DRILL / DRIVER WITH CLUTCH.
- A clutch? You read it correctly. The ability to adjust a drill’s torque before it disengages, preventing overdrilling and screw head stripping. No clutch? You’re WAY more likely to destroy something.
- Save money by purchasing a combo kit rather than an individual drill. Aim for a drill / driver PLUS an impact driver for tougher jobs. Bonus if you choose a brand you like and buy ALL cordless tools that use interchangeable lithium ion batteries.

Step 3. Wood cut list.
*See Step 1 for a measuring guide. Choose dimensions that fit your space! Here are the custom dimensions we used:
- 3 – 1x10s @ 30” long. [That was easy.


Step 4. Drill pocket holes with your Kreg Jig.
- We’re using 3 boards for our wood sign. This only requires pocket holes in 2 of the 3 boards.
- Set your Kreg Jig to the ¾” thick setting on the adjustable drilling guide AND on the drill bit collar.
- Predrill a total of 6 pocket holes (PHs). 3 PHs per board. Leave the third board without any PHs.
- Spacing. Predrill in the center of 2 of the boards. And then roughly 3-4 inches in from each edge. Keep in mind: this build is NOT structural.


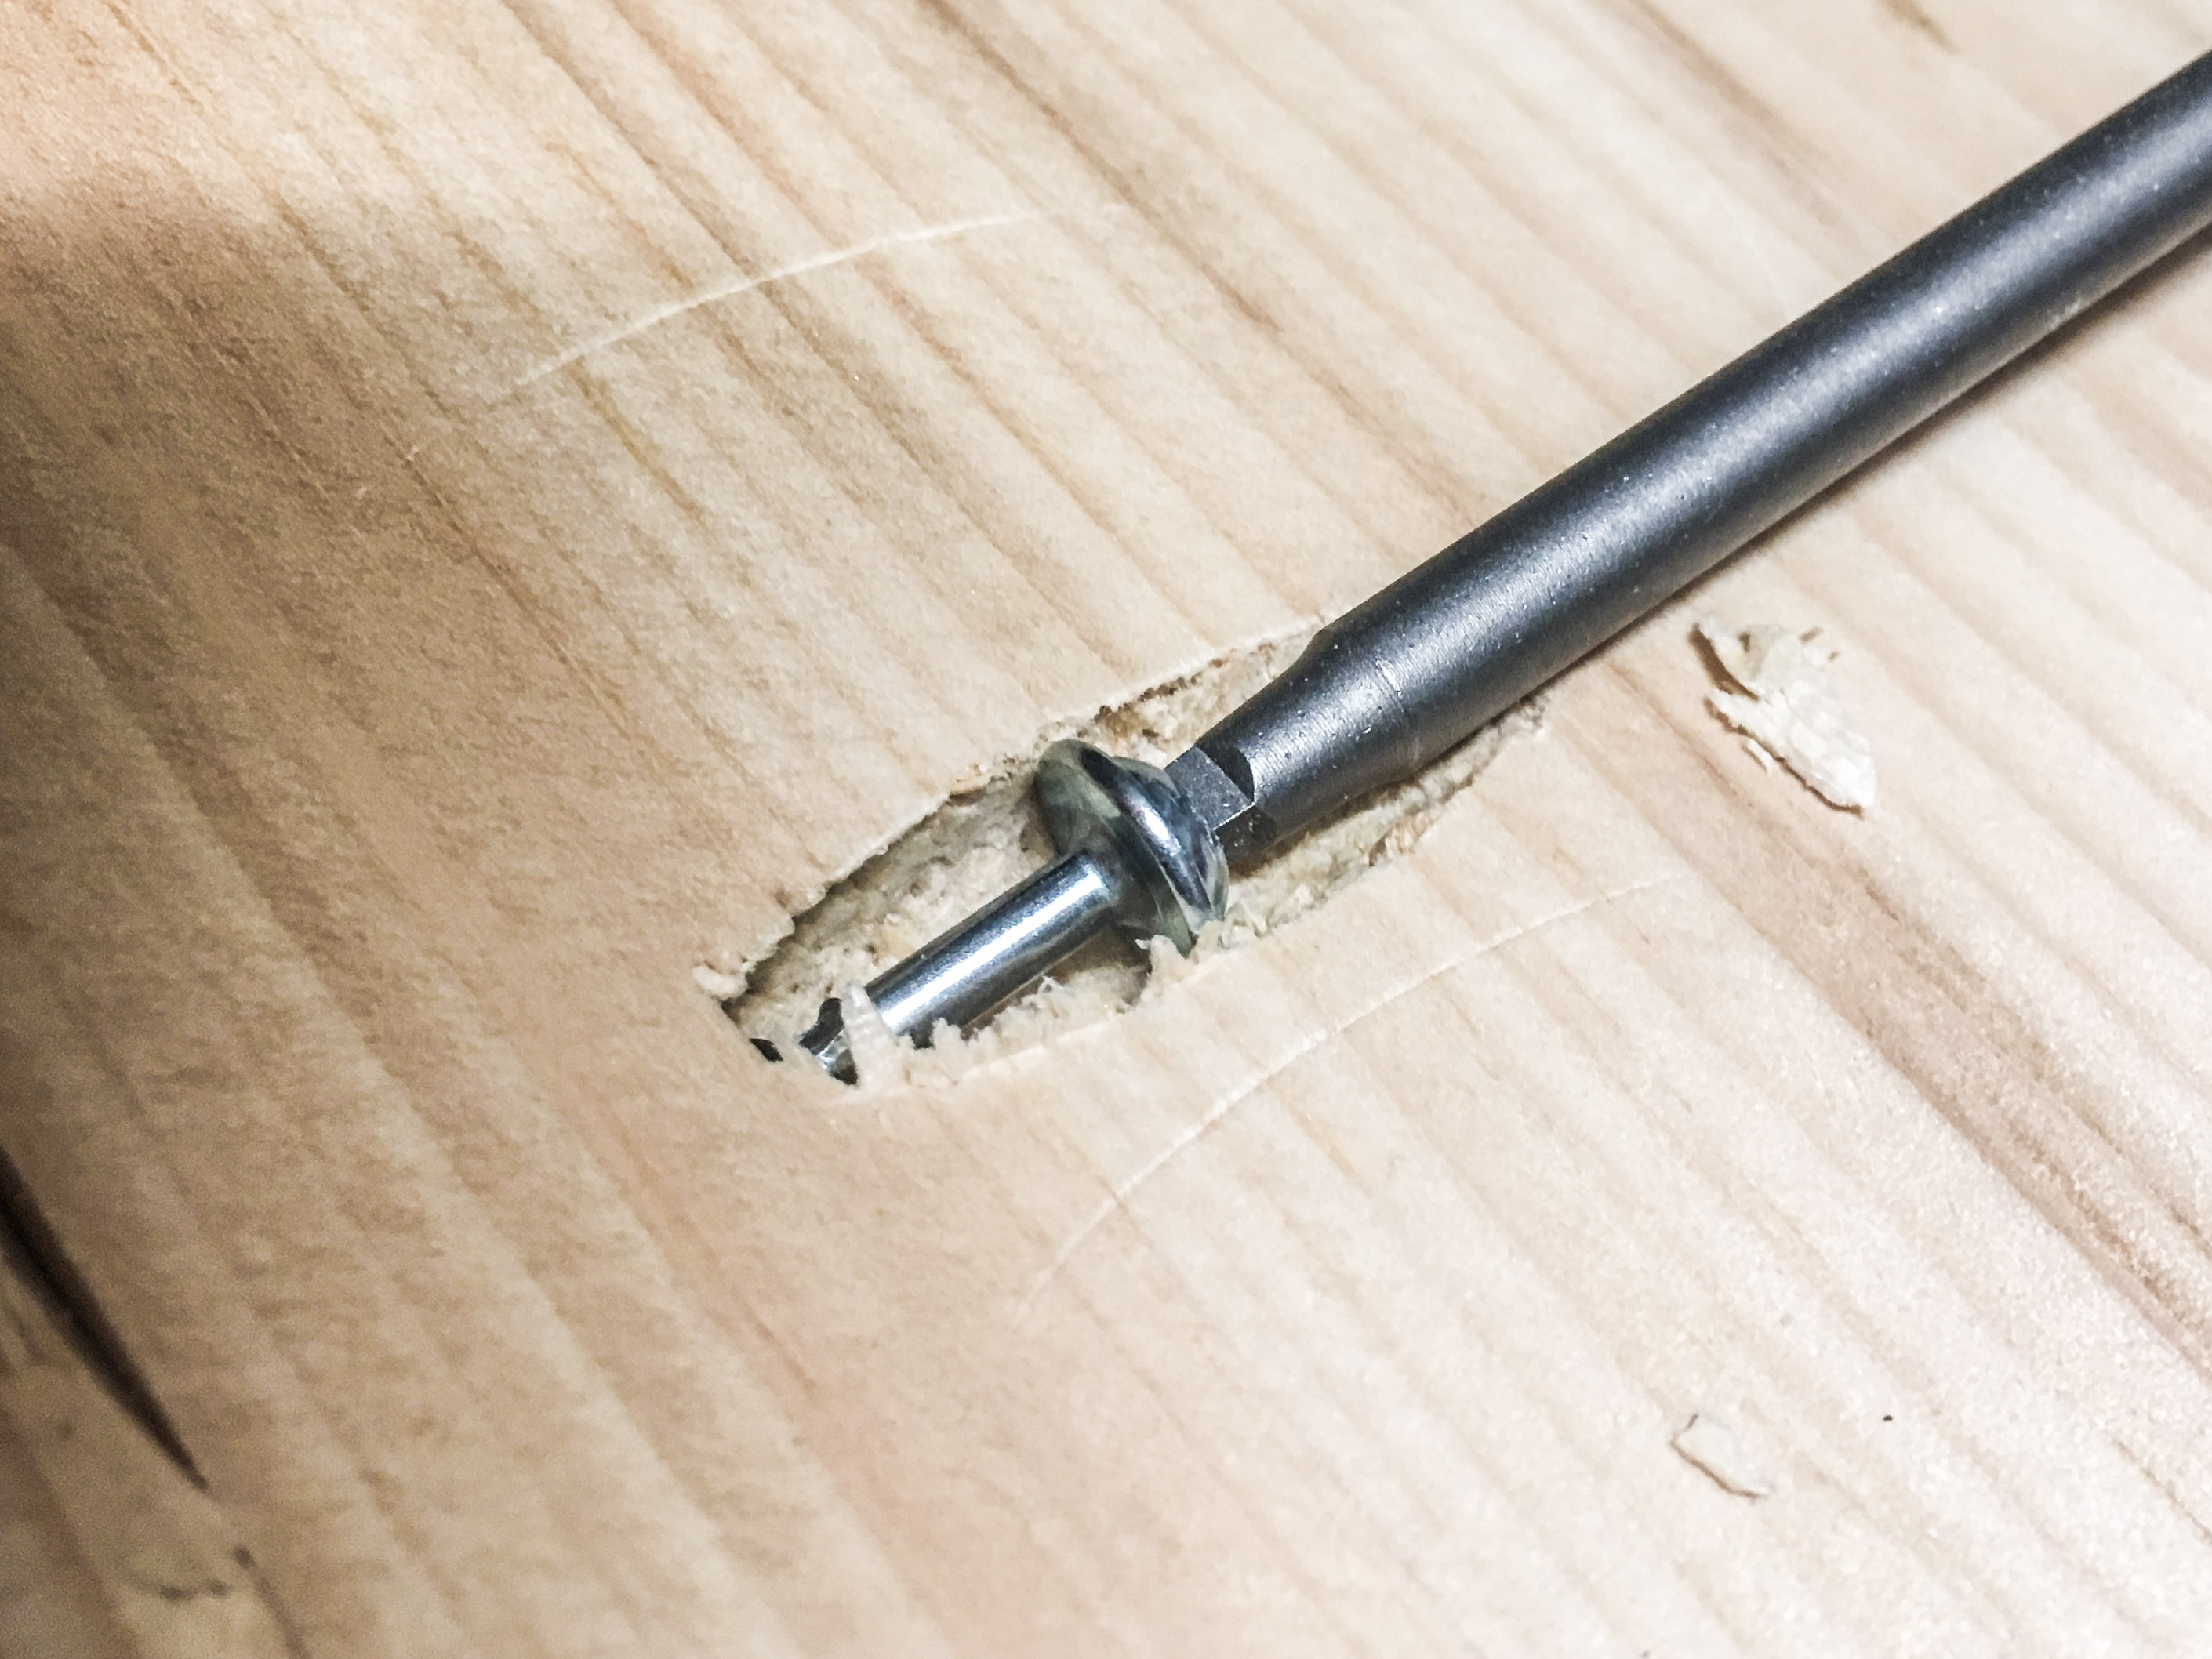
Step 5. Connect the boards with glue and screws.
- Find a flat surface. Glue droplets will likely adhere to the surface.
- Fit your cordless drill with clutch with the 6” long square drive bit that comes with the Kreg Jig kit. Your drill’s torque ring will likely need to be somewhere between 8 and 14.
- Turn the 2 boards with PHs vertical, in the same direction.
- Apply a bead of wood glue to the edge of the 2 boards for a super strong joint.
- Without delay, lay the boards flat and install all 6 PH screws. Be sure to put most of your weight on the boards you’re connecting at the moment. Then shift your knees or feet to the other boards to connect the last joint.
- Allow the glue to dry overnight.


Step 6. Consider sanding the sharp edges.
- Sharp edges aren’t your favorite aesthetic or feel? Sand the edges until you reach a desired roundness.
- Lower grit sandpaper like 60 will remove more material. Higher grit sandpaper like 220 will remove less material and provide a much softer feel.
- If glue seeped out of the joints onto the face of the wood sign, then you may want to chip off the glue droplets and sand the entire face.
Pro tip: sanding only one area of a wood project will vary the stain absorption, which may alter the consistency of your overall stain.
Step 7. Stain the wood sign.
- Put on your nitrile gloves. Otherwise you’ll stain your hands for practically a week.
- Open your can of stain and thoroughly mix for 1 minute using a wooden paint stir stick.
- Apply a generous amount of stain using a clean shop towel. Rub it in until the coat appears evenly distributed.
- Let the stain penetrate the grain for 5-10 minutes.
- Vigorously wipe off the stain residue with a new shop towel until the splotchiness subsides and all excess has been removed.
- Allow the stain to dry at least 1 hour before adding whitewash. Normal conditions are 50% humidity and 70ºF. Colder and more humid conditions will require a much longer dry time.


Step 8. Whitewash the wood sign.
- Find an old plastic container and mix white paint with water. 1:1 ratio for an average whitewash coat thickness. 2:1 paint to water will provide a heavier coat of paint. We used 1:2 paint to water, yielding a much thinner and lighter coat of whitewash.
- Mix the water and paint thoroughly with a wooden paint stir stick.
- Apply the paint with a new shop towel until coverage is even.
- If you like the current white pigment, don’t wipe it off!
- If you’re aiming for a lighter white haze like ours, then wipe off the whitewash with a new shop towel a few minutes after whitewashing.


Step 9. Add custom calligraphy or stenciled text.
- Try you hand at custom calligraphy or use a stencil.
- If your handwriting doesn’t scream “talented and gifted”, then find a pro-level calligrapher. We LOVE SunkissedScripts on Etsy. Check out her store. Examples below.


Step 10. Style the board.
- Your board slapped on a wall or shelf may look beautiful as is. Ours doesn’t standalone.
- We balanced the negative space around the wood sign with our homemade pallet mirror, a mini-wreath and a few smaller items.
- The gold and silver play off of the boards’ neutrals.
Pro-tip: lay out ALL of your design and decor items before styling a built-in, shelf, wall or area of the house. Use trial and error, adjusting and re-adjusting, until the overall aesthetic seems to perfectly blend your textures, colors, shapes and words.
What’s up pro-level sign maker.
After another build like that, it’s time to start you blog. Or Etsy shop. Or some personal brand that shares your crafts and creations with the world. Don’t keep your interior designs and decorations to yourself! We’d love to see ‘em.
Here’s a little inspiration for your next DIY project. Get after it.
Your next project.
- Laundry Room Renovation Reveal & 9 Step-by-Step Tutorials
- How to Make Crates out of Wood Pallets.
- How to Make DIY Shiplap.
- How to DIY Install Floor Tile.
- How to Saw Your Door Bottom to Fit Over the Threshold.
- How to Make & Install DIY Stained Wood Shelves.
- How to Change a Wall or Ceiling Light Fixture.
- How to Dry Brush Reclaimed Pallet Wood with Paint.
- How to Build & Install a Sliding Barn Door.
- DIY Restoration Hardware Copycat Headboard.
- DIY Herringbone Headboard.
- Custom Calligraphy Wall Decor.
- Decorate Your Home for Fall on a Budget.
- DIY Fabric & Burlap Banners.
- Centerpiece Pallet Wood Box.
- Pallet Wood Pumpkins.
- Homemade Fire Pit.
- Rustic Finish For Your Reclaimed Table.
- Installing Laminate Flooring.
- Paint, Stain, Whitewash & Distress Your Farmhouse Table.
- DIY Entryway Organizer.
- How to Clad with Pallet Wood in Your Kitchen.
- How to Install a Solid Wood Range Hood Cover.


