
Intimidated by furniture making? I was too, friend. I thought it required a whole lotta fancy dove tailing, planing, jointing, maybe a little biscuit or domino joinery, extensive routing, your grandpa’s hand tools, all of your time margin, and the lingering stale scent of patchouli oil. Perhaps a Swanson-stache (you ladies included) or a house flipping business in the historic district of Detroit or swanky Orange County. Is there a faster, easier way to make rustic chic / farmhouse furniture? Heck yeah there is. It’s called a Kreg Jig.
Note to the artisans.
Disclaimer: for all you artisan woodworkers who scoff at the idea of screws over wood-glue joints and consider metal a cuss word – here’s my challenge. Build ONE piece using your less-than-artisan friend’s Kreg Jig and THEN make an experience-based assessment of the tool. Concerned about the structural integrity? Glue your pocket-holed (PH) joints. Square table top boards? Run them through your jointer + planer + table saw before connecting with PHs + wood glue. Zero dry time per the strength of the screws. Visibility of the PH screws? Join on the inside and underside of your piece. Hide the holes with angled wood plugs, glued and tapped in place, sanded down, wood puttied and sanded again.
Woodworking for us regular people.
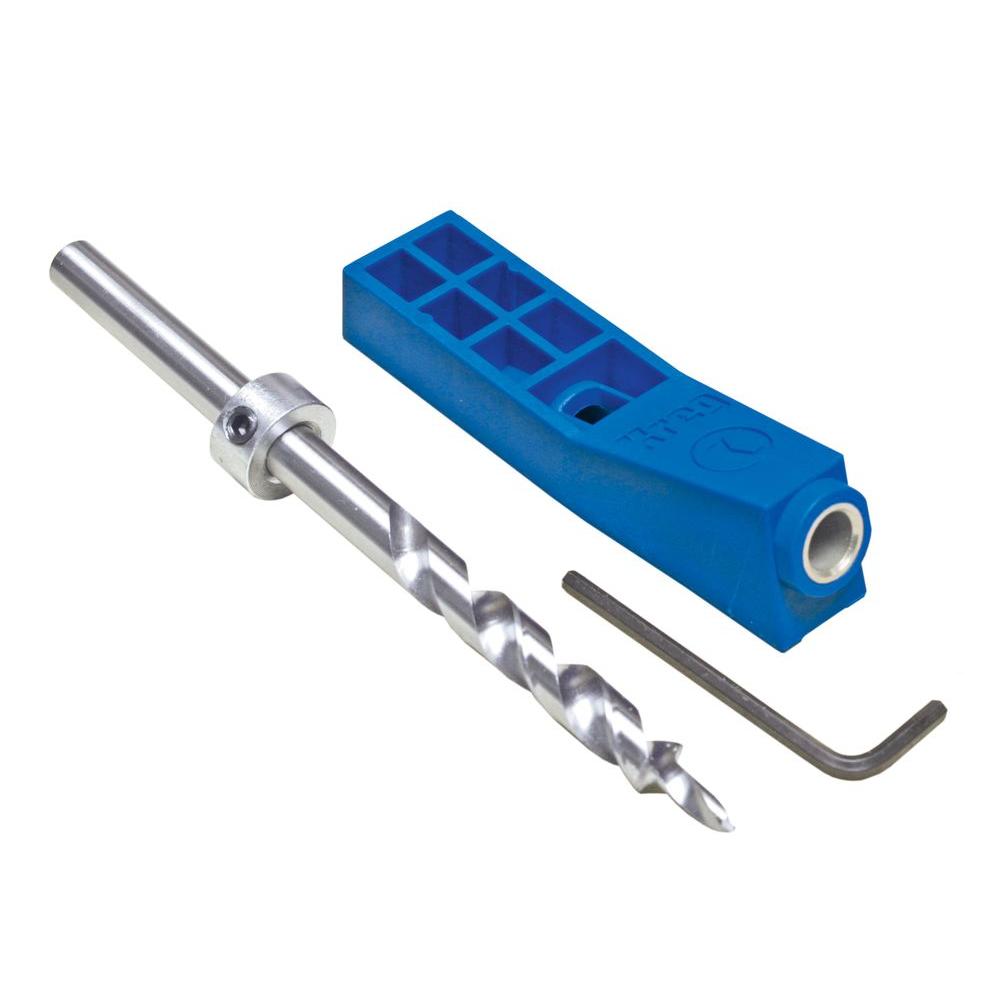
What’s a Kreg Jig, you ask? It’s a guide for predrilling angled holes in a piece of wood in order to connect it to another piece of wood with pocket hole (PH) screws. The 3/8″ stepped drill bit has a built-in step that counter sinks a hole with a flat surface to perfectly catch the flat underside of your pan-head PH screws (rounded head). The thinner tip of the drill bit predrills a pilot hole to ensure your PH screws gets installed at the perfect angle.
Here’s the value add: how would attach two pieces of wood together and hide the screws? Maybe you’d attempt to toenail a screw on the backside of one board into another, but your success rate is very low. A freehanded angle with little margin is a toughie. The Kreg Jig solves this problem. Alternatively, you could connect the pieces with compressor / nail gun and glue, but screws are ALWAYS stronger than nails for our DIY purposes.
Interested in learning more? Check out the specs and tutorial below.

Stepped drill bit specs.
- 3/8″ (9mm) diameter of the larger shaft.
- 0.170″ (4mm) diameter of the pilot tip.
- Adjustable depth collar that loosens and tightens with a standard Allen wrench for varying wood thicknesses.
- Depth collar is designed for the following wood thicknesses: 1/2″ to 1-1/2″.
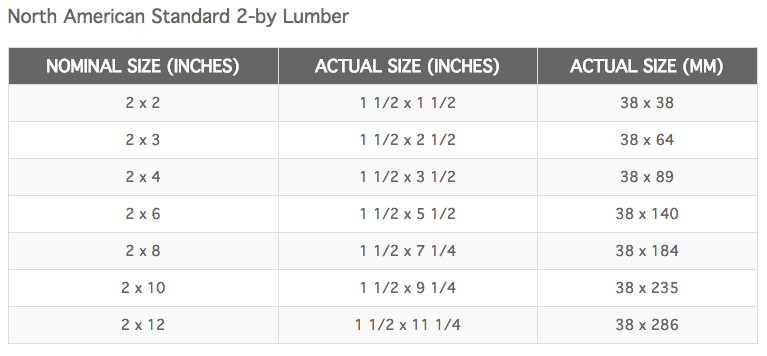
Pro-tip: nominal wood measuring is an enigma. If your hardware store says it’s a 2×4, which implies 2 inches by 4 inches, it’s not. It’s actually 1-1/2″ by 3-1/2″, a nominal measurement. A 1″ thick board is nominally / actually 3/4″ thick. However, your 1/2″ thick board is actually 1/2″ thick, as expected. Remember: this is for softwood dimensional lumber ONLY. E.g. pine, fir, spruce and cedar (according to the Art of Manliness). The cheaper options. NOT hardwood lumber, e.g. oak, walnut, mahogany, maple and hickory (A of M). Usually the more expensive options.
Nominal measurement charts.
Here are (4) charts from the archtoolbox showing nominal measurements vs actual measurement for softwood dimensional lumber:


How to use a Kreg Jig like a boss.
Materials
- Wood for building things. E.g. farmhouse tables, any rustic furniture, picture frames, headboards, all the DIY.
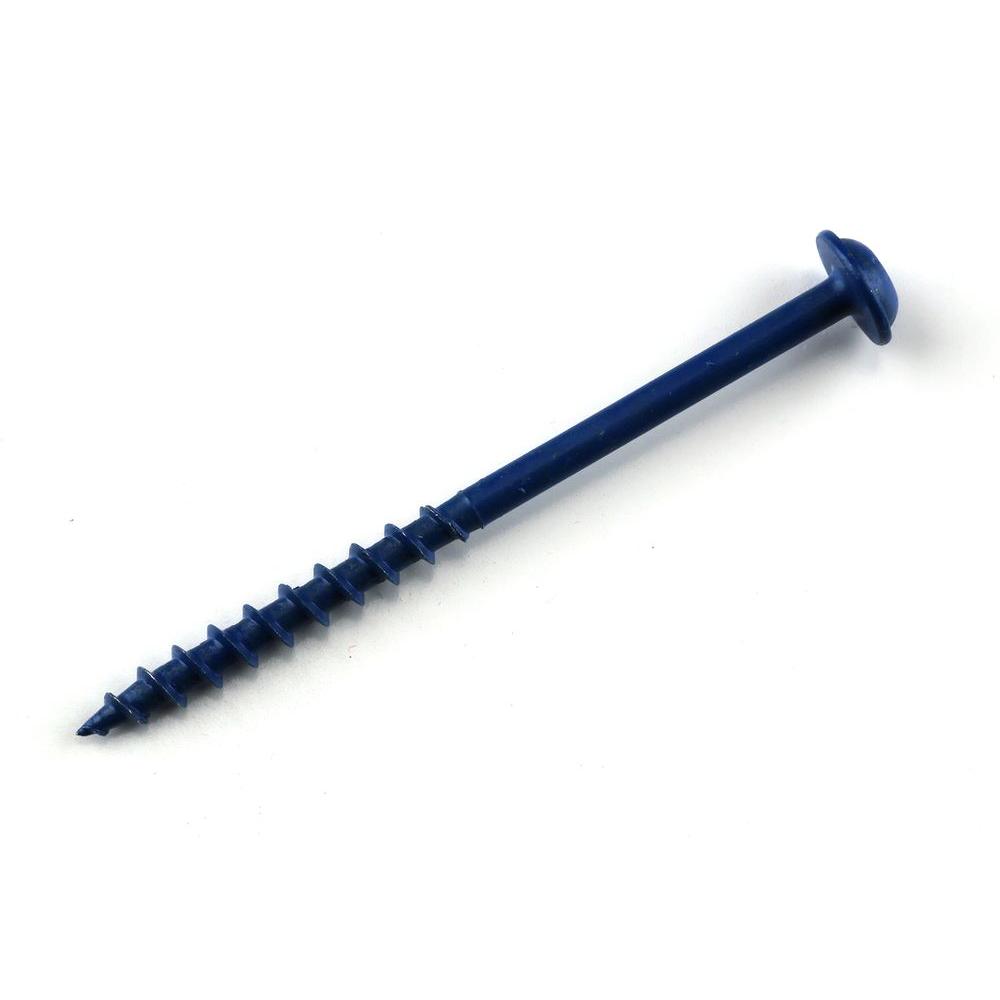
- Pocket hole (PH) screws. Always have 2-1/2″ PH screws AND 1-1/4″ PH screws on hand for Kreg Jig projects. The “system” below comes with a mix of screws to begin with.

Tools
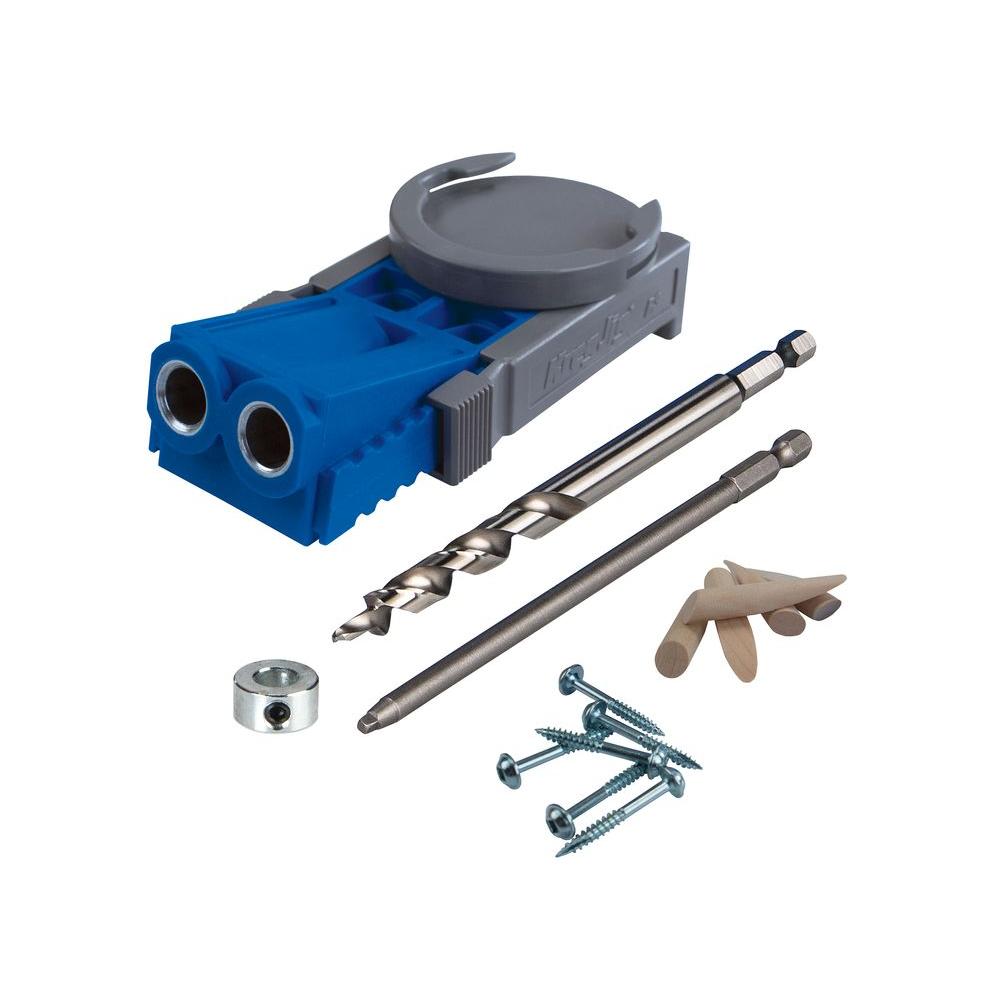
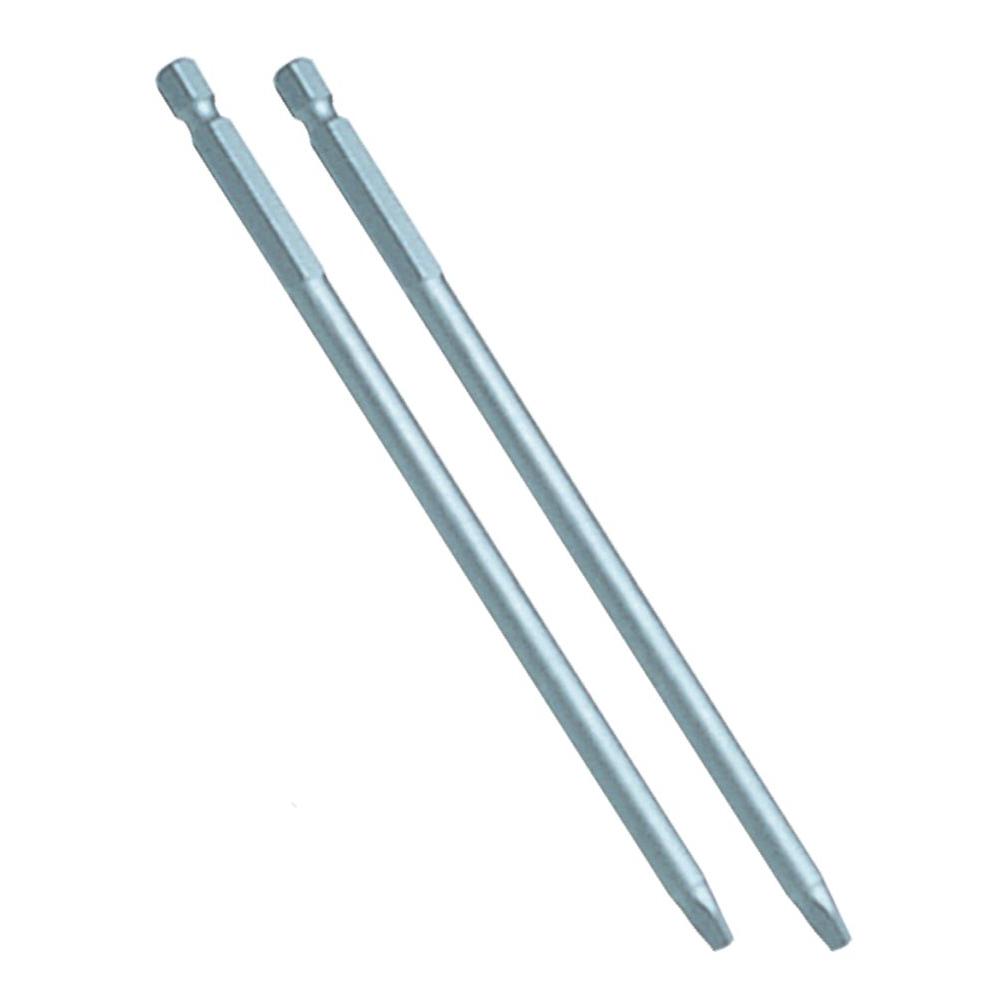
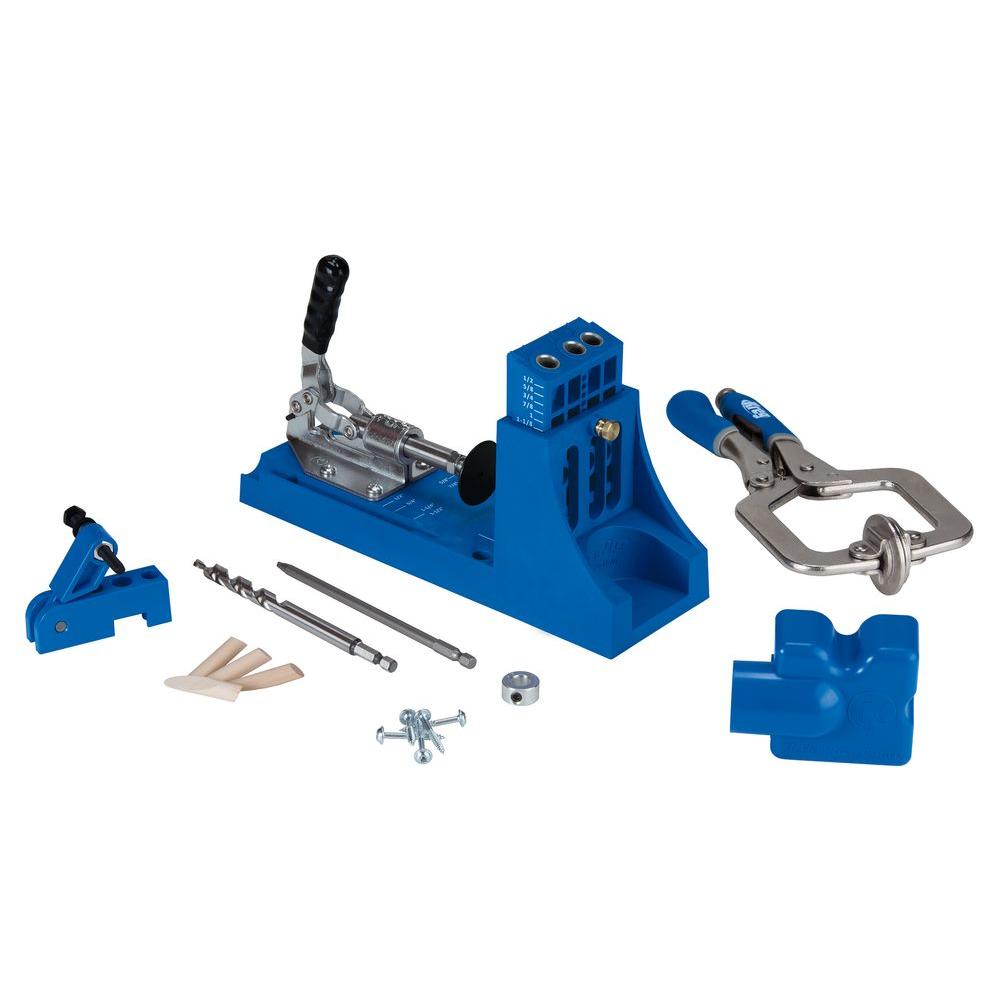
- Kreg Jig Master System for ~$139.00. Include: removable 3-hole drill guide, bench top base with built-in clamp, separate solid clamp, dust collection attachment, 3/8″ stepped drill bit, 6″ square driver bit, 3″ square driver bit, starter pack of PH screws, PH plug set, and owner’s manual.
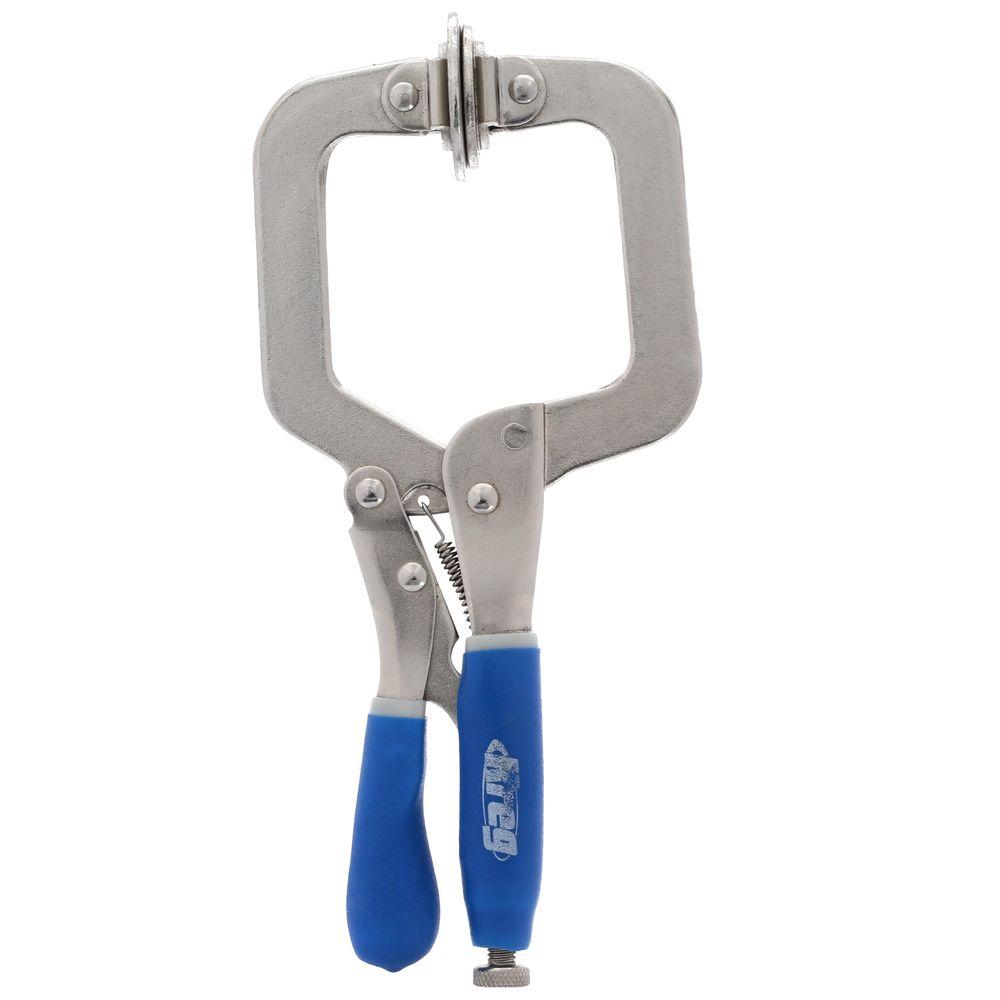
- Cheaper option 1: Kreg Jig Pocket Hole System for ~$40 + Kreg 3 in. Automaxx Face Clamp for ~$30. (Doesn’t include screws). Total = $70.
-
- Cheaper option 2: Kreg 8.25 in. Mini Jig Pocket Hole Kit for ~$20, using a clamp you already have + Kreg #2 Square 6 in. Steel Case Hardened Driver Bit (2-Pack) for ~$5.50. (Screws / driver bit not included). Total = $25.50.
- Cordless drill-driver with clutch to drive PH screws. Buy a drill-driver + impact driver (high torque) in a combo kit to save money.
- Miter saw (or) circular saw (or) miter box with hand saw.
- (Optional) pipe clamps w/ matching diameter black pipes. Holds furniture board together while screwing into pocket holes.
- (Optional) corded drill for predrilling. Saves corded drill battery. Saves time if you use the corded for driving screws only.
Budget options (tax not included).
- PH Screws ($13.47+$4.97) + Master System ($139) = $157.44
- PH Screws ($13.47+$4.97) + Pocket Hole System ($40) + 3 in. Automaxx Face Clamp ($30) = $88.44.
- PH Screws ($13.47+$4.97) + 8.25 in. Mini Jig Pocket Hole Kit ($20) + #2 Square 6 in. Steel Case Hardened Driver Bit (2-Pack) ($5.50) = $43.94.
Disclaimer: prices may slightly vary per changes in deals and sales.
Step 1. Hit up your local hardware store for materials.
- Choose your build. What project have you been eyeing? Farmhouse table? Coffee table? Desk? Workbench? Outdoor chair? The options are endless. Get your creativity on.
- Choose your softwood dimensional lumber! Be sure to look down the end of each piece of wood to assess for twisting, warping, bowing or cupping. The straighter the better.
Reminder: your boards MUST be at least 1/2″ thick, or a maximum of 1-1/2″ to work with the Kreg Jig.
Step 2. Cut your wood.
- Using your build plan’s cut list, miter all of your boards to length. Rip all of your plywood to width with a circular saw or table saw if necessary. 90º ends and sides where boards will attach is essential. Otherwise your furniture piece will be wonky / offset – unless that is intended.
Step 3. Bust out your Kreg Jig items.
- Pull out all Kreg Jig pieces. Your Master System kit should include:
- The “L” shaped Kreg Jig (bench top base).
- Face Clamp. Necessary if you opt to use ONLY the drill guide and a portable clamp. Any 300 lb. trigger clamp should do, but be sure to assess if the clamp fits before using or purchasing.
- Portable Base.
- Drill Guide Spacer. Usable with only a face clamp.
- Material Support Stop.
- Dust-collection attachment.
- 3/8″ (9mm) stepped drill bit.
- 6″ (152mm) square driver.
- 3″ (76mm) square driver.
- Starter Kreg® Screw set.
- Pocket-hole plug set.
- Owner’s manual.
- If you’re using the base: attach the 3-hole drill guide to the bench top base with built-in clamp.
- If you’re NOT using the base: simply have your face clamp or trigger clamp and your drill guide ready for use. Skip to Step 5.
Step 4. Set the depth of your drill guide.
- Check the side of your drill guide for measuring increments from 1/2 up to 1-1/2, in multiples of 1/8. Set to the depth of the wood you’re about to drill into.
- E.g. your 2×4 is actually 1-1/2″ thick. Set the drill guide to 1-1/2. If your board is a 1×6, it’s actually 3/4″ thick, so set the drill guide to 3/4.


Step 5. Set the depth of your 3/8″ drill bit collar.
- Place your bench top base (large “L” shaped piece with the built-in clamp) face up on the table. Notice the inset drill bit and collar guide as part of the blue nylon base.
- Very loosely attach the metal collar onto the 3/8″ drill bit. Loosen or tighten the collar with an Allen wrench.
- Place the drill bit with slide-able collar into the inset guide and align the wider step of the bit with the numerical thickness of the wood you’re using (don’t measure based on the much thinner pilot tip of the drill bit). Tighten the collar down with your Allen wrench.


Step 6. Clamp your wood to the drill guide.
- With base, built-in clamp and drill guide facing upward, grab your first piece of wood. Allow the board to be vertical as you secure it with the built-in clamp.
- Double check that the end of your board is flush with the blue nylon base.


Step 7. Predrill your holes with your drill.
- Attach your drill bit with tightened collar to your corded drill (or cordless drill if you don’t have one).
- Predrill at least 2 holes for less wide pieces of wood, at least 1/4″ to 1/2″ from the outer edges to prevent chipping or cracking. Use more holes for wider pieces.


Step 8. Attach square driver to drill & grab PH screws.
- Attach your 6″ square driver bit to your cordless drill with clutch.
- Set your clutch to 8 as a starting point. Turn up to 10 or 12 if 8 doesn’t sink the screw all the way and yield a tight joint.
- Grab your PH screws. The screw length will be based on your build plans. 1-1/2″ thick wood usually uses 2-1/2″ PH screws. 1/2″ thick wood usually uses 1-1/4″ PH screws.


Step 9. Clamp your boards and install PH screws.
- Clamp or securely hold your two pieces of wood together and drive a pocket hole screw into a predrilled hole.
- Assess for a solid joint and adjust your clutch as needed.
- Note: the easiest mistake to make at this point is missing the deeper, thinner pilot hole with the tip of your screw. I have accidentally driven a screw into the 3/8″ step, altering the proper Kreg Jig angle, and allowing the screw to exit the face of the receiving board.
- Repeat predrilling and driving PH screws for every necessary board according to your DIY plans. To save time, predrill ALL boards of the same thickness, then readjust the metal collar and drill guide depth setting for the next thickness. Continue until your piece is fully assembled.


You’re a furniture maker!
Excellent decision to expedite the rustic furniture making process with a Kreg Jig. How did it go? What did you make? Any unanswered questions or hang-ups? Any tips you’d offer to new users? We’d love to see your piece once it’s finished. We’re excited to celebrate your new build, and your new DIY skillset.


