
You LOVE fall. It’s the glorious middle ground between the harsh extremes of summer and winter. Warm weather without pit stains. Cool nights without frostbite. All the natural reds, oranges and yellows permeating the wild & whimsical outdoors.
All the home decor.
Planning to make some gorgeous home decor to compliment the season? You absolutely should. Don’t rush into DIY decor that you don’t really love so it only lasts 3 months before ending up in the trash or recycling bin or backyard fire pit (tutorial here). You want the type of seasonal decor that you store away in November with a childlike excitement for September to roll around again. Another merry opportunity to give all of your visitors a sense of “home” and visual inspiration.
The banner.
One of the easiest DIY fall decor projects is a homemade banner. Drape it across your fireplace mantle. Pin it up in your bookcases or built-ins to fill the negative space above your trinkets, candles, vases, decorative mini pumpkins and color-coordinated books. Let it float across your reclaimed window hanging on the wall. Hang it above a doorway in the foyer to welcome your guests, in the dining room beyond your farmhouse table or in the family room softly blended into your other seasonal decor.
Ready to try your hand at creating this banner from scratch? You sure are. Here’s where to start:
How to make a DIY banner for fall.
Materials
- Fabric (Chevron orange & white fabric) and/or burlap. Some fabric options we love:
- Canvas cloth.
- Chevron orange & white fabric.
- Gray & white chevron fabric. (HOBBY LOBBY)
- Orange & White 1/8″ Gingham Check Fabric. (HOBBY LOBBY)
- Orange Tonal Bubbles Cotton Calico Fabric. (HOBBY LOBBY)
- Gray & White Triangle Apparel Fabric. (HOBBY LOBBY)
- Black & White Plaid Apparel Fabric. (HOBBY LOBBY)
- Twine or yarn.
- Paint and a paint brush or a paint pen.
- A stencil (unless you have amazing handwriting).
- Hot glue gun and hot glue sticks.
- Sharpie.
- Scissors.
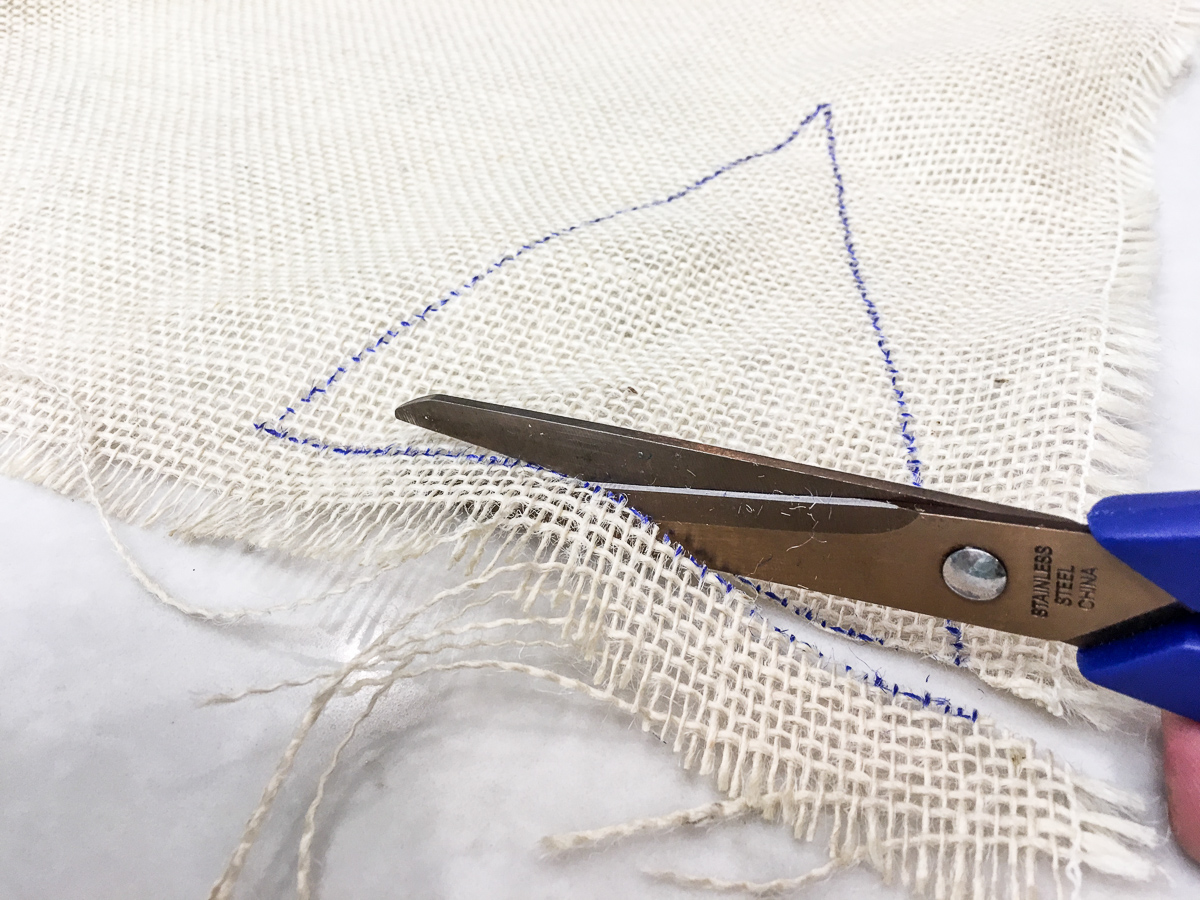
Step 1. Plan your size & shape.
- (*Insert body-type MomJoke*).
- Decide on the size and shape you want the pendants for the banner.
- Each flag on the small orange and white fabric banner is 5.5 inches long and 4 inches wide at the top.
- Each flag on the the burlap “fall” and “give thanks” banners are 8 inches long and 6.5 inches wide at the top.
- Make sure to leave and extra inch at the top of the banner flags to fold over the twine or yarn.


Step 2. Add letters to your flags.
Note: Skip this step if you’re not painting letters on the banners.
- After you cut your flags, get out your paint, sharpie and stencil (put down newspaper or cardboard to protect your floors).
- Position each stencil on the corresponding flag (leaving at least an inch above the stencil). For extra stability, you can tape down the edges of the stencil to the fabric.
- Using the sharpie, trace the outline of the stencil as a guide for your paint.
- Use your paint and paintbrush to trace over the sharpie-d stenciled area and fill it in to create the letters.
- Start with a light coat and do a second light coat when it dries if needed

Step 3. Glue twine or yarn to the flags.
- Unravel your twine or yarn in the area you’re going to install it. Dry fit for appropriate length and cut it accordingly.
- Once the paint is dry on your flags, fire up your hot glue gun.
- Fold the top of each flag over the twine or yarn and using a thin bead of glue, attach the folded over flap to the back of the flag, being careful not to glue it to the twine or yarn.
- While the glue is still warm and not set (but not hot enough to burn you), slide the flag back and forth on the yarn or twine to make sure it doesn’t stick to it. (You want to be able to slide the flags around once they are all on to adjust the spacing.)
- Repeat this step till all flags are looped onto the twine or yarn.


Step 4. Hang the banner!
- After your glue dries, hang your brand new fall banner.
- We like to hammer in thin nails to denser woods (like the fireplace mantle). Or clear push pins to softer woods.
- Tie a basic knot around each nail or push pin to ensure the banner doesn’t shift or take a nosedive.

One step closer to an entirely homemade household.
Customized home decor is next level, friend. Getting slightly addicted to the creativity, crafting & money savings? We are too. It’s totally normal (coming from another DIY-obsessed human).
If you liked this banner tutorial, check out our “How to Build a DIY Pallet Wood Pumpkin for Fall Decor” (coming soon). And don’t miss our “How to DIY Decorate Your House for Fall on a Budget”, also coming very soon!
Happy autumn-ing!


