Take a long, hard look at that massive wall of absolutely nothing in your home.
Are we minimalist? Not until Saturday morning… when all our friends suddenly decide to become neo-amish for a month to avoid becoming our hoarder parents. You have Insta Stories to thank for your daily dosage of non-sustainable life inspo.
I guess minimalism wasn’t your goal. The gaping negative space is your personal reminder to throw a lovely piece of decor on that wall as soon as humanly possible. But you’re not settling for a generic placeholder. “Vanilla” design feels like selling out. As if you’re letting down all your home improvement besties on HGTV and Netflix.
Beauty on the cheap.
Custom wall design doesn’t have to cost you as much as your mortgage payment. Or your soul. Or your sanity.
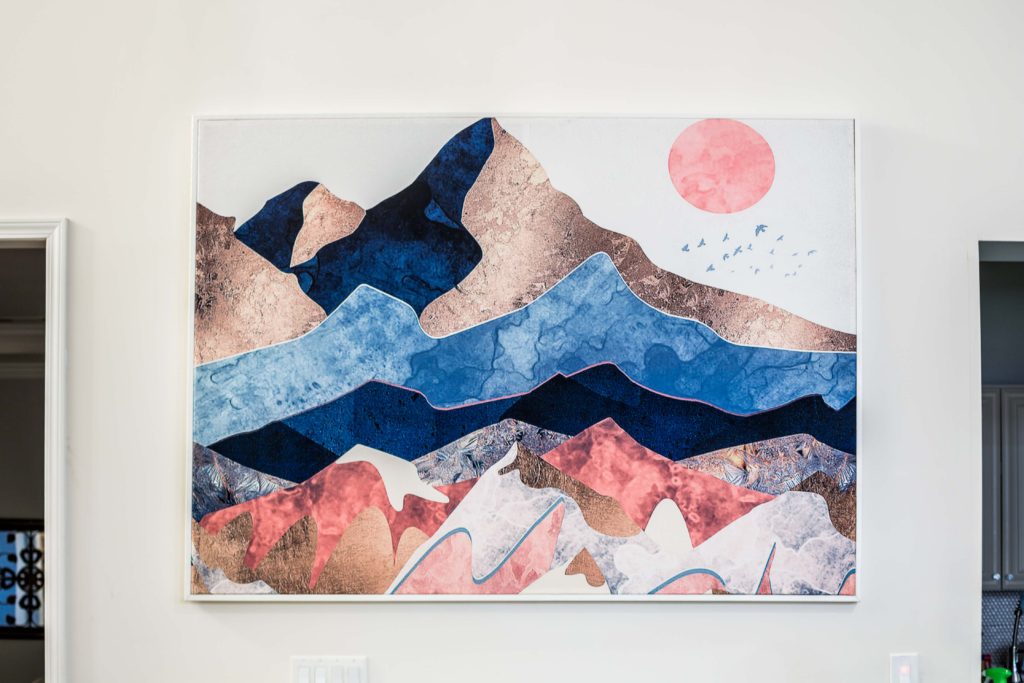
Maybe a few hours on a Saturday at most. Now we’re talkin’. You can order this tapestry on Amazon and build the frame in the amount of time it would take you to speed shop a few art retailers.
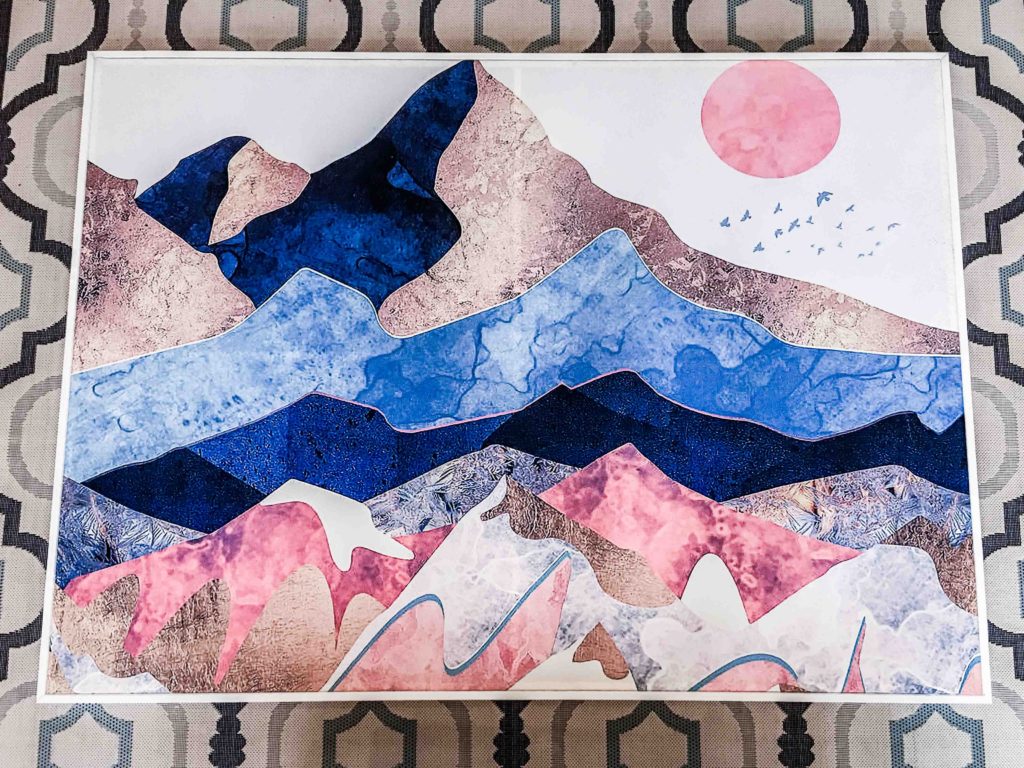
The entire thing costs just $30 (for the tapestry and the frame). For a giant piece of art, you absolutely can’t beat that!
The tapestry fabric is both strong and eye-catching. Slap a few 1x2s together with nails or screws to build the wood structure. Tightly wrap the fabric around the structural frame and staple away.
Saw a few more boards to frame out the tapestry canvas, stain or paint the wood pieces, attach with nails or screws and call it a day. Throw your gorgeous, handmade piece up on the wall for your viewing pleasure. Not to mention all the inquisitive guests that you’ll impress. Here’s how to make it:
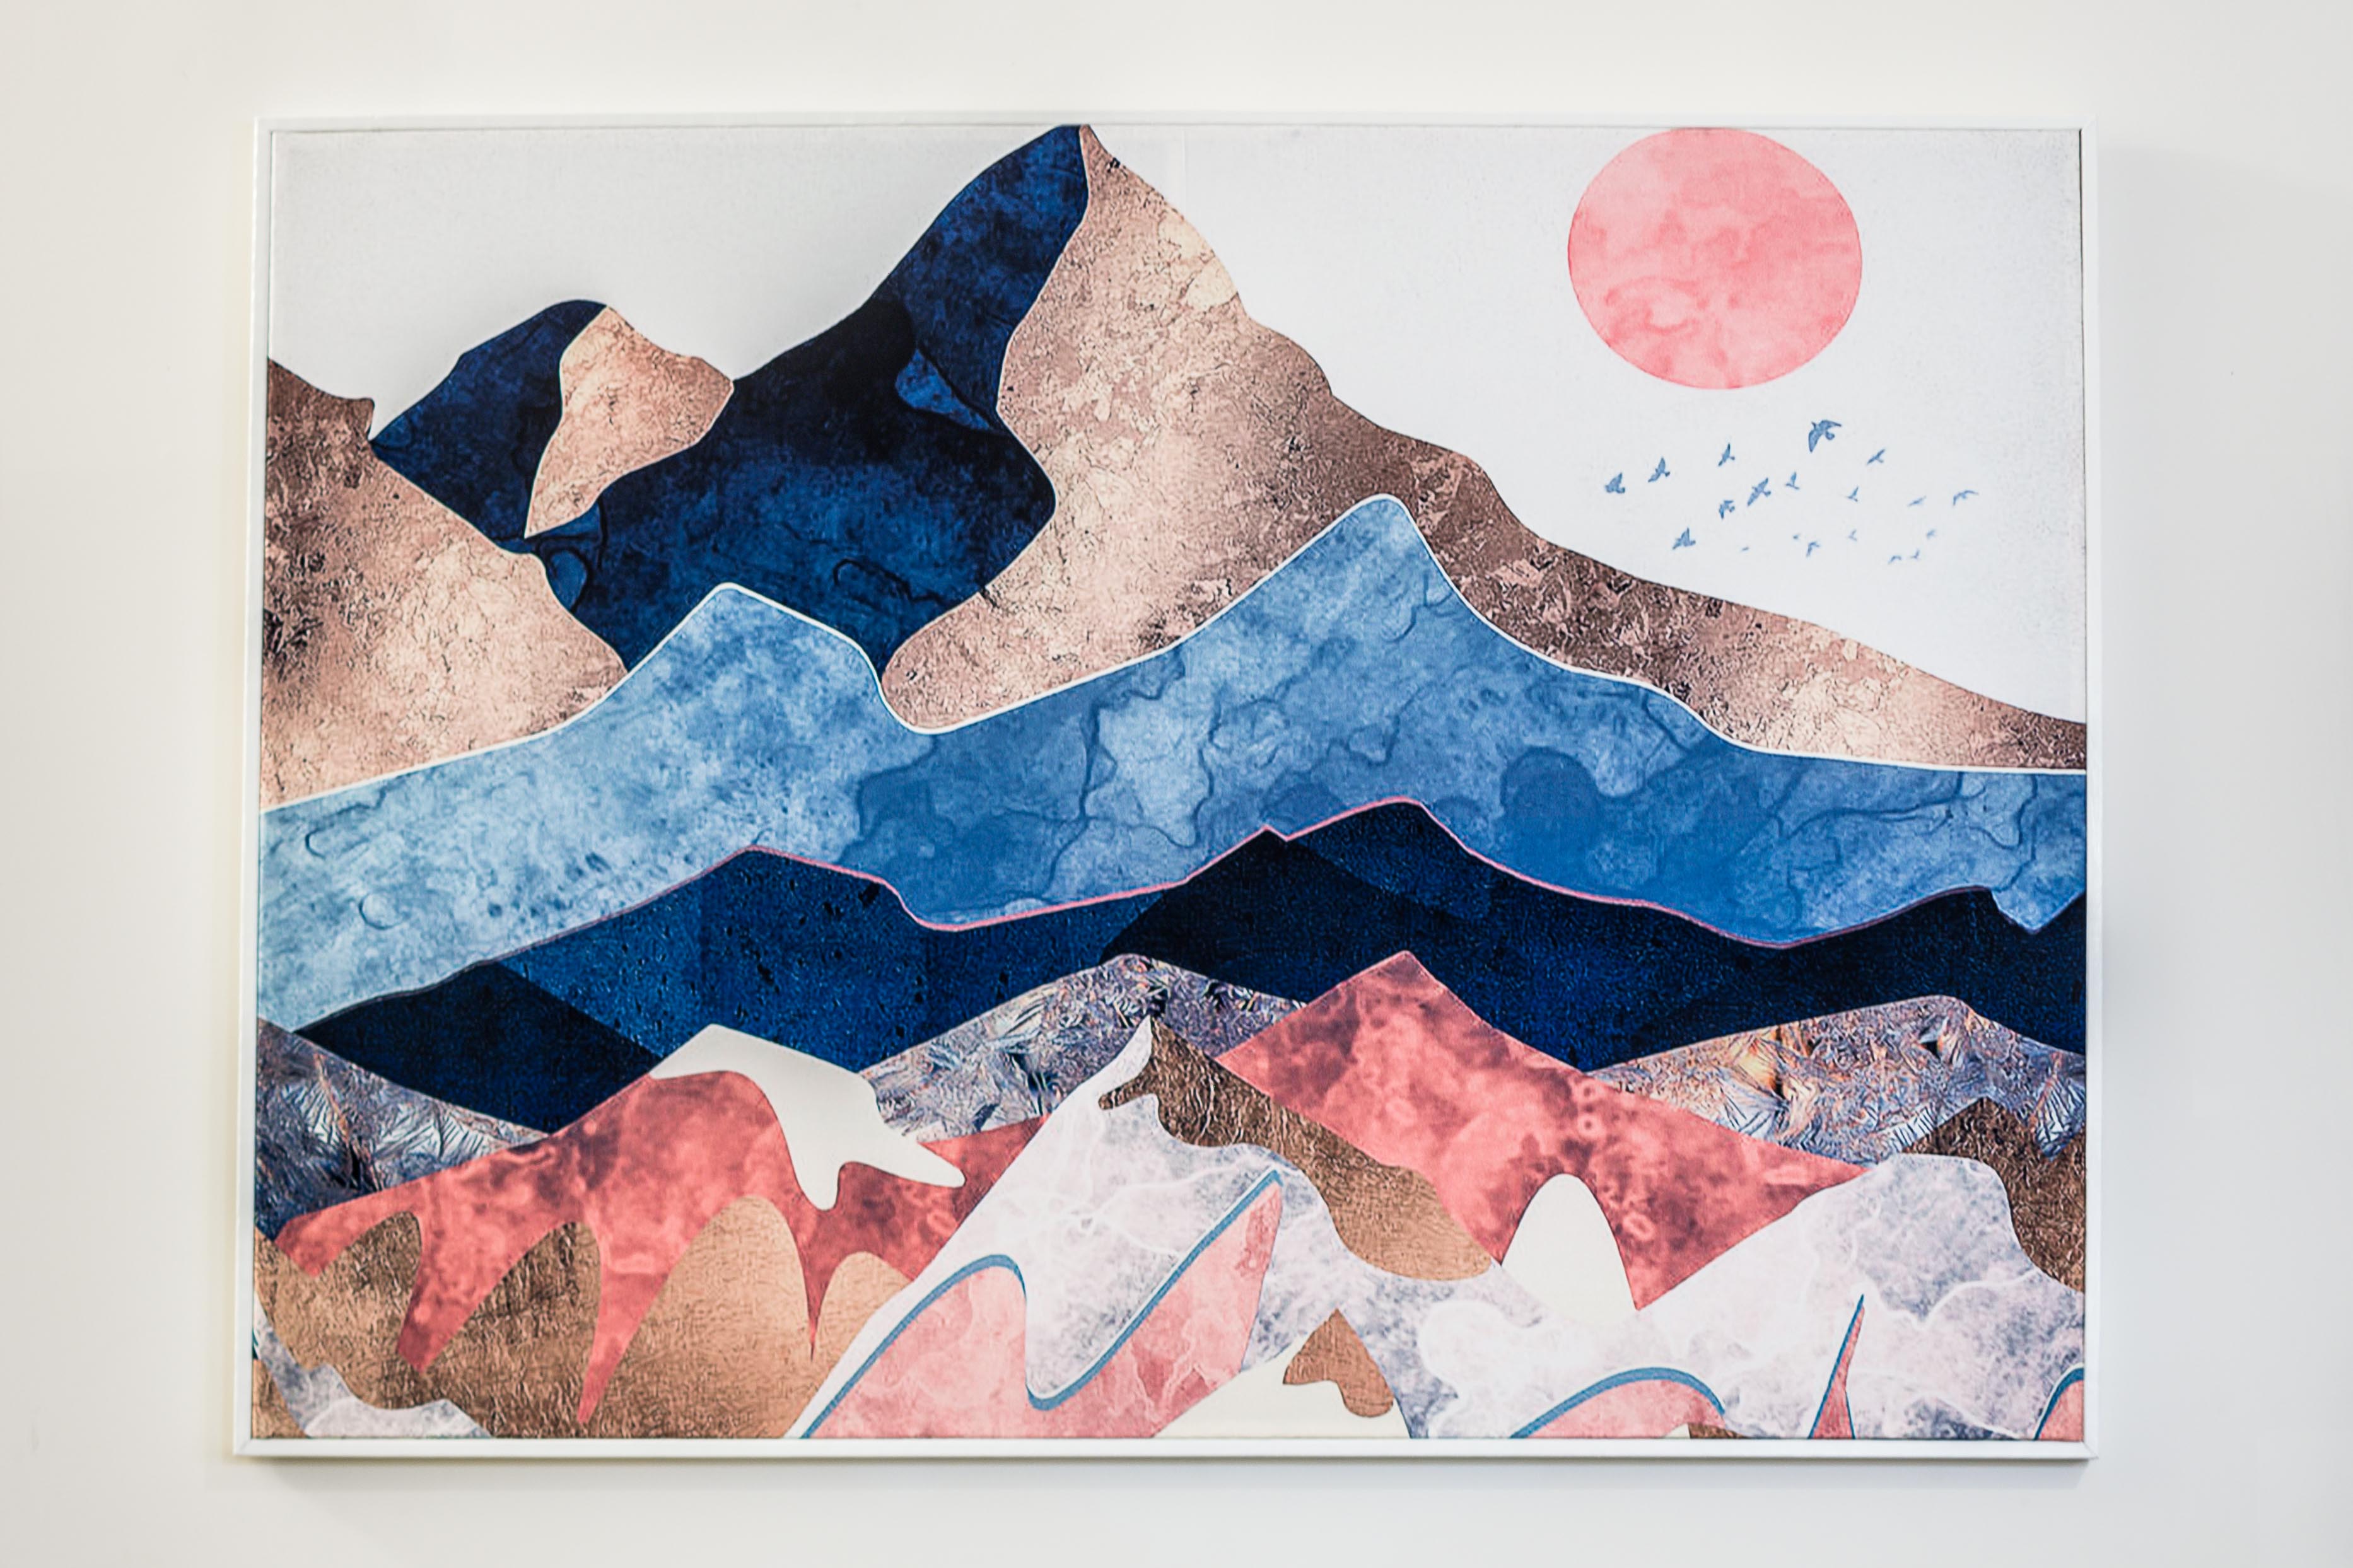
How to hand craft your DIY tapestry canvas.
Materials.
- The 60” x 80” tapestry for $17 on Amazon.
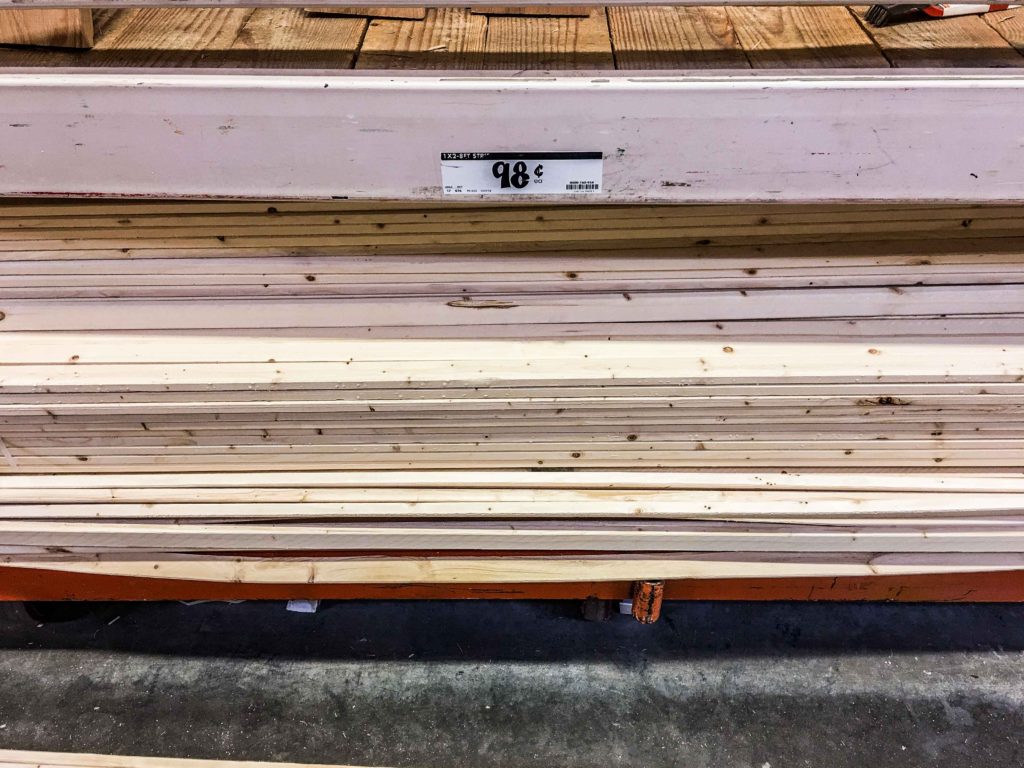
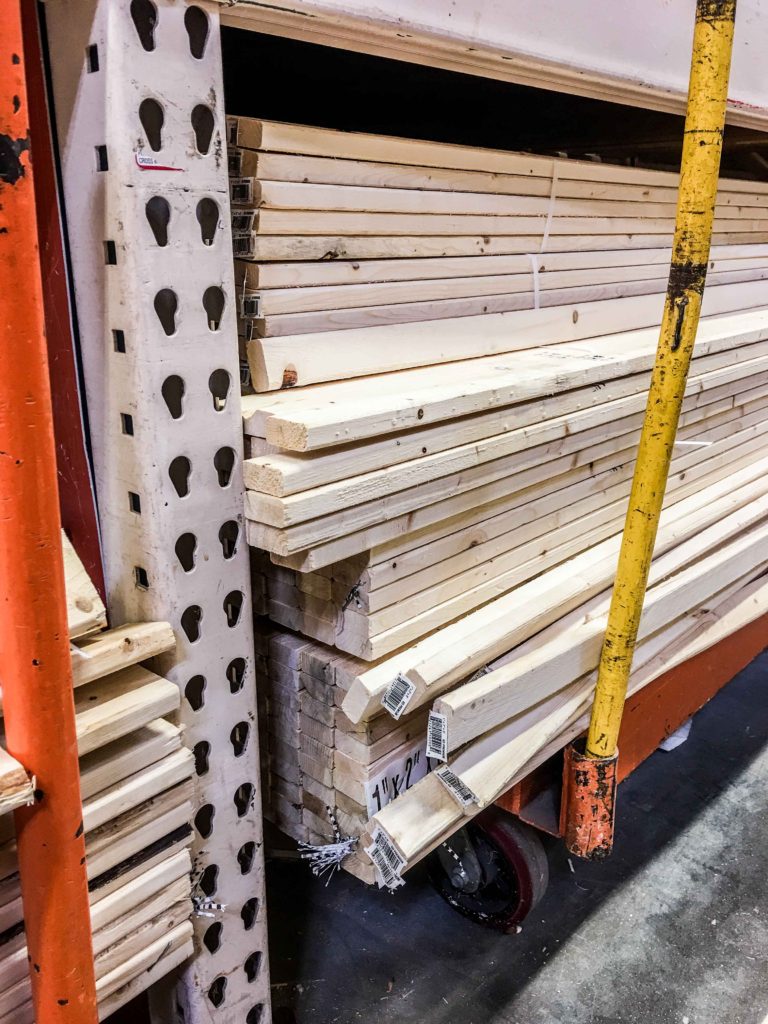
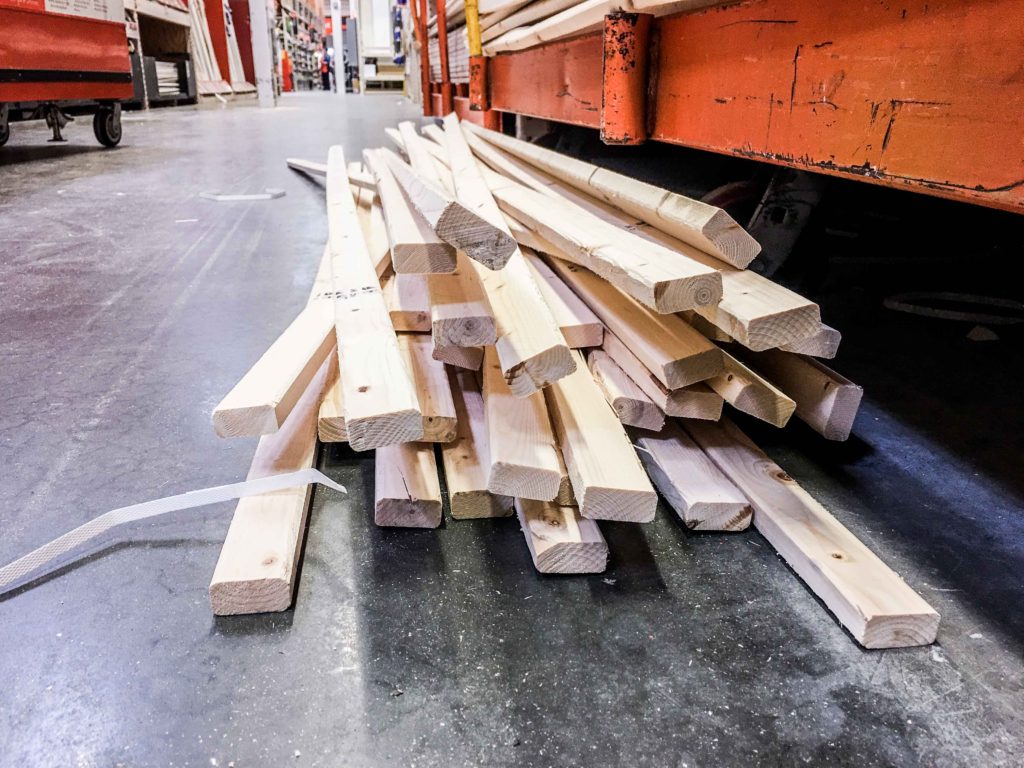
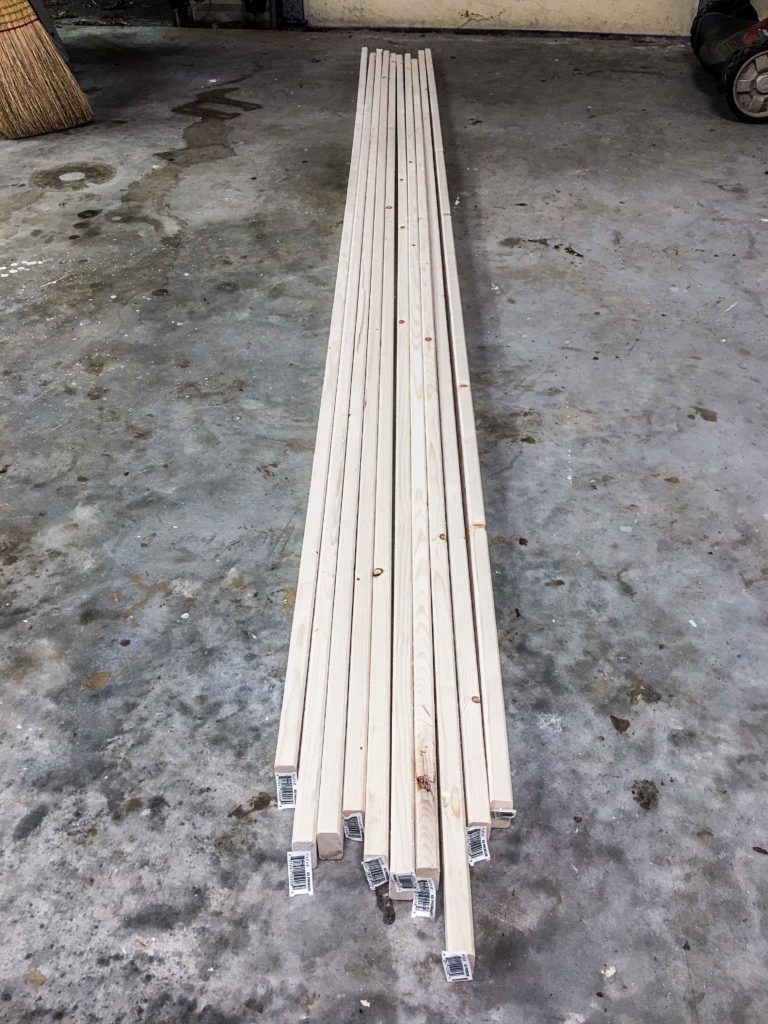
- 9 – 1x2x8 furring strip boards at $1 per board, totalling $9. Make sure they’re straight!
- 2” brad nails at ~$3.13 for 900 (assorted pack).
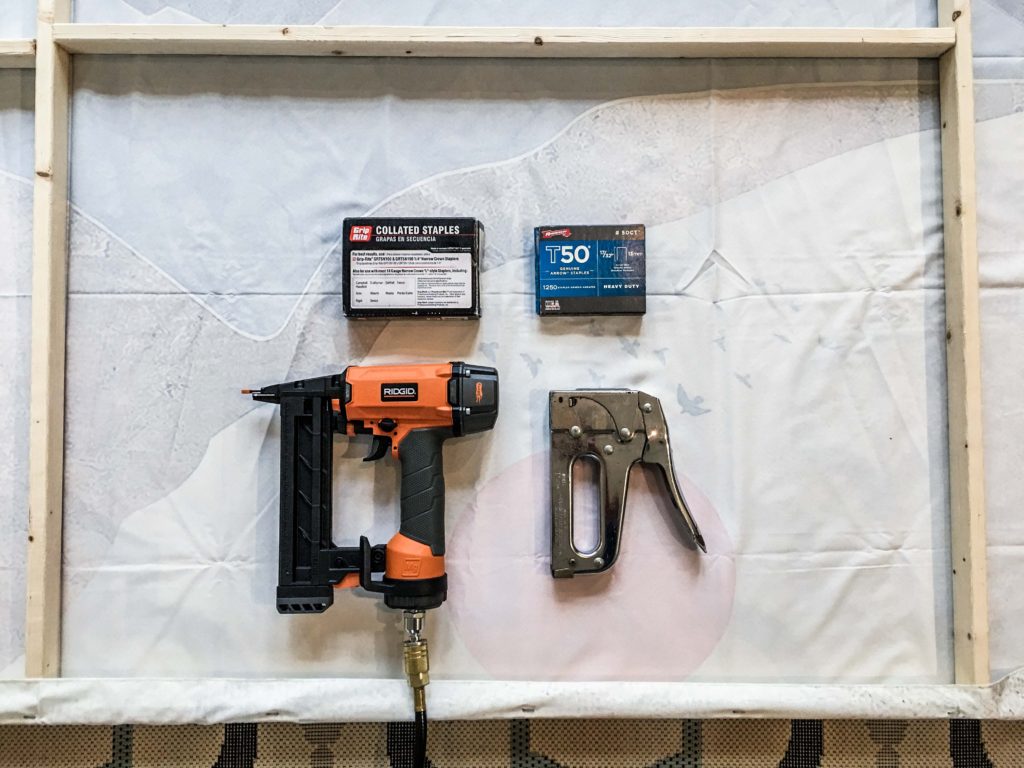
- Staples for manual staple gun OR pneumatic staple gun – you probably already have these if you own either stapler.
- White paint. We chose Behr Paint at Home Depot color matched to Benjamin Moore Simply White. Interior, flat / matte sheen. Or any paint that compliments your space & contrasts your tapestry. ~$15 a quart.
- Paint brush. ~$2 per brush.
- Wood glue ~$4 for 8 oz.
- Picture hanging hardware for your tapestry canvas. 220 piece kit for ~$10.
- (Optional) white caulk – to fill and hide the cracks.
Tools.
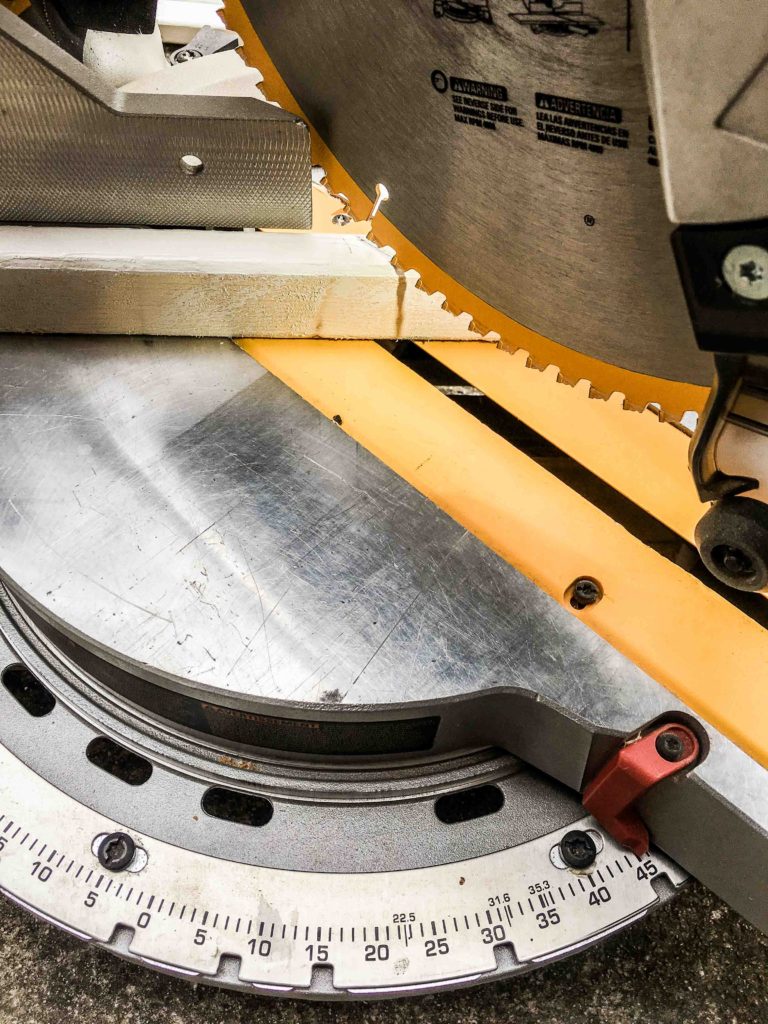
- Miter saw or circular saw.
- Air compressor & brad nail gun with nails (above). (Save cash buying them together). OR hammer + 2” finish nails (frame building).
- Heavy duty staple gun or pneumatic stapler.
- Measuring tape.
- Pencil.
- Hammer – to hang your canvas.
- (Optional) level – to make sure your canvas is level on the wall.
- (Optional) caulk gun.
Budget.
- All materials cost = $56.13.
- All materials cost for DIY regulars = $26. (~$30 with tax).
- We only needed the tapestry and the wood. The other materials came from previous project inventory.
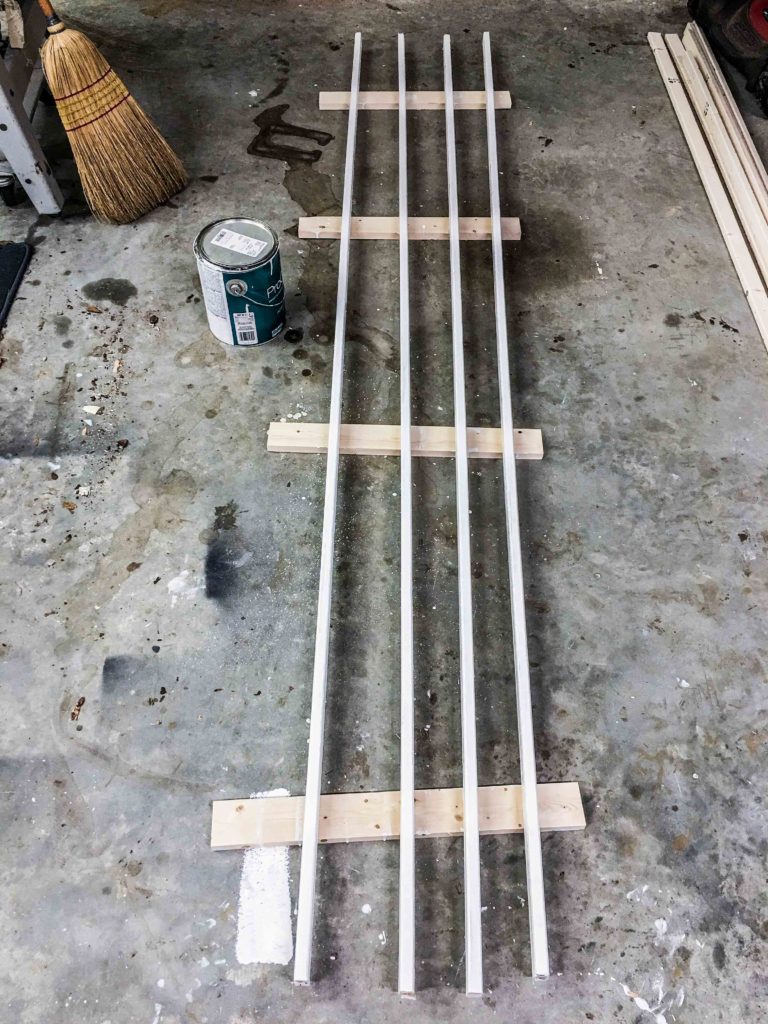
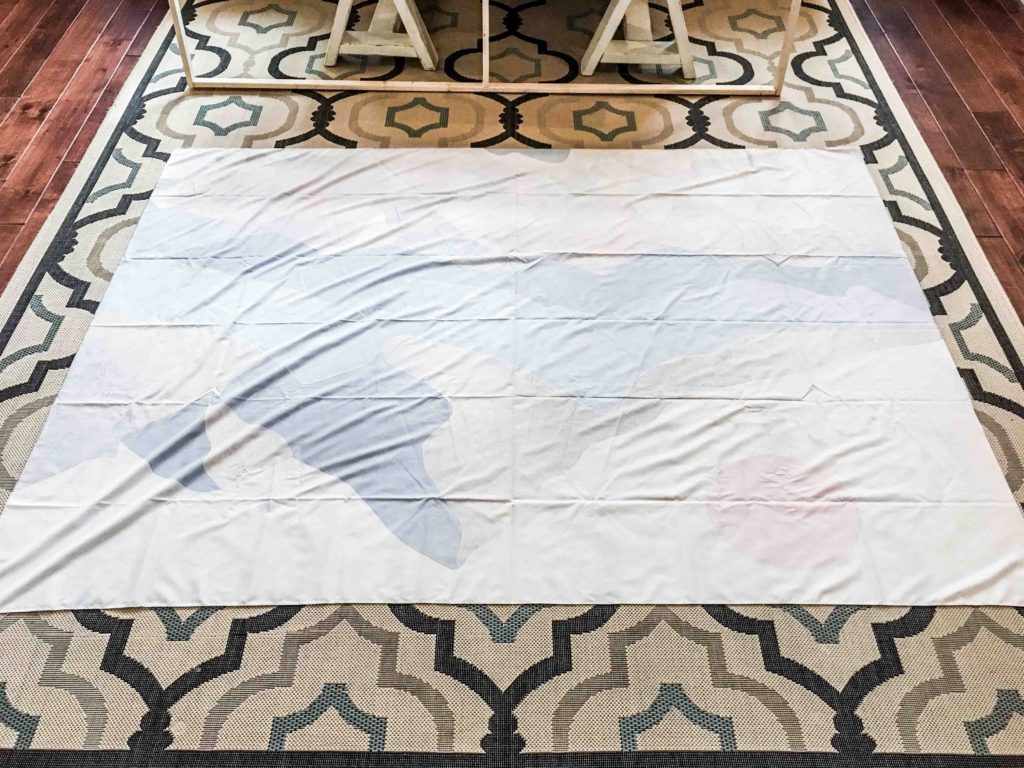
Step 1. Order your tapestry on Amazon.
Note: Amazon Prime is free 2-day shipping on countless items, Prime Video for TV shows and movies, streaming music through Prime Music and Prime Photos for limitless photo storage. Save all the time and money on more than just home decor.
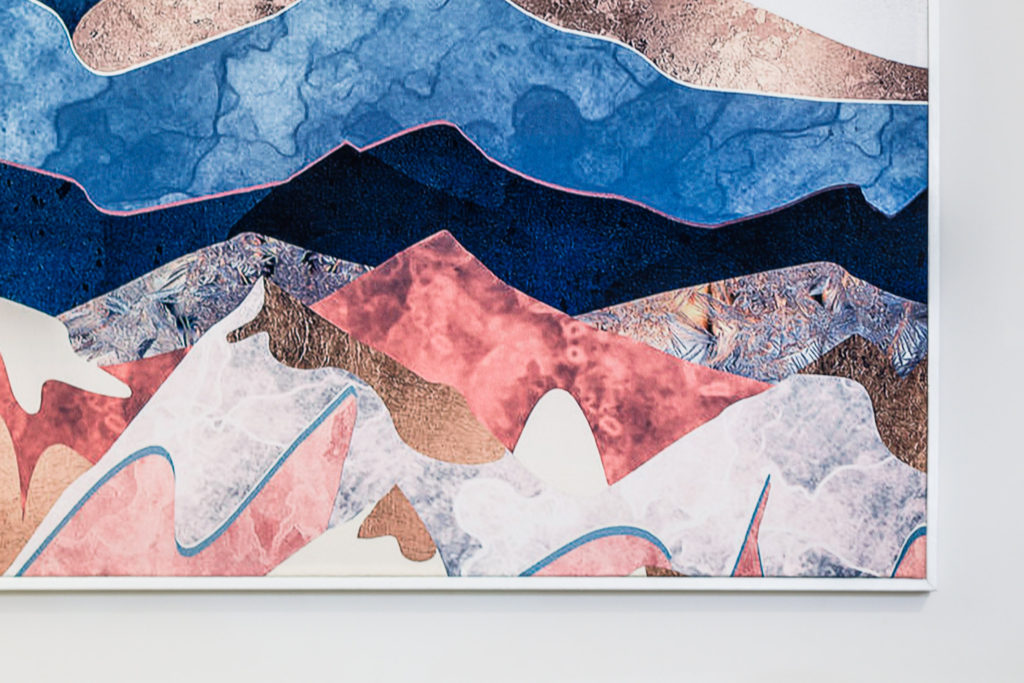
- This “APHER Sunset Golden Mountain Wall Hanging Tapestry” is 60 inches by 80 inches. Check out their 50” by 60” tapestry for a smaller size.
- You’ll cut your wood pieces to be 4 inches shorter on every side to allow sufficient material to wrap around and staple to the wood frame. Your frame will be 52” by 72” based on the measurements above.
- If you choose a different tapestry with a different length and width, be sure to adjust your common board lengths for the structural wood frame.
Step 2. Hit the hardware store.
- Brad nails. Make sure your brad nails are NOT longer than 2 inches or you’ll risk nails breaking through the surfaces of your wood boards.
- Staples (manual or pneumatic). Staples with NO wider than a ½” crown. Your boards are only ¾” thick.
- White caulk. Caulking is helpful to remove visual gaps in wood. Consider adding caulk where the mitered boards connect at each corner. Similar usage for moulding gaps and cracks for baseboard, crown, chair rail, quarter round or shoe mould.
- Wood furring strips boards. A fancy name for dirt cheap wood used as a supplement to other building materials. They create gaps between finished walls / floors and masonry walls, aid with insulation install, help make surfaces level / plumb, and for leveling your shower pan [source].
- A 1x2x8 common board (whitewood) costs ~$5. A 1x2x8 furring strip costs ~$1. Why? The furring strip is usually softer, less dense, and severely warped / twisted / bowed.
- Be sure to stare down the end of EVERY board to find the top 25% (9 to be exact). I went through 36 boards to find 9 relatively straight ones. These boards aren’t designed for furniture or art purposes, but we’re saving money by choosing these over common boards. It’s $45 vs. $9 for wood. You do the math.
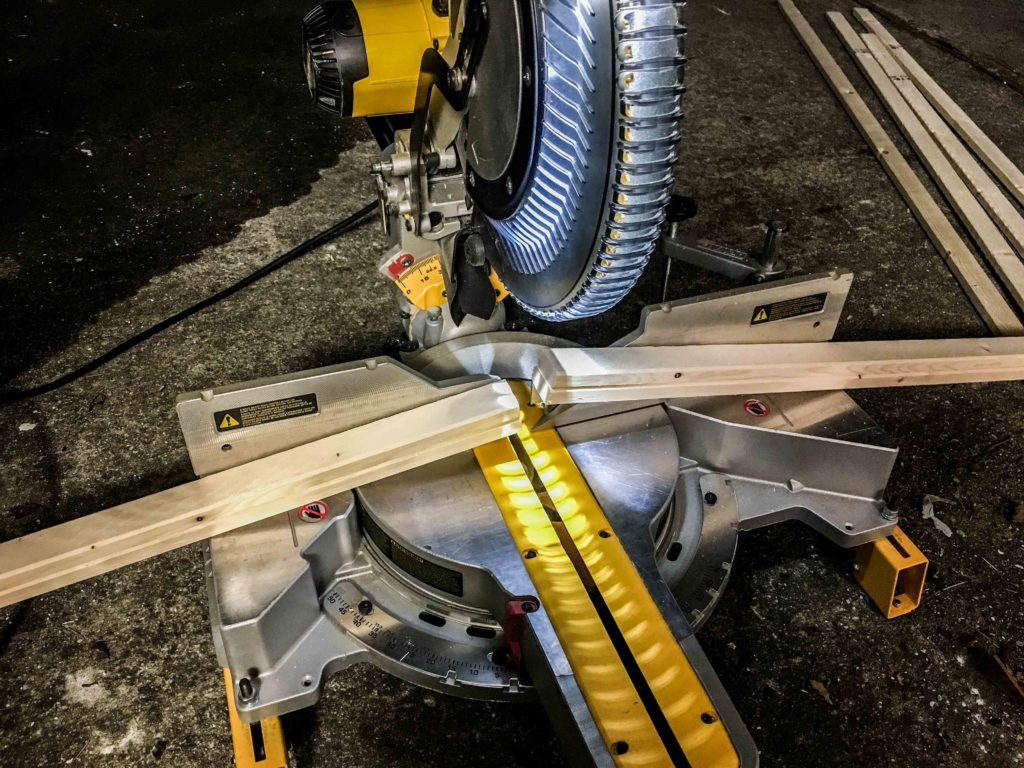
Step 3. Cut list.
Note: your tapestry cloth is 60” by 80”. By reducing each side by 4”, the tapestry will overlap the sides of the wooden frame (1-½”) and then wrap over the back of the wooden frame (2-½”). Do NOT make your wooden frame any larger or else the tapestry will only wrap around the sides of the frame. (The cut list perspective is as if the canvas is up on the wall).
- 2 — 1x2x52”, 45º non-parallel cuts, edge grain up (frame sides).
- 2 — 1x2x70-½”, 45º non-parallel cuts, edge grain up (frame top & bottom).
- 1 — 1x2x50-½”, 90º square ends (frame cross brace).
- 2 — 1x2x **cut to fit**, 90º square ends (frame cross braces). ~34-⅞” for each board.
- 2 — 1x2x53-½”, 45º non-parallel cuts, edge grain up (trim sides).
- 2 — 1x2x72”, 45º non-parallel cuts, edge grain up (trim top & bottom).
Note on “cut to fit”: wait to cut these 2 pieces of wood until AFTER the rest of the frame is assembled. Here’s why. If your placement of the 50-½” cross brace is even 1/8” off, then these 2 perpendicular cross braces will NOT fit.
Note on edge grain: this is the side of your 1×2 boards. The thinner side is actually ¾” thick. Place the thinner side face up toward the miter blade for these cuts. See the pictures for reference.
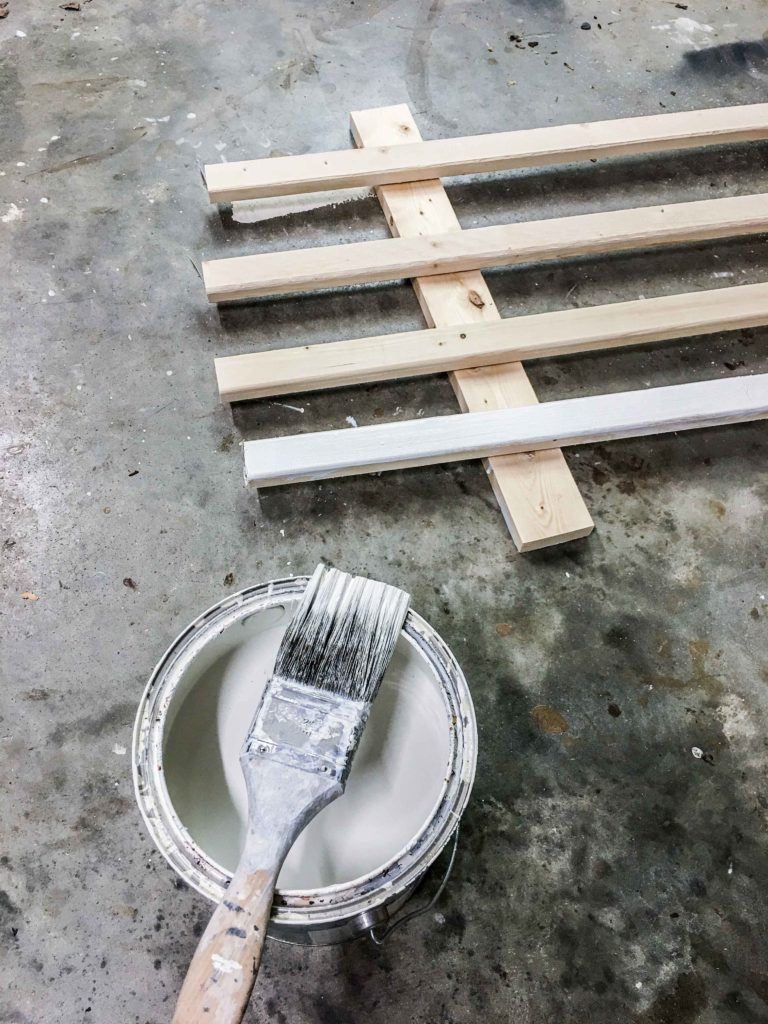
Step 4. Paint the trim.
- It’s easier to paint your 4 pieces of wood trim BEFORE your attach it to your tapestry-wrapped frame.
- Thoroughly mix your can of paint with a wooden paint stir stick for at least 1 minute.
- Apply paint to at least the two visible sides of the trim boards.
- Set aside until dry. Allot 1 hour dry time if the temperature is at least 70º and less than 50% humidity. Allow a longer dry time for nonideal conditions.
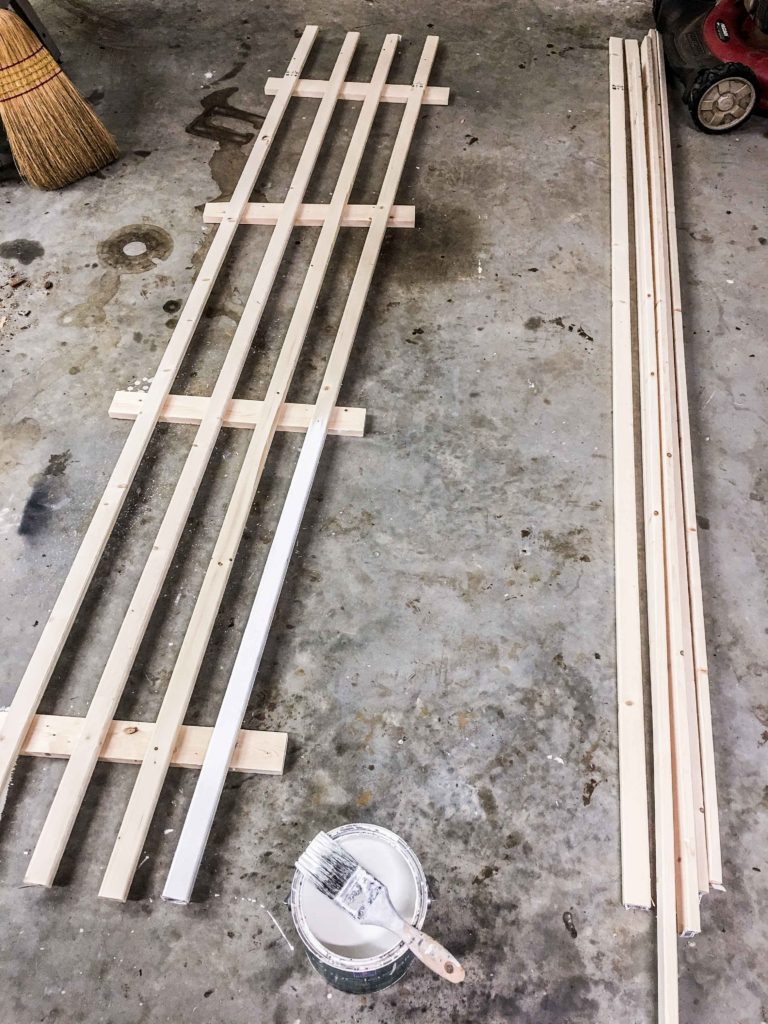
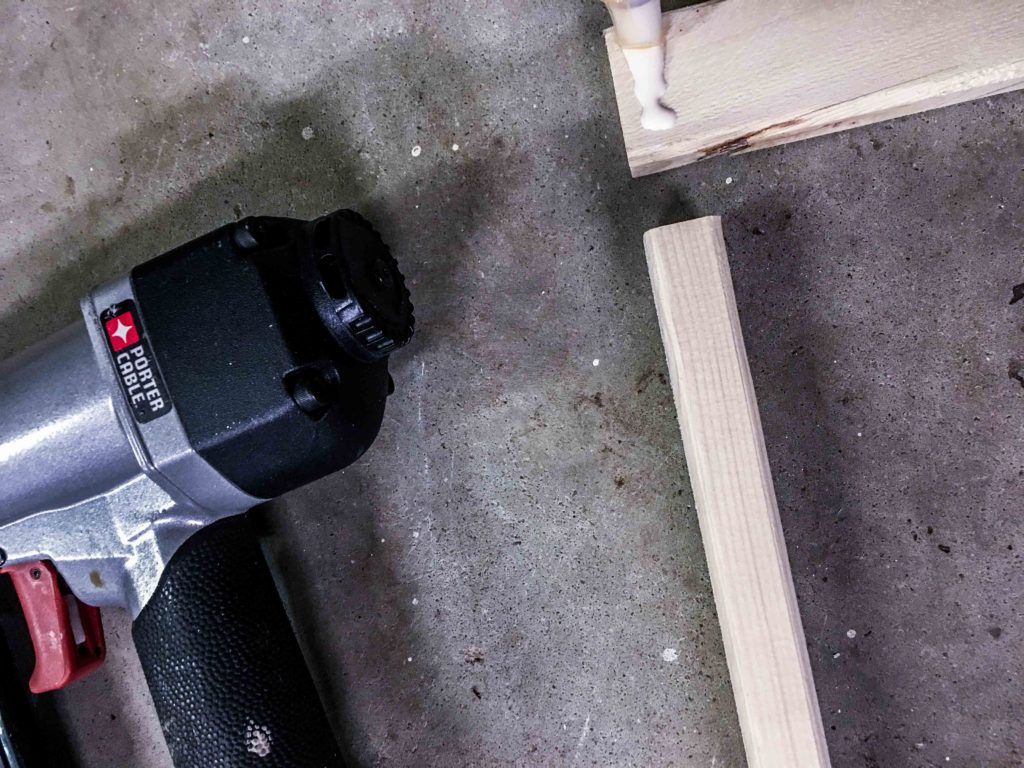
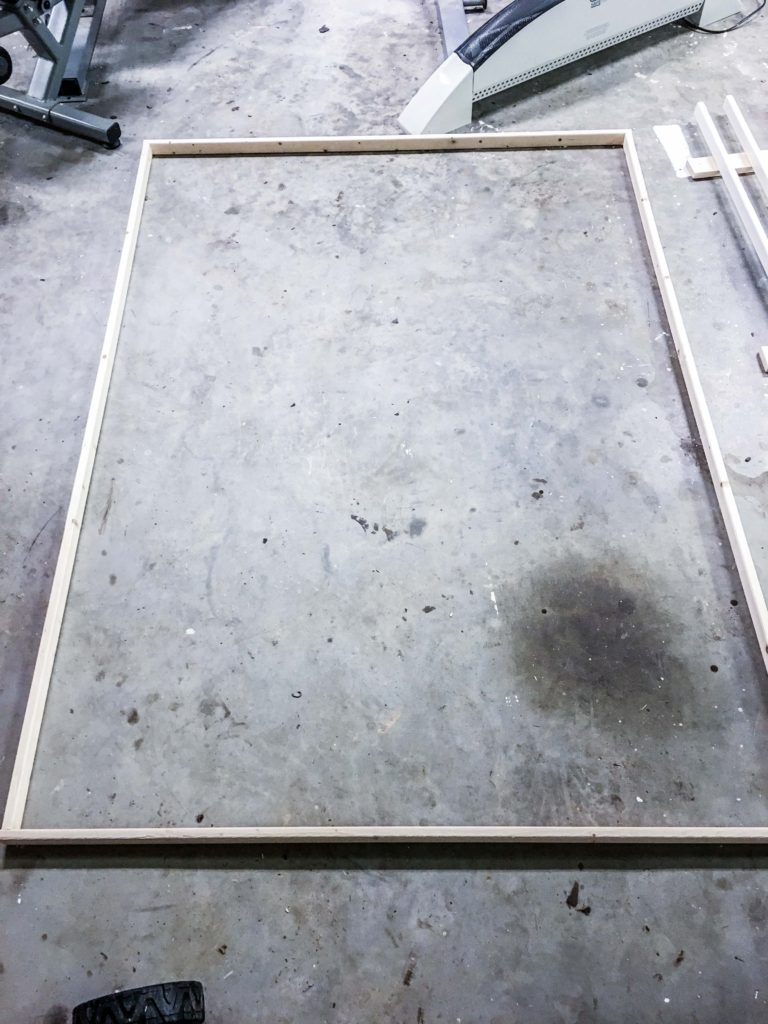
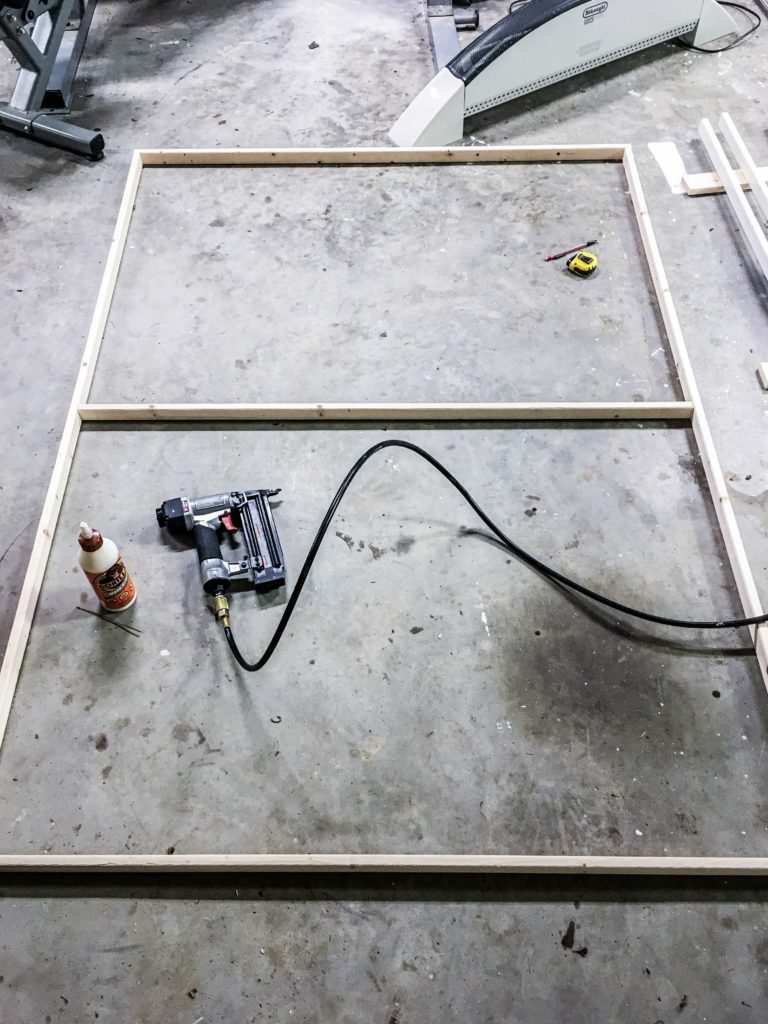
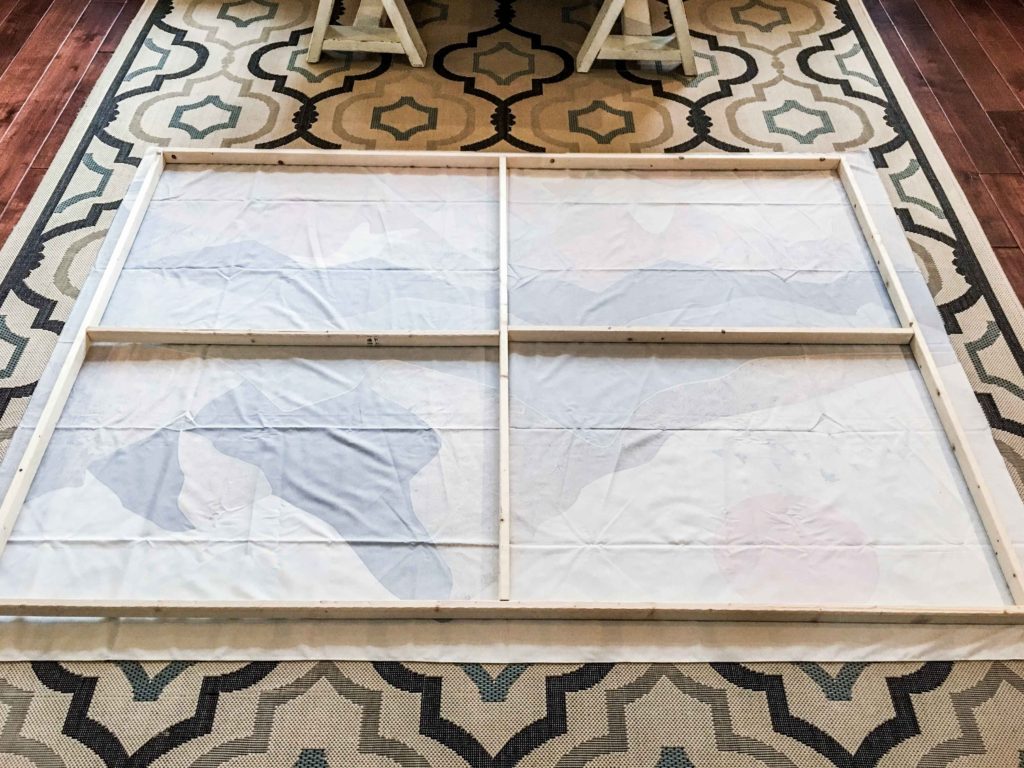
Step 5. Construct the wood frame.
- Fire up your air compressor. Otherwise use your hammer + finish nails + extreme patience.
- Place a 52” board next to a 70-½” board, allowing them to meet at a 45º end. This should look like the beginnings of a picture frame.
- Add wood glue to one end, press them together and brad nail them together with 2” long brad nails. Make sure your non-dominant hand is AT LEAST 2” away from the end of the gun.
- Attach the other 52” board to the other end of the 70-½” board with glue + nails.
- Complete the rectangle with the final 70-½”.
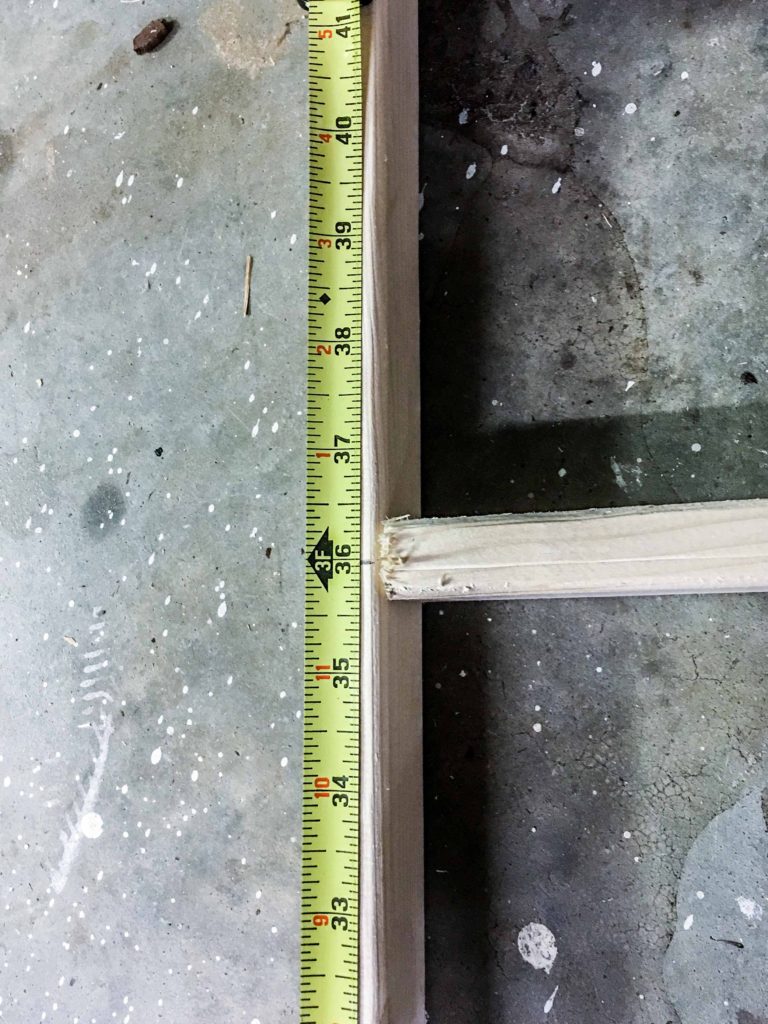
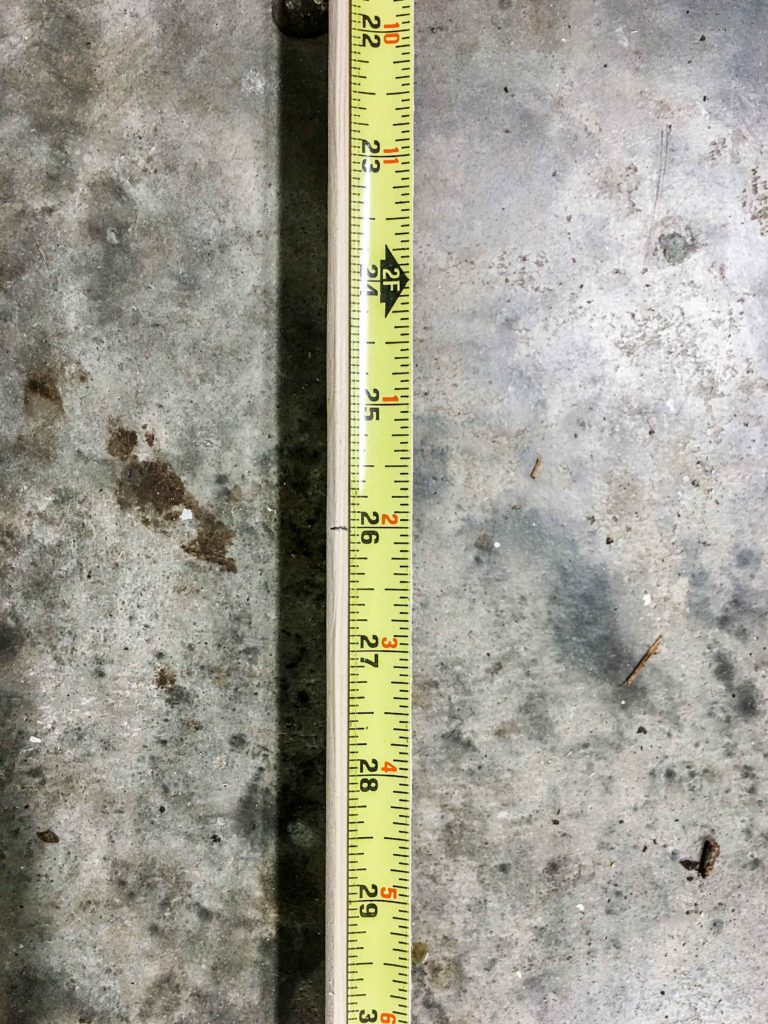
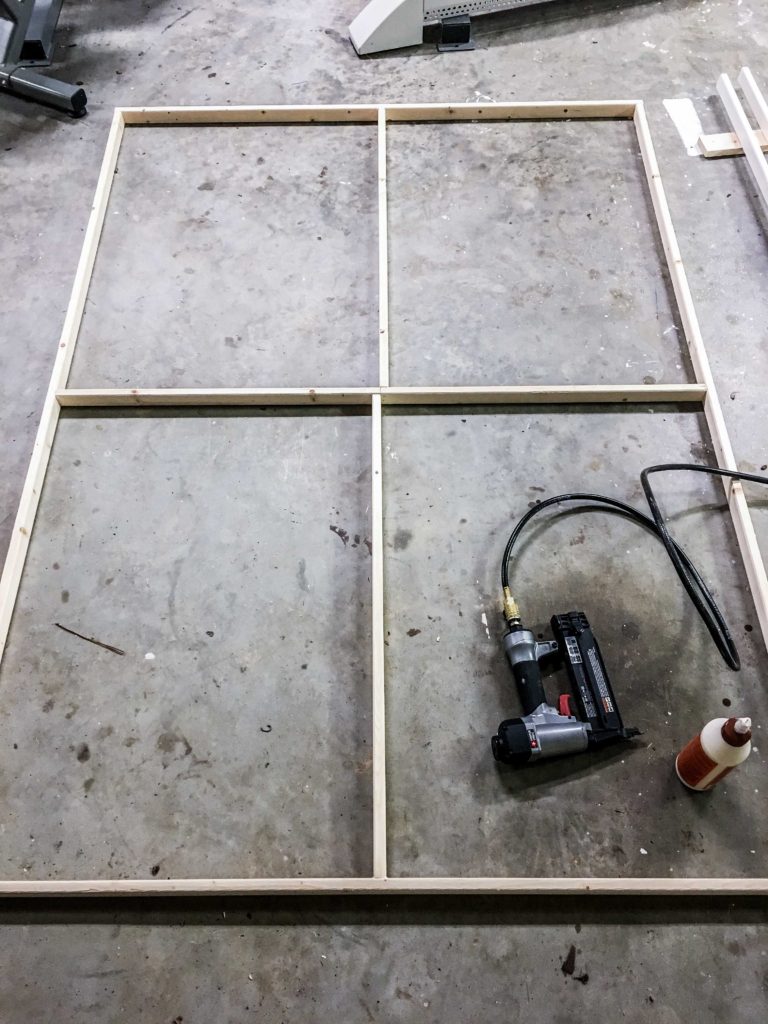
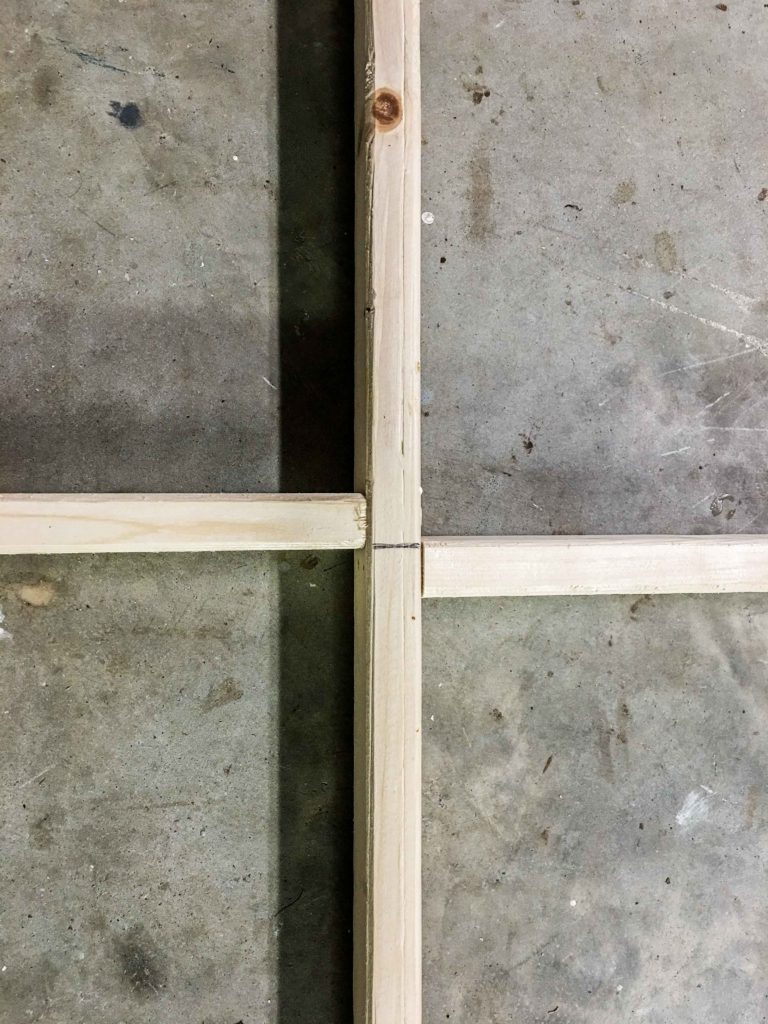
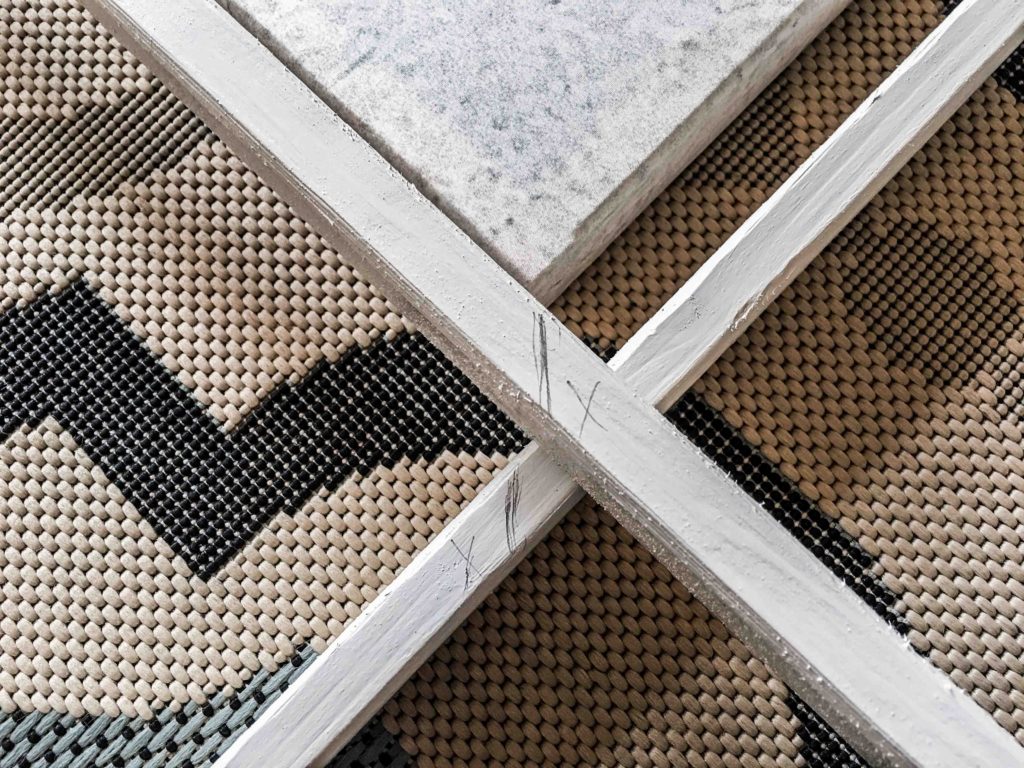
- Mark the center of both 70-½” boards with a pencil.
- Install the 50-½” cross brace from the center of one 70-½” board to the other 70-½” board.
- Mark the center of your 50-½” cross brace with a pencil.
- To complete the “plus” in the rectangle, measure the distance from the center of one 70-½” board to the center of the 50-½” cross brace. Cut a board for a perfect fit. Install with glue and nails. Position it ⅜” off center to allow the final cross brace to be easily attached with glue and nails.
- Repeat for the final cross brace.
- Allow the glue to dry at least a few hours before handing the wood frame.
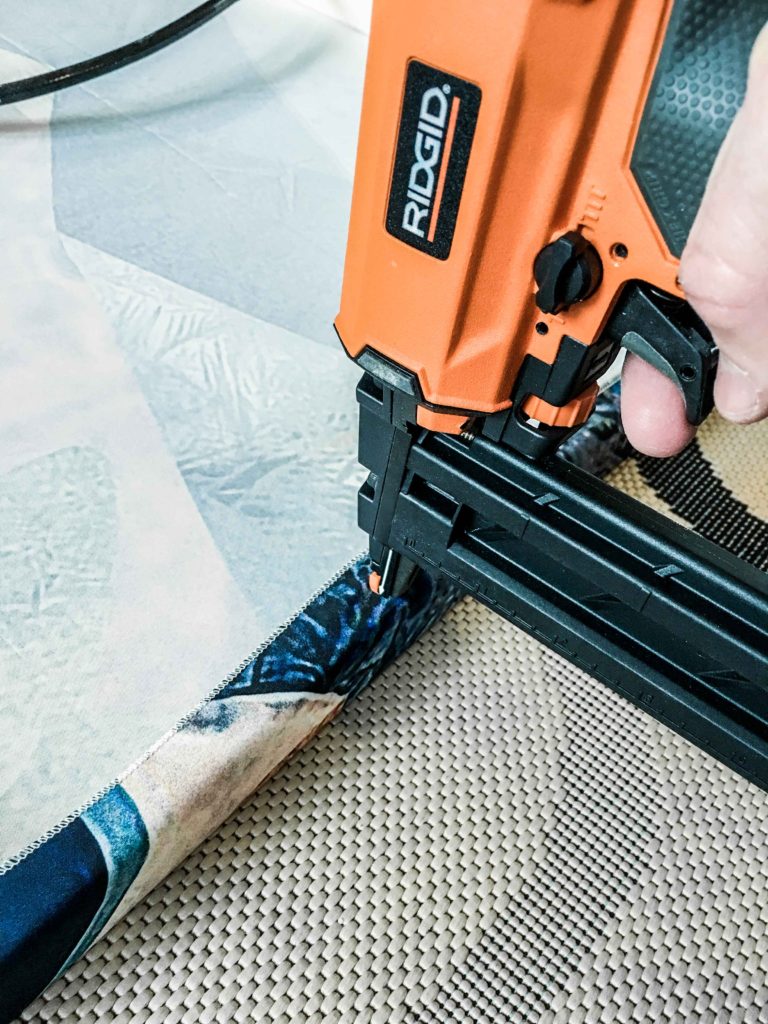
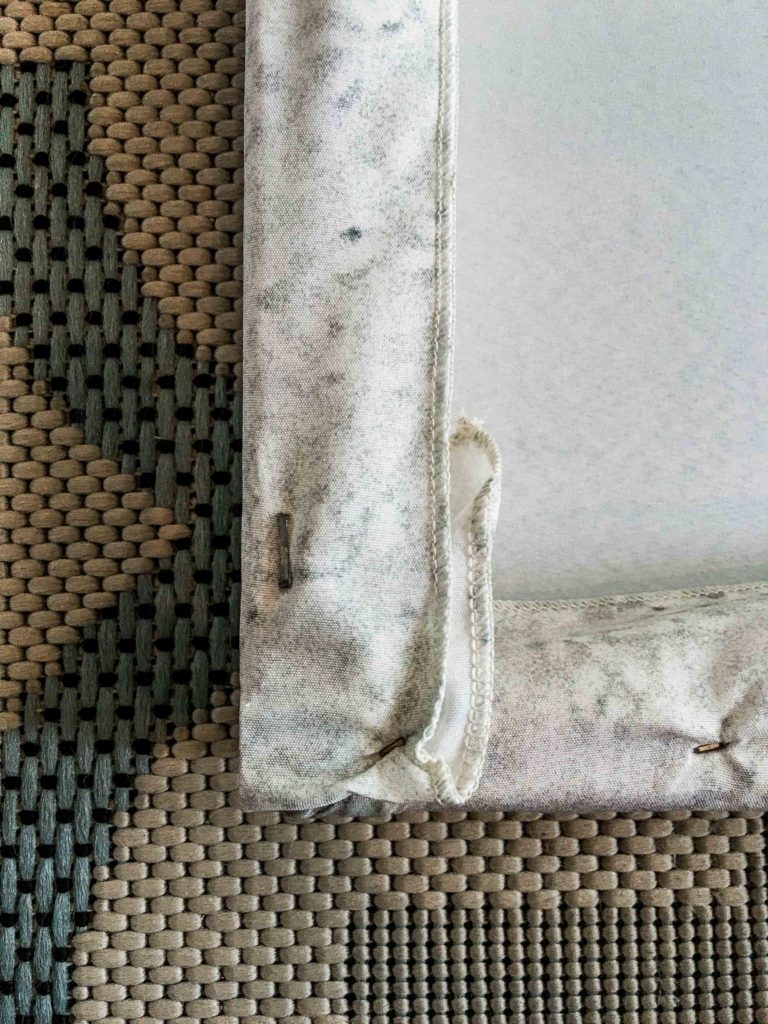
Step 6. Staple the tapestry to the frame.
- Clean + vacuum the surface you’re about to use.
- Place the tapestry facedown on the floor or large, flat surface. Remove all wrinkles until as it lays at flat as possible.
- Put your wooden frame on top of the tapestry. Center it.
- Wrap the tapestry around one side of the frame. Hold it in place with one hand.
- With your heavy duty staple gun OR pneumatic stapler, attach the tapestry to the back of the frame. Do NOT apply more than one staple until you move your hand and tighten the next piece of tapestry. Wrap with subtle pressure, hold it in place, staple it to the back of the frame, reposition your hand and repeat until your entire tapestry is secured to the frame. Place a staple about every 6-8 inches. Do NOT over tighten the tapestry as your wrap it around the frame or else you may notice inconsistencies once the piece is on the wall.
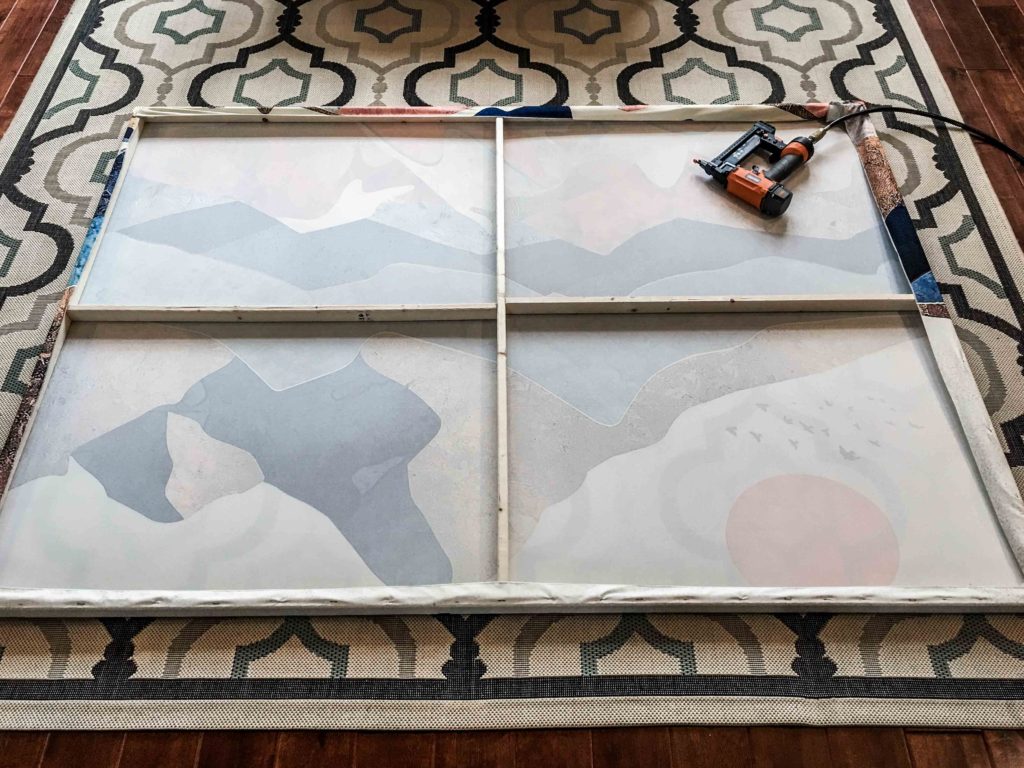
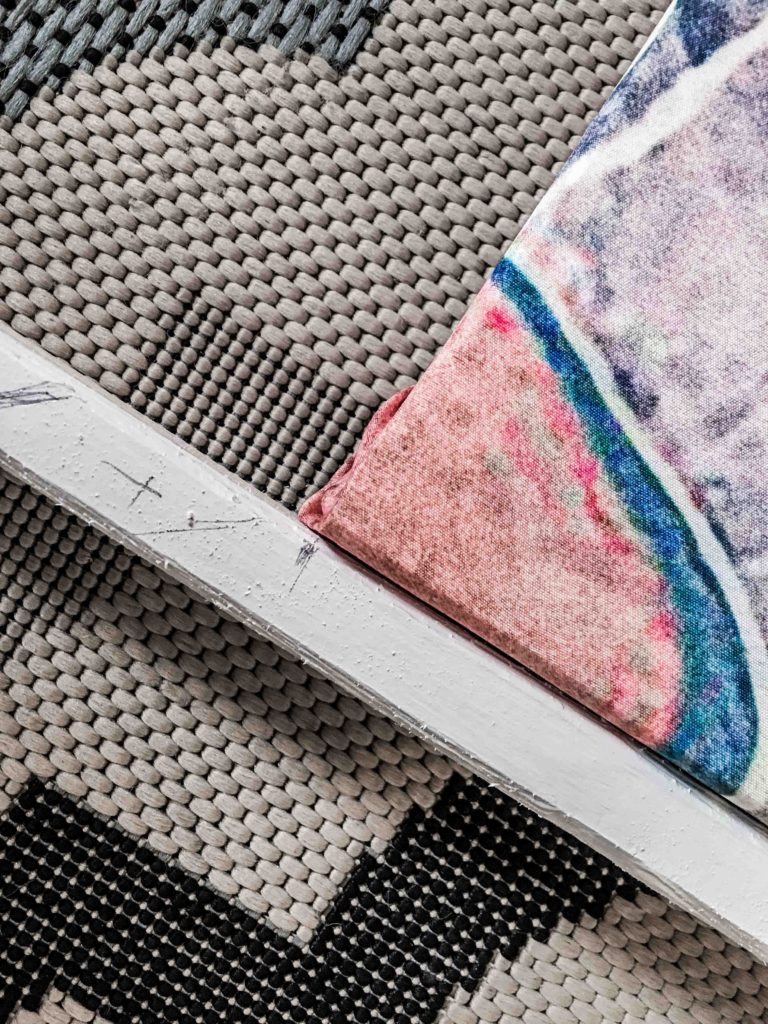
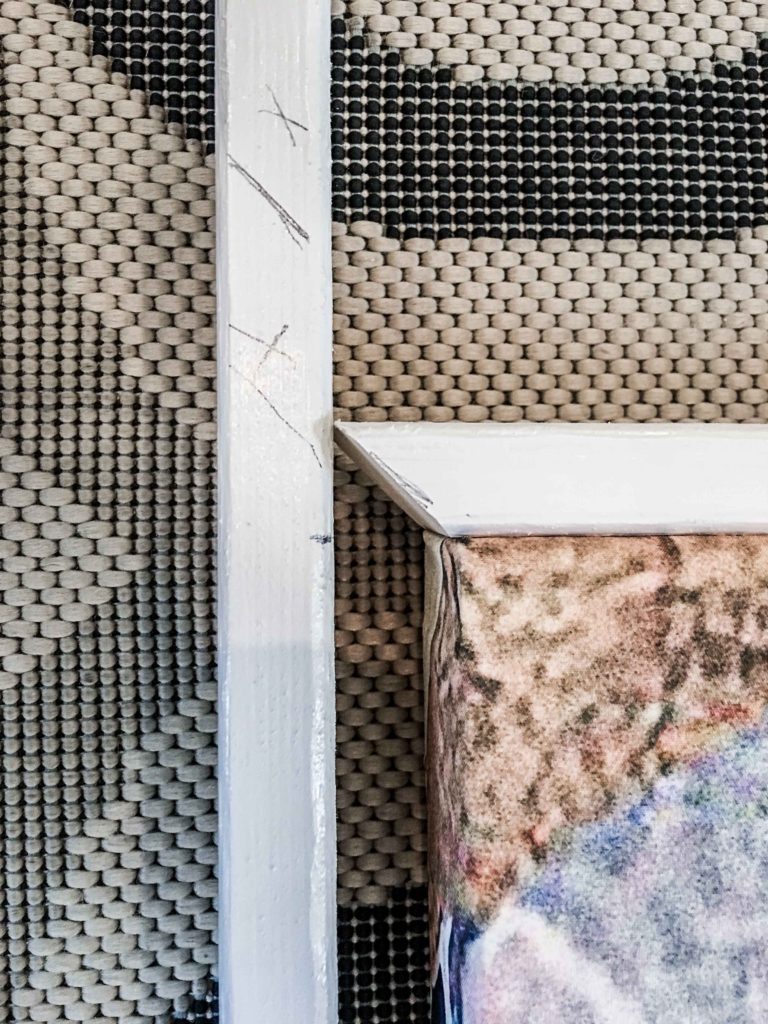
Step 7. Attach the trim to the frame.
- Nail your trim to the sides of your tapestry-wrapped frame.
- If there are gaps between mitered ends, be sure to add white caulking to fill the gaps. Allow the caulking to dry according to manufacturer instructions. Each caulk is different. It usually takes 30 minutes to 2 hours in normal conditions.
Step 8. Install picture hanging hardware.
- Your piece may only weigh about 15 pounds. Attach the proper picture hanging hardware to hold this amount of weight.
- Non-conventionally, I attached a centered d-ring to the upper back of the wood frame with a screw. Feel free to use a sawtooth back instead (centered). Or hanging wire + 2 ring hooks on either upper end on the back of the frame.
Step 9. Hang your tapestry canvas on the wall.
- Dry fit your piece on the wall. Mark behind the hanging hardware with a pencil.
- Install your 30-pound (or more) rated hook into the drywall with a nail and hammer.
- Hang your tapestry canvas on the wall.
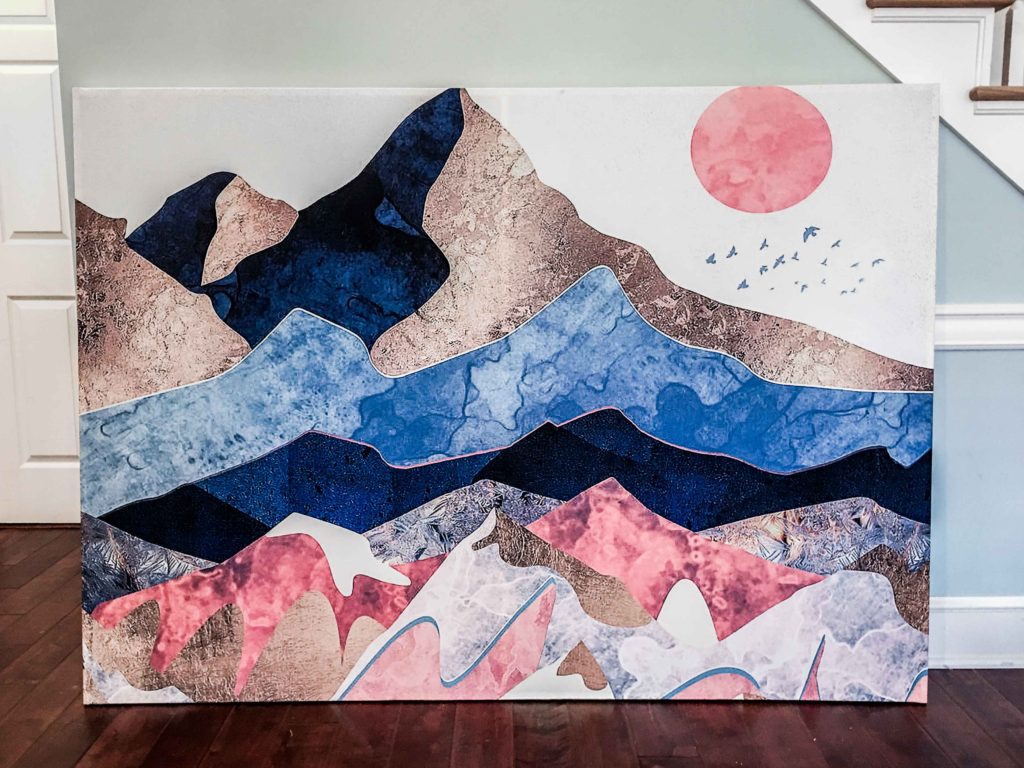
- Marvel at your DIY super powers.
Do all of the DIY wall decor, friend.
Don’t stop with this custom-built tapestry canvas. I know you’re already dreaming about your next home project. Here’s some inspiration for the upcoming DIY home decor piece. Up your home improvement game, one weekend at a time.


