Your sweetest little one wants to help in the kitchen.
(I updated this post for 2020 during the quarantine. No better time to build something amazing. Especially if it empowers your kiddo to help in the kitchen.)
And at the crafting table while you curate beautiful things. And at the desk while you peruse Pinterest when you’re supposed to be paying soul-sucking bills. Pretty much wherever they can’t be, they want to be. That KidLife.
Here’s the problem. If you put them on the counter, tabletop or desk, they will be so incredibly obedient that you won’t know what to do with your newfound sanity. They’ll straighten your piles, catch every single snack crumb in their brightly colored plastic bowl, and even launch a lucrative side hustle to pay for your athleisure obsession.
In your dreams.
The piece your little helper needs.
A stool. Not the itty bitty stool they may use in the bathroom to wash their hands that positions those cute little eyeballs just barely above the countertop. And definitely not the adult-sized 2-step stool that just screams medical deductible.
The stool has handrails to mitigate your anxiety. It’s adjustable – lower the platform as your kiddo grows. 18”, 15” or 12” off the ground. Choose the height that enables the nugget to witness the home chef at work.
“Furniture designed for children” usually translates to, “It’s gonna break in 0-3 years” or “Your child will absolutely love it, but the poor functionality will make you pull out all of your hair within 0-3 years.” We designed this adjustable wooden stool to support a full grown human. If it isn’t dance-on-able, it isn’t worthy of our household.
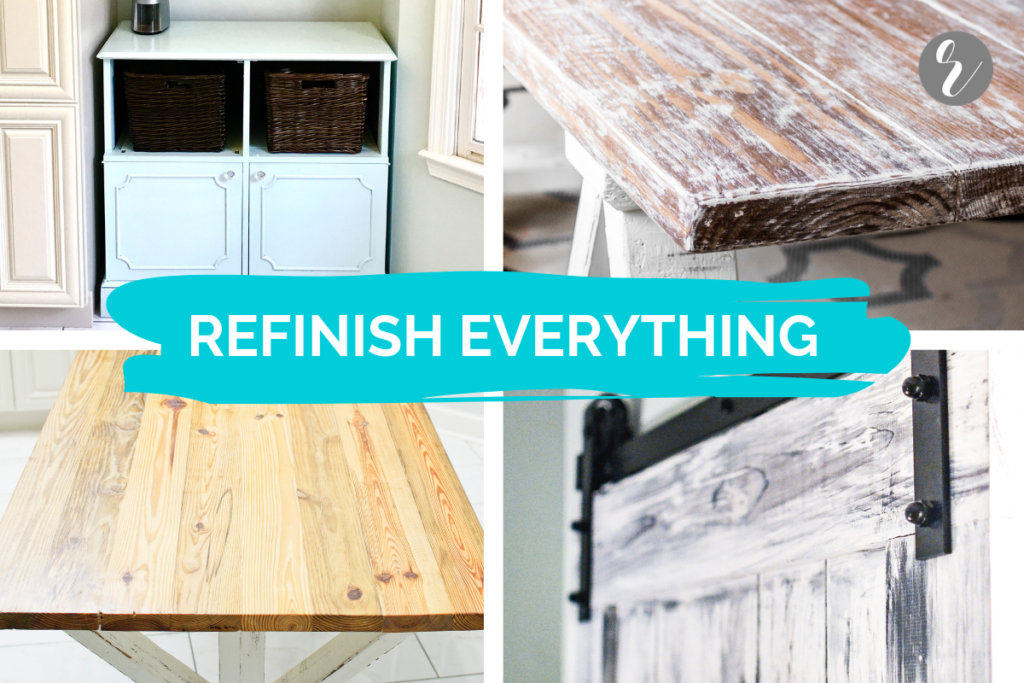
The finish? Good news: you get to paint, stain, dry brush, whitewash or distress it to perfectly match your color palette and overall interior decorating aesthetic.
No more reading. Let’s make something that will up your parenting game for years to come. In the slightly-improvised words of the Lone Ranger, “Bob the builder, AWAAAAAAY.”
Note on structural integrity.
We only build wood furniture that is dance-on-able. If it can’t handle adult humans having a party on top of it, then it’s not worthy to set leg in our household. Make it strong or don’t make it at all. That’s our motto as of 10 seconds ago.
The glue is KEY. Single pocket hole screws will NOT suffice. The boards will turn and the structure will not last. Add wood glue to every joint and call it a life. Know for sure that your stool will hold all the raging toddlers. Even at the same time.
Table of contents.
- Materials.
- Tools.
- Budget.
- Step 1. Hit the hardware store.
- Step 2. Cut list.
- Step 3. Kreg Jig pocket holes.
- Step 4. Assemble the sides.
- Step 5. Connect each side together.
- Step 6. Build the platform.
- Step 7. Sand for days.
- Stool finish inspiration.
How to make a stool for kids that actually works.
Materials.
- 6 – 2x2x8 furring strip boards – choose straight ones! ~$12.
- 1– 1x4x10 common boards. ~$6.
- 2-½” pocket hole screws – for 1-½” thick wood joinery. Pocket hole is abbreviated “PH”. ~$5 for 50 screws.
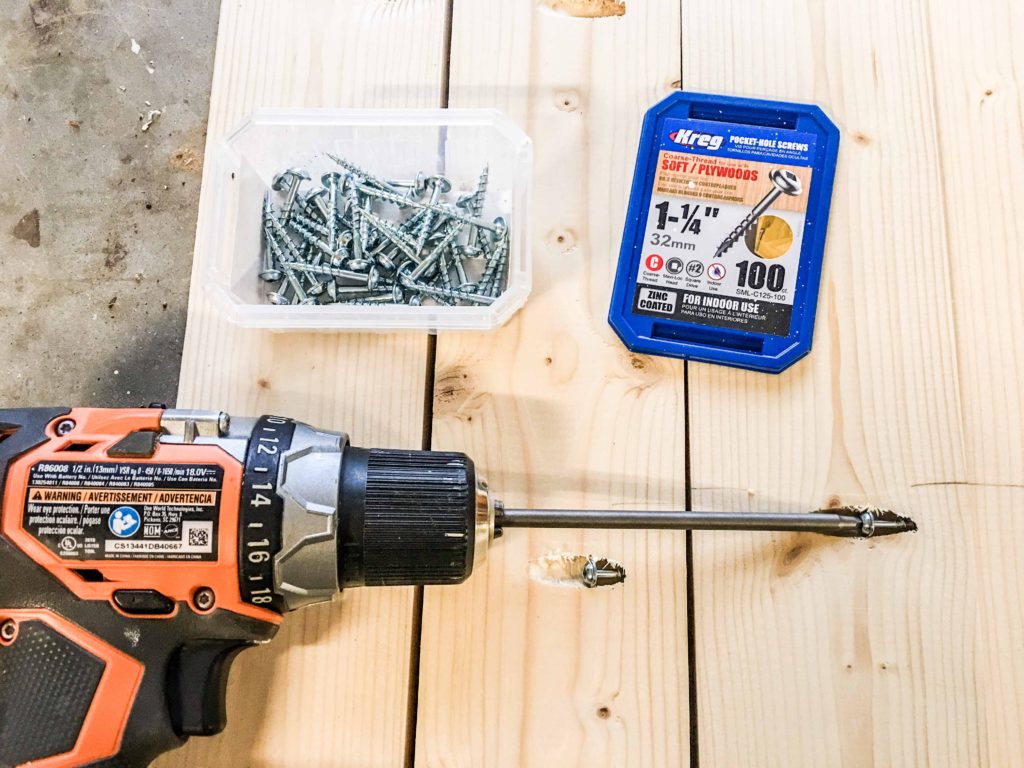
- 1-¼” pocket hole screws – for ¾” thick wood joinery. Pocket hole is abbreviated “PH”. ~$4 for 100 screws (at the hardware store, link for visual reference).
- 4 – 1-¼” screws. Must be flat head or bugle head screws to sink beneath the surface of the wood face. Or countersink your pocket hole screws. To secure the two guides under the platform.
- Wood glue. ~$4 for 8 oz.
- Sandpaper sheets. Assortment of 100, 150 & 220 grit for ~$3.
Tools.
Budget.
- All materials cost = $34.
- All materials cost for DIY regulars = $23.
- For those who already have leftover 1-¼” PH screws, wood glue and sandpaper.
Step 1. Hit the hardware store.
- Finding straight wood is the most difficult part of the entire build. Furring strip boards are notorious for being severely warped, twisted and bowed.
- Look down the end of every board and choose the straightest boards in the store. I assessed 40 boards to find a handful that would suffice.
- Why strip boards? They’re insanely cheap. If you can’t find quality strip boards, upgrade to 2×2 common boards. Select pine is better than common board. Oak is your ideal hardware store choice. Each option increases your overall price substantially.
Step 2. Cut list.
- 4 – 2x2x36” (countertop height)
- 19 – 2x2x17-½” (horizontal cross connections; set aside 3 for safety cross supports)
- 5 – 1x4x20-½” (platform)
- 2 – 1x4x8-¾” (rough crosscut, halving the left over 1×4 piece for guides under the platform)

Step 3. Kreg Jig pocket holes.
2x2s
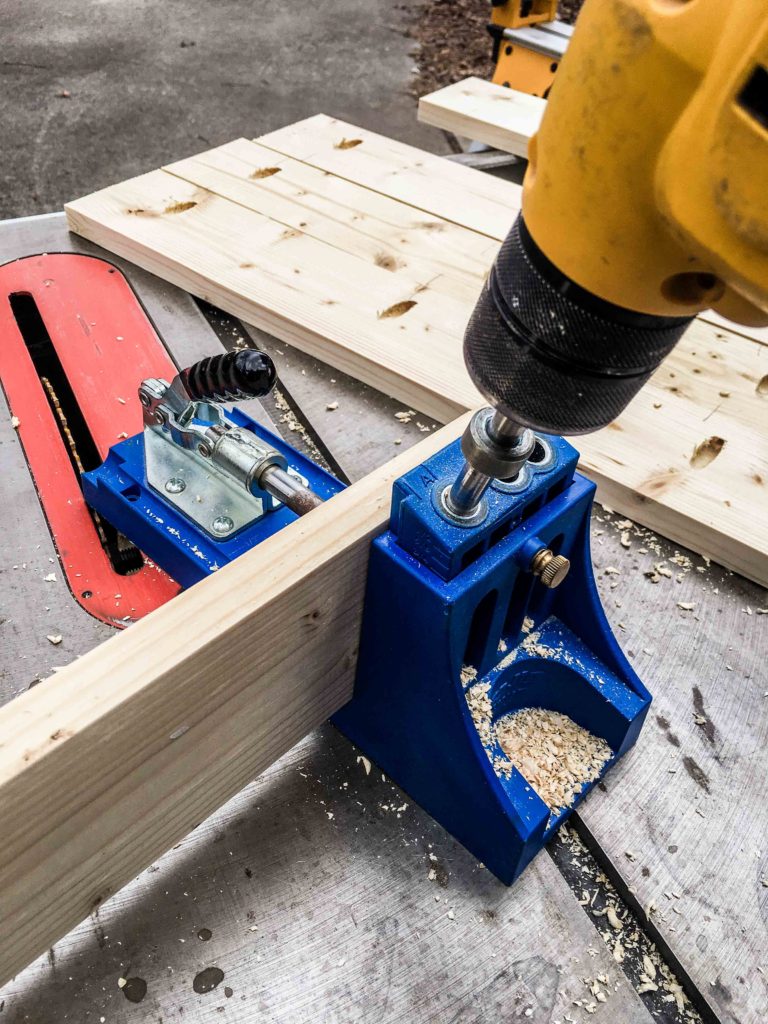
- Set your Kreg Jig drill guide to 1-½. Set the metal collar on the stepped drill bit to 1-½.
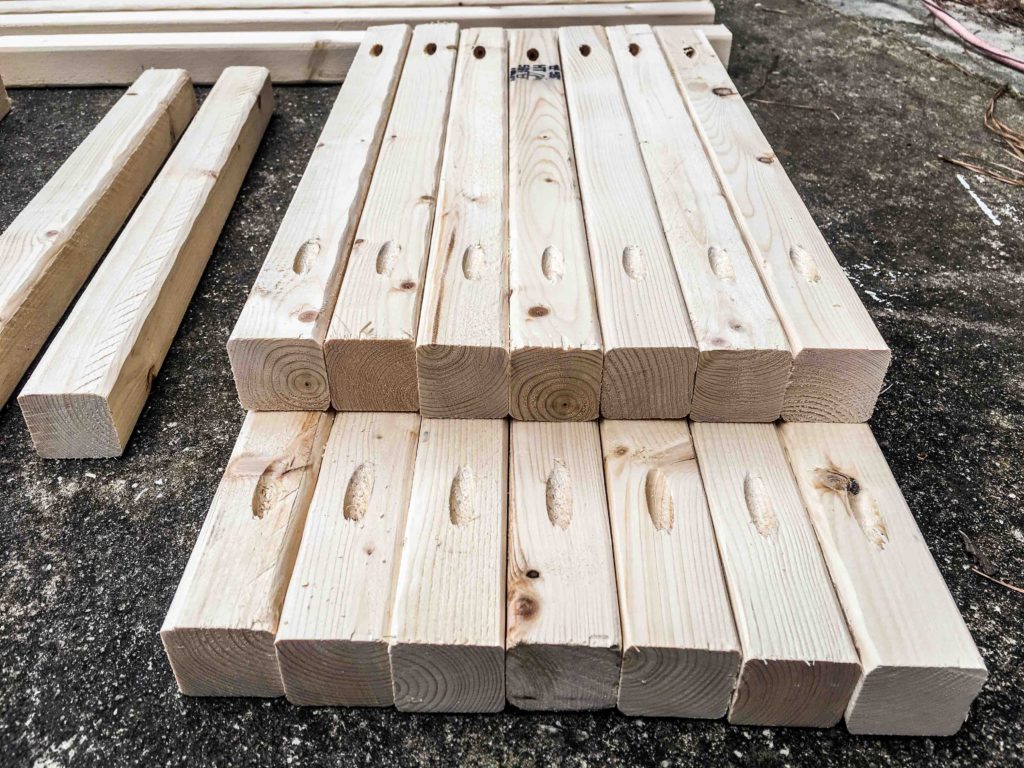
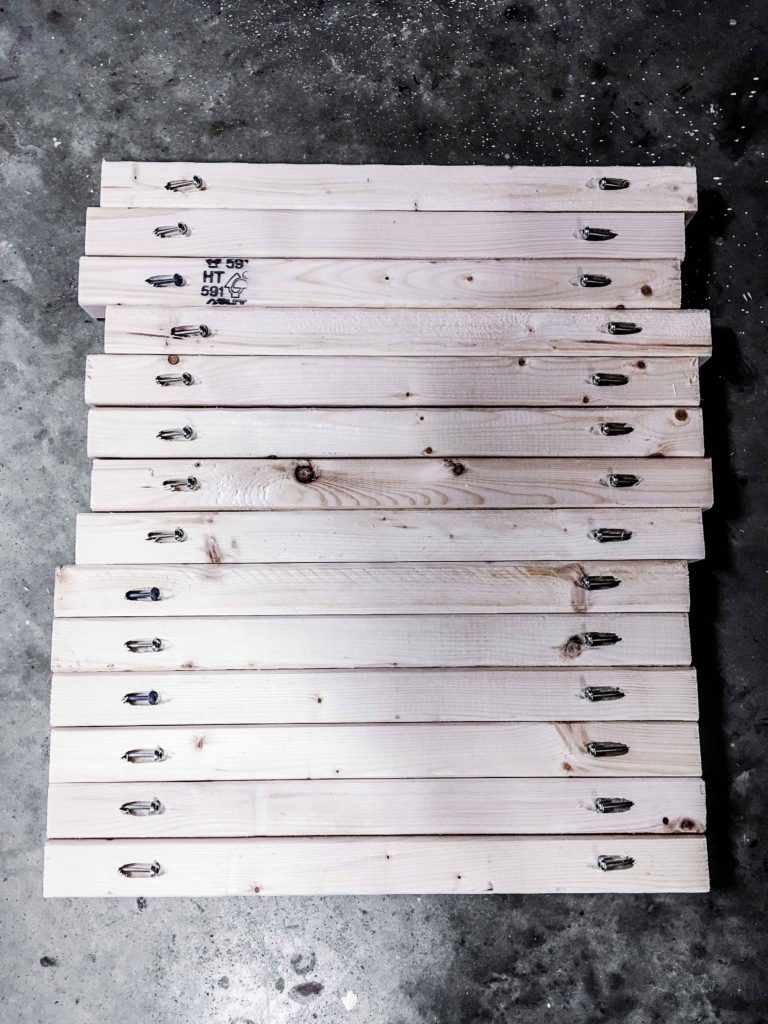
- With corded drill, or cordless drill on the predrill setting, drill one hole on both ends of one face of all 19 – 17-½” boards.
- The one face you choose per board will be inward facing, thus less visible to your countless stool admirers (like your toddler’s friends actually care).
- Do NOT drill holes into the 4 – 36” long boards.
1x4s
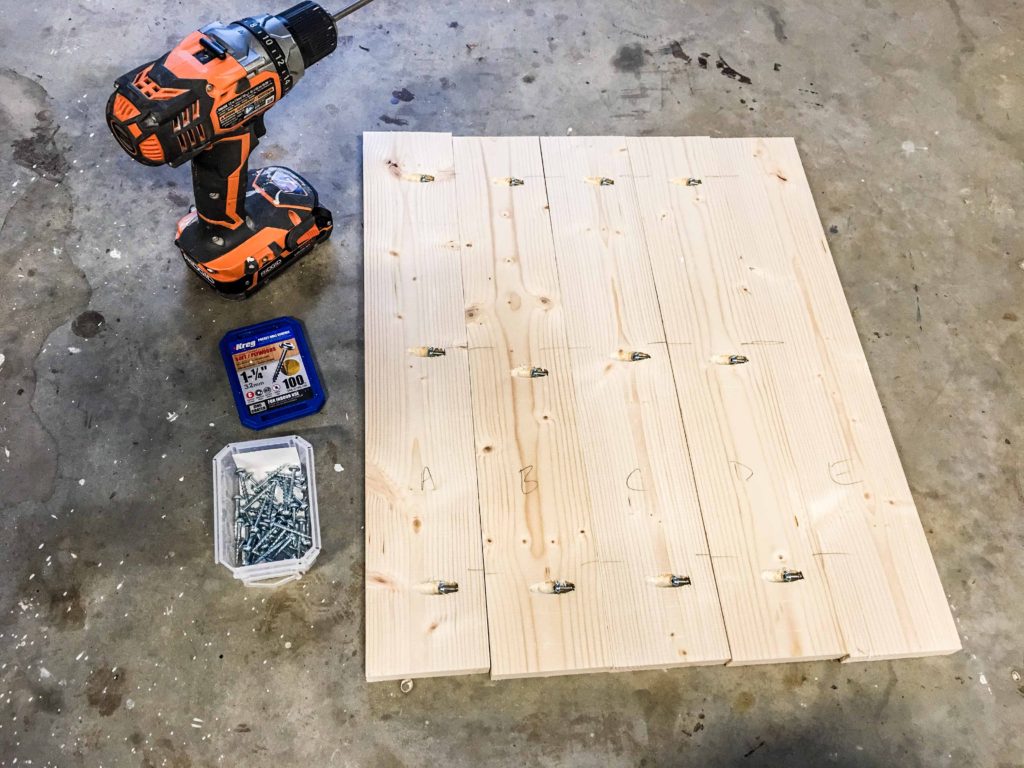
- Set your Kreg Jig drill guide to ¾. Set the metal collar on the stepped drill bit to ¾.
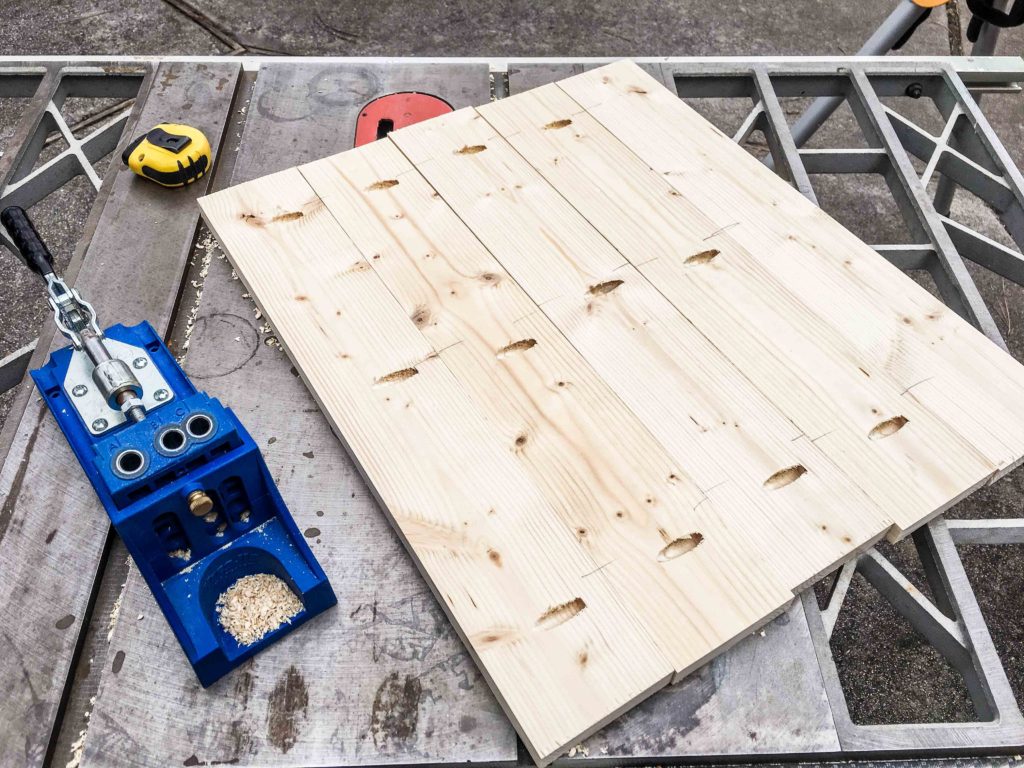
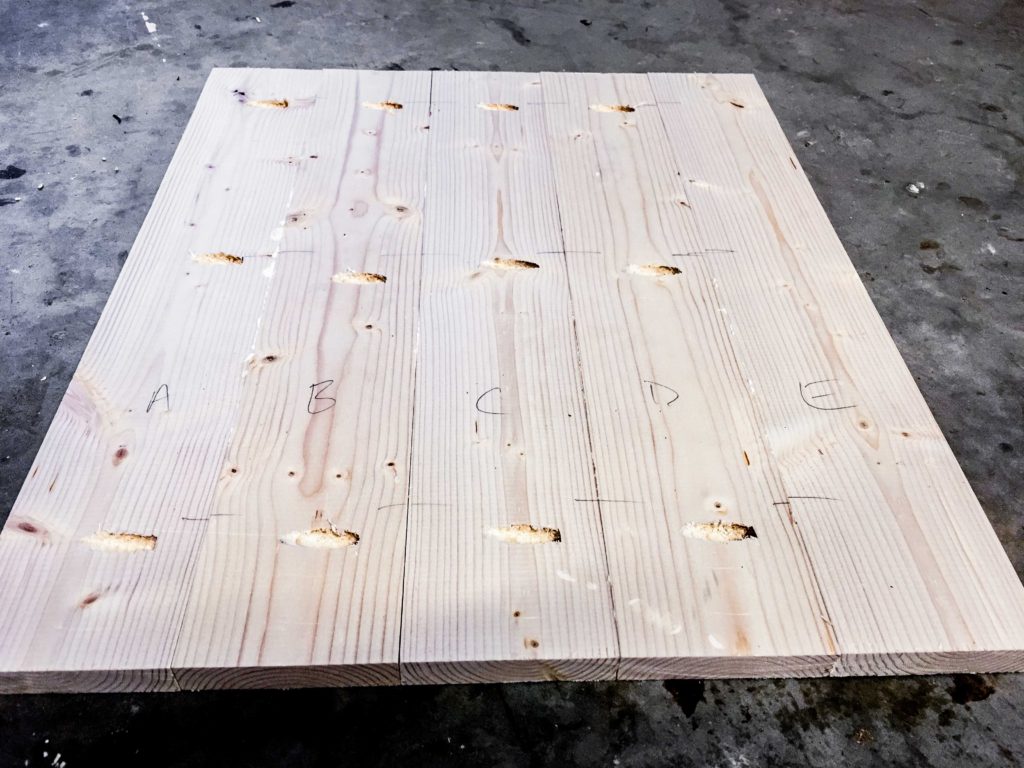
- You’re preparing the platform your kiddo will stand on, made of 7 side by side 1×4 boards.
- With corded drill, or cordless drill on the predrill setting, drill 3 holes per 1x4x20-½” board. Holes should be ~2 inches from either end, with one hole in the center.
- Only drill holes in 4 boards, NOT all 5 boards. The screws installed in board #4 will attach to board #5.
Step 4. Assemble two facing sides.
Note: we installed the 3 safety cross supports (2x2x17-½) last based on side and height preference.
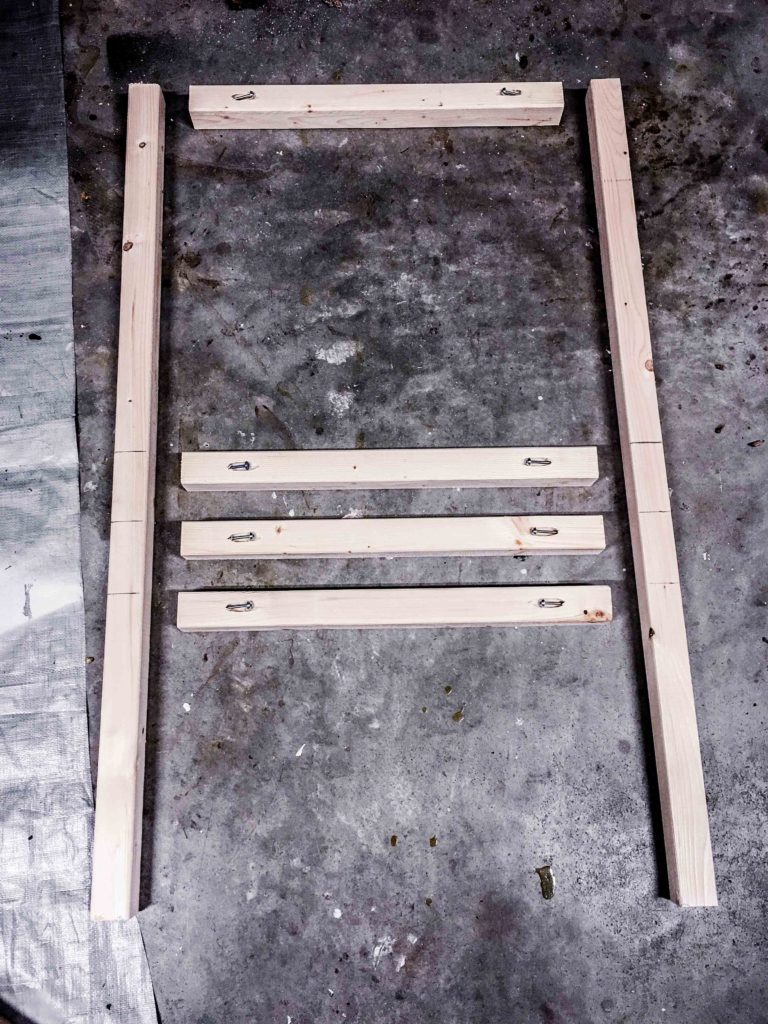
THE LAYOUT
- Partially install 2-½” pocket hole (PH) screws into every PH on your 19 – 2x2x17-½” boards. Do NOT allow the screw to pierce through the end of each board. You’re only prepping the boards for quicker install once they’re glued.
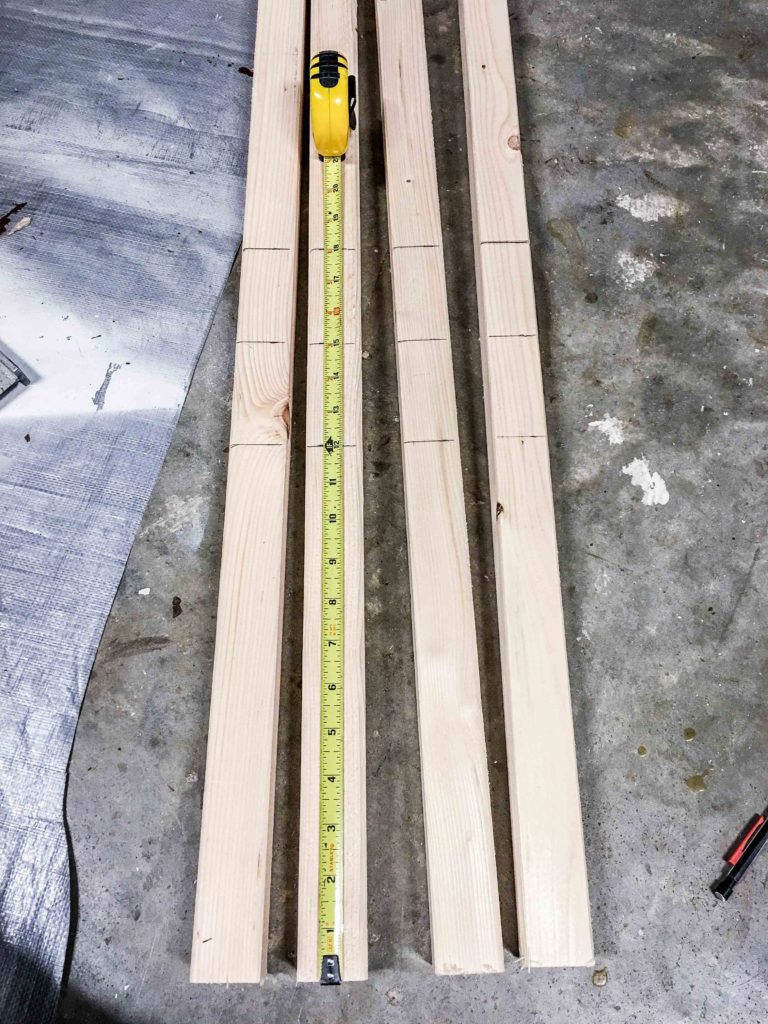
- Lay out 2 – 2x2x36” boards on a flat surface, parallel to each other.
- Lay out 4 – 2x2x17-½” boards, perpendicular to the 36” boards to make a “ladder”.
- Make sure your PHs are all facing up.
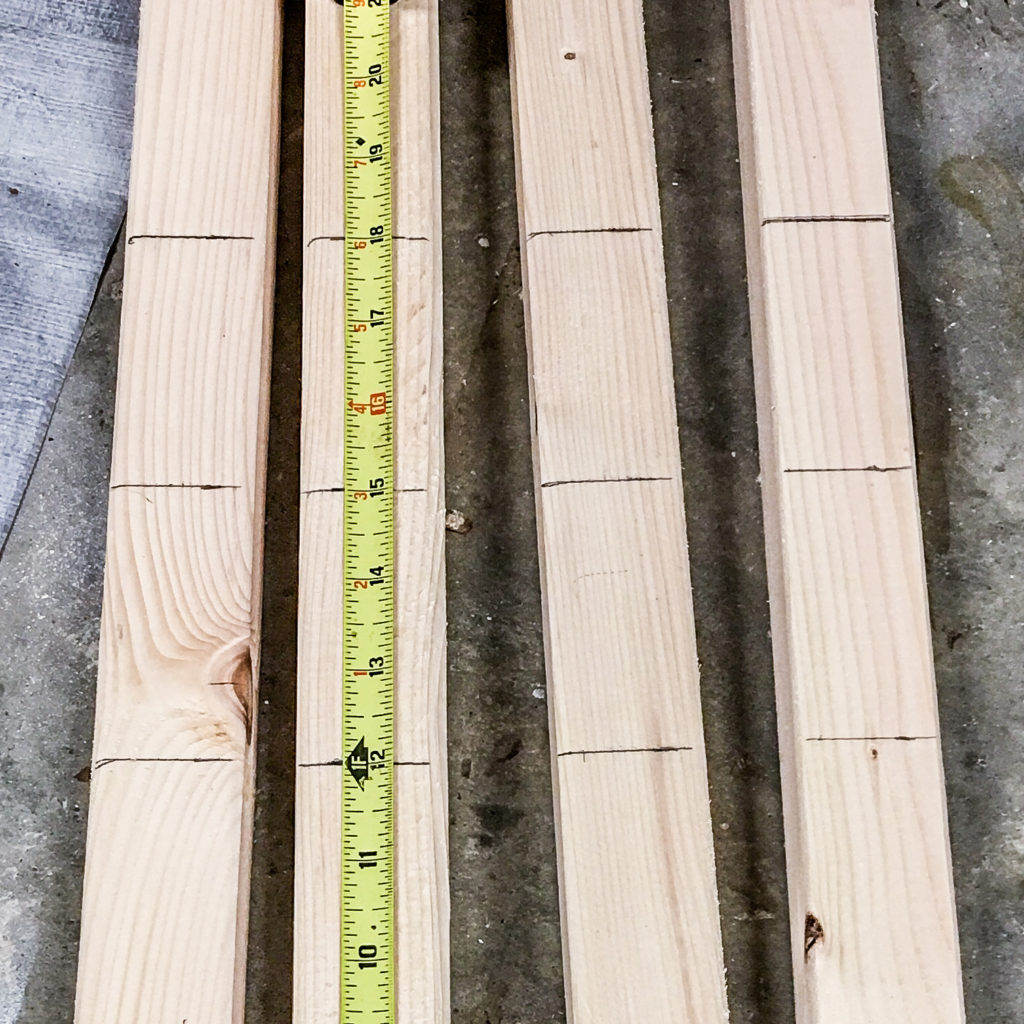
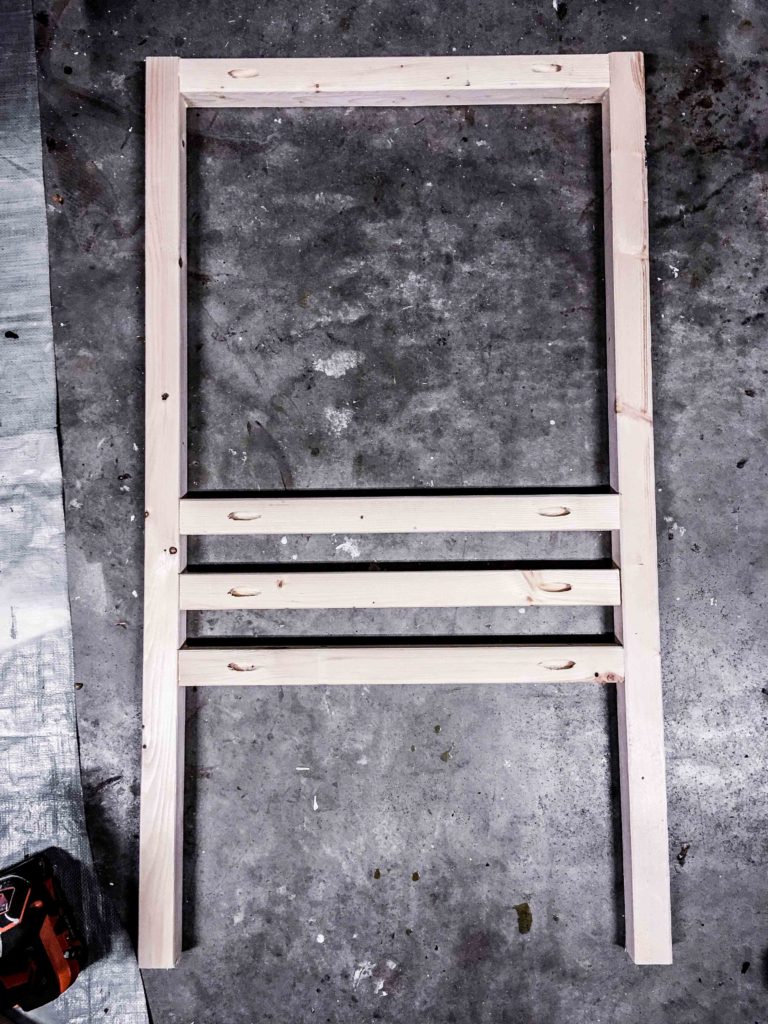
- The first 17-½” board should be flush with the top of each 36” board. Mark all lines with a pencil.
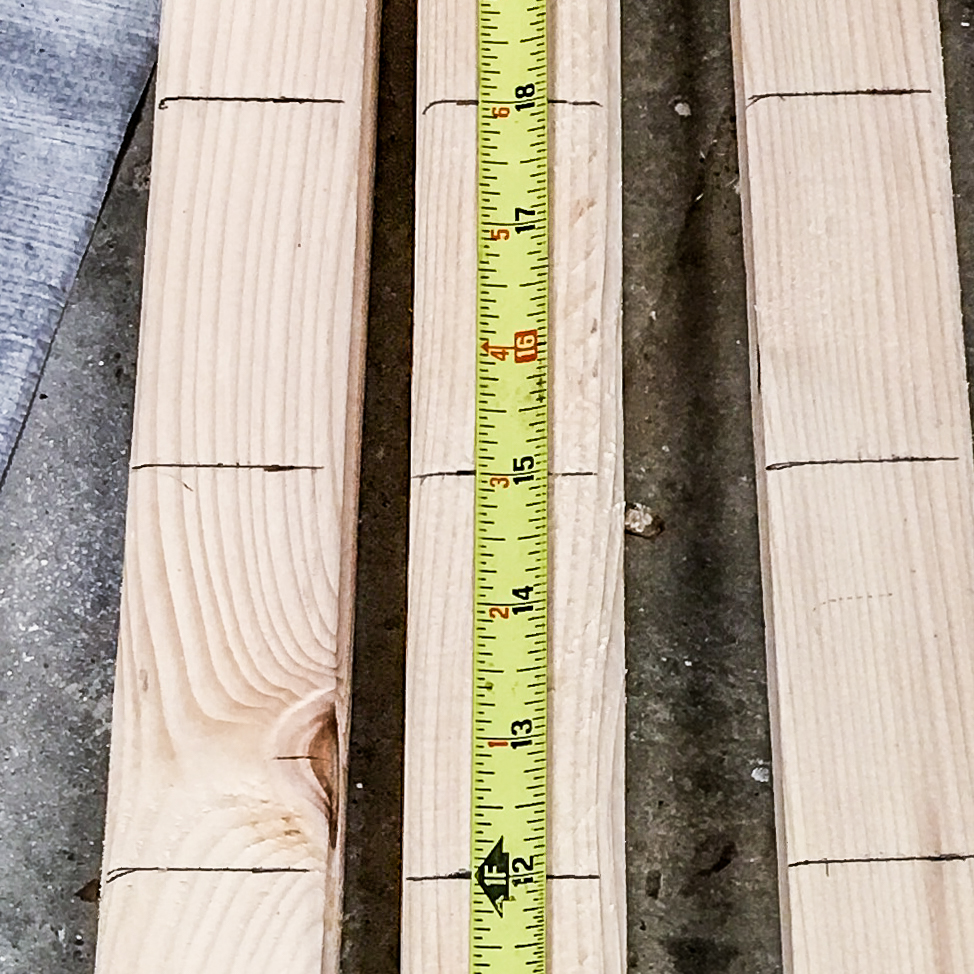
- The second 17-½” board should end at 18” from the bottom of the 36” boards, and start at 16-½” from the bottom.
- The third 17-½” board should end at 15” from the bottom of the 36” boards, and start at 13-½” from the bottom.
- The fourth 17-½” board should end at 12” from the bottom of the 36” boards, and start at 10-½” from the bottom.
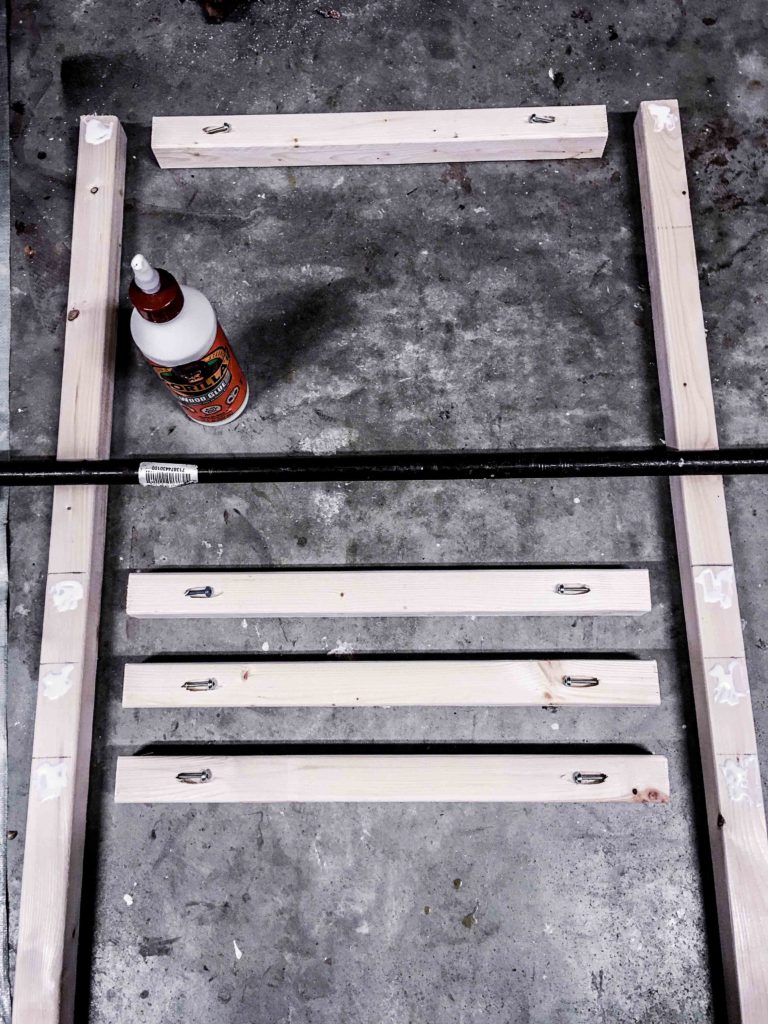
GLUE & SCREW
- Consider using pipe, parallel or trigger clamps to hold the boards together after gluing, before screwing.
- Before screwing the boards together, turn the 36” boards upward and apply glue to the four areas on each 36” board where every cross connection with attach.
- Screw the boards together with your cordless drill set to mid or low-level clutch setting. Use your 6” long #2 square drive bit, designed for PH screw install.
REPEAT
- Repeat all of Step 4 for the other stool side.
- The other stool side is identical to the first. These will face each other once the build is complete.
- Note: we will connect each side using DIFFERENT measurements for the placement of the 2x2x17-½” boards.
Step 5. Connect each side together.
THE LAYOUT
- This step might be easier with a friend.
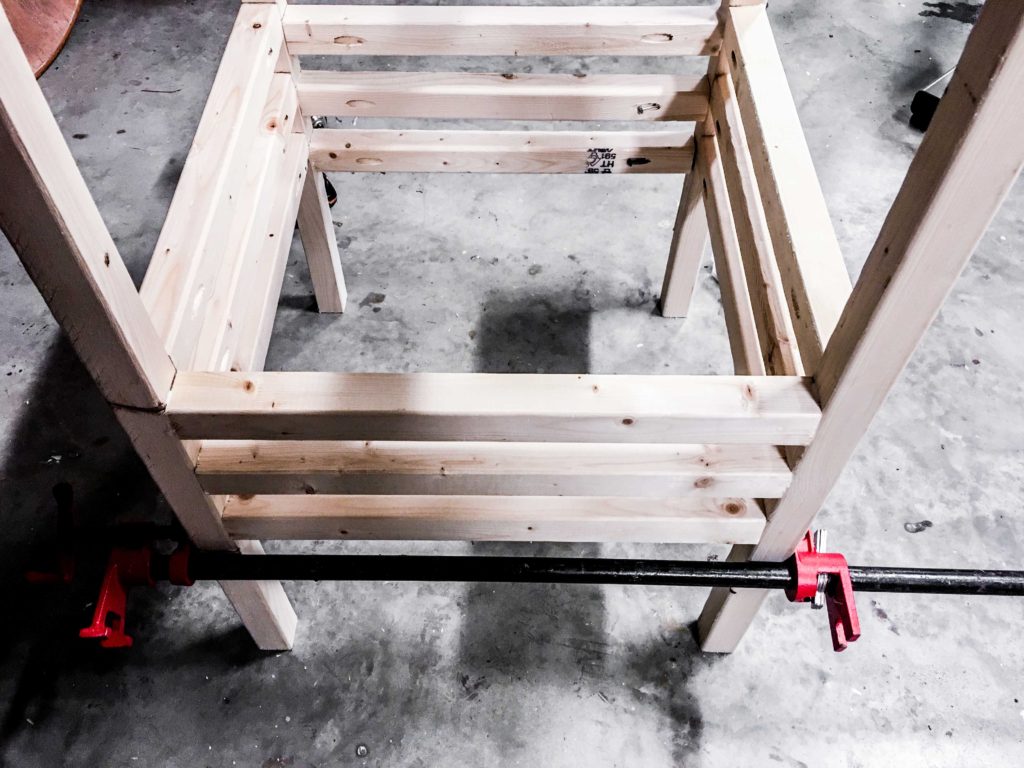
- Mark with a pencil where the remaining 8 – 2x2x17-½” boards will be placed. On both constructed sides. 4 will make one side, the other 4 will make the opposing side. These 8 boards will be ¾” lower on the finished stool than their adjacent 2x2s.
- The first 2x2x17-½” board will be flush with the top to make a handrail for your toddler.
- The second 2x2x17-½” board will be from 15-¾” to 17-¼” from the bottom of the 36” boards.
- The third 2x2x17-½” board will be from 12-¾” to 14-¼” from the bottom of the 36” boards.
- The fourth 2x2x17-½” board will be from 9-¾” to 11-¼” from the bottom of the 36” boards.
- Note: the 3 lower boards are offset from the adjacent side boards by ¾” to make up for the ¾” platform where your little one will stand.
- Make identical measurements and pencil marks on the opposing side.
GLUE & SCREW
- Partially install 2-½” PH screws to expedite the assembly process once glue is added.
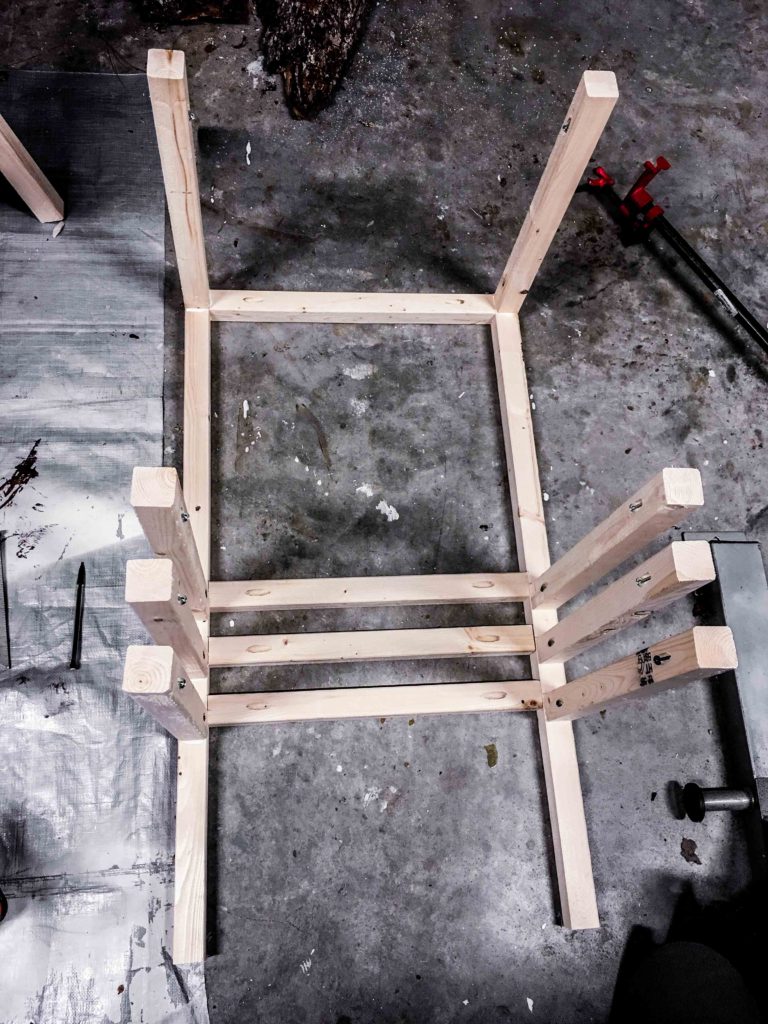
- Lay one constructed side flat on the ground.
- Place wood glue where of all 8 – 2x2x17-½” boards will attach. Make sure the PHs are facing inward.
- One at a time, hold a 2x2x17-½ board in place. With immense downward pressure on the board, install the PH screw.
- Continue this process for all 2x2x17-½ boards until all 8 are sticking straight up into the air. Be sure to raise the setting on your drill’s torque ring if the boards are still able to twist after install.
- Double check that your other constructed side has the same marks as the side that’s face up on the ground.
- Place the other constructed side face down onto the 8 boards sticking up in the air.
- One at a time, put a board in place, apply immense downward pressure and install the PH screw for that one board.
- You can continue this process with every piece sticking up in the air, or complete a few until the stool can stand vertically on its own. Then consider using a clamp before installing every remaining screw.
Step 6. Build the platform.
Note: alternate the end grain pattern of each board to prevent platform bowing over time. If the first board has rings shaped like an “n”, place the next board with rings shaped like a “u”. And so on.
THE 7 PLATFORM SLATS
- Partially install 1-¼” PH screws into all 12 PHs of your 4 – 1x4x20-½” boards. Don’t let the screw tip poke through the end. The 5th board doesn’t have PHs.
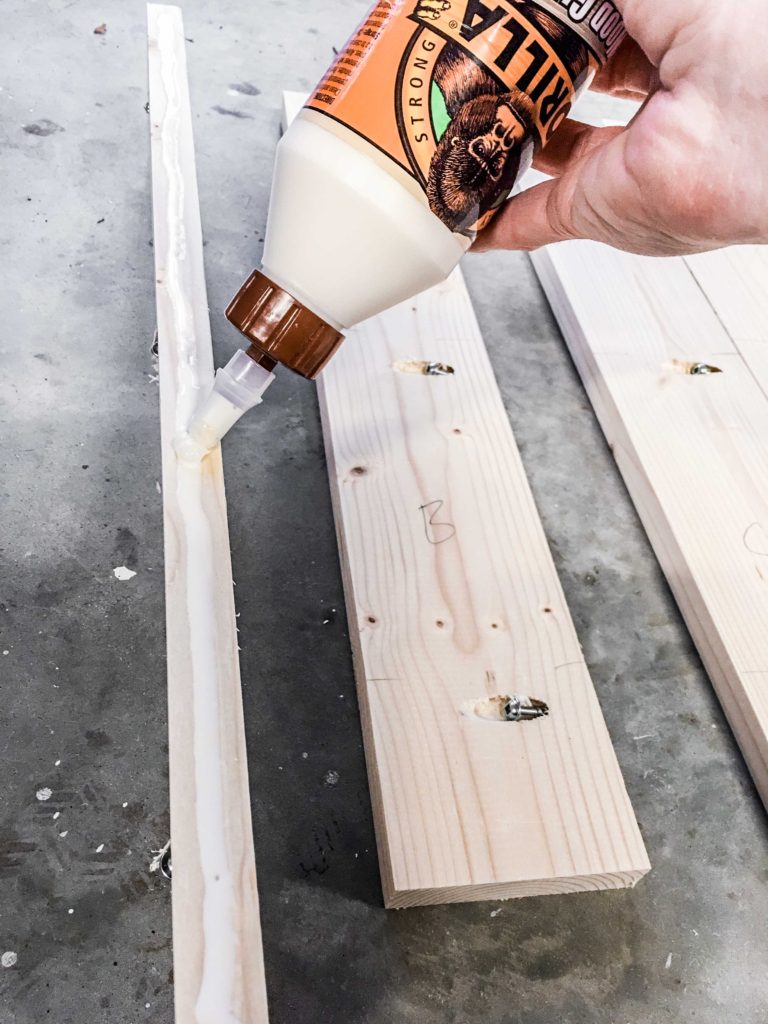
- Turn the first board upward and place a bead of glue along the center of the side.
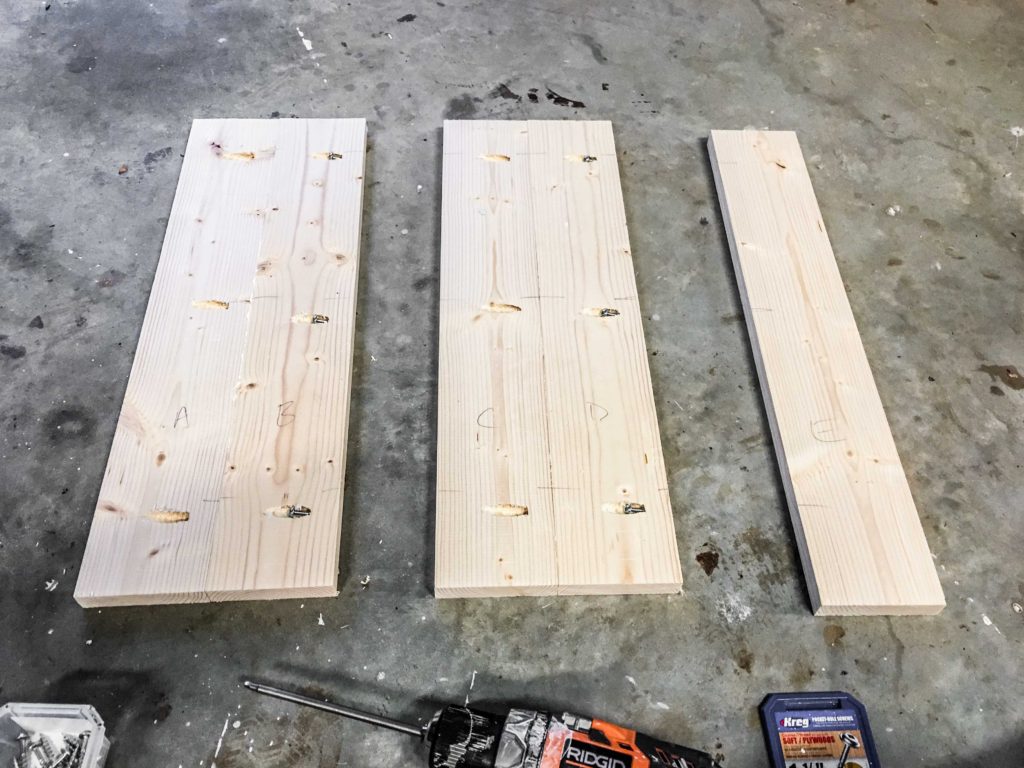
- Flatten the first board, press it up against the second board, consider clamping them together, and install screws.
- Repeat for the remaining boards until all 1x4x20-½” boards are joined together with glue and PH screws.
THE GUIDE PIECES UNDERNEATH
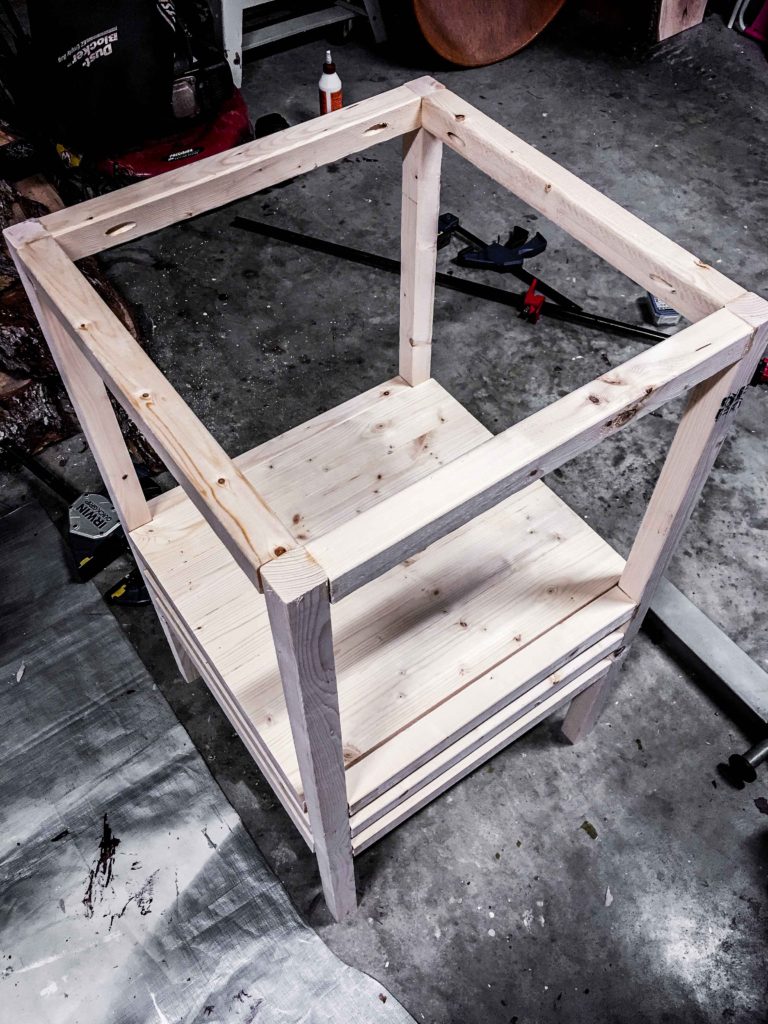
- Dry fit your 5-slat platform on any of the 3 levels on the stool.
- Place the 2 – 1x4x8-¾” boards on the underside of the platform, on the inside of the stool structure. These 2 guide pieces will hold the platform in place at any of the 3 levels.
- Mark the placement of the cross supports with a pencil. (If you have 2 clamps, consider clamping the platform in place, flipping the entire stool upside down and immediately installing both guide pieces with 2 – 1-¼” screws each.)
- Remove the platform from the stool structure and place it face-down on a flat surface.
- No need for glue – you may need to remove the screws and re-adjust your guide pieces for a perfect fit.
- Attach both 1x4x8-¾” boards with 2 – 1-¼” screws per board. Make sure the head of all 4 screws is flush or just beneath the surface of the wood. Otherwise the 15” and 12” tall levels won’t accept the platform.
Step 7. Attach the safety cross supports.
- Grab the last 3 – 2x2x17-½” boards.
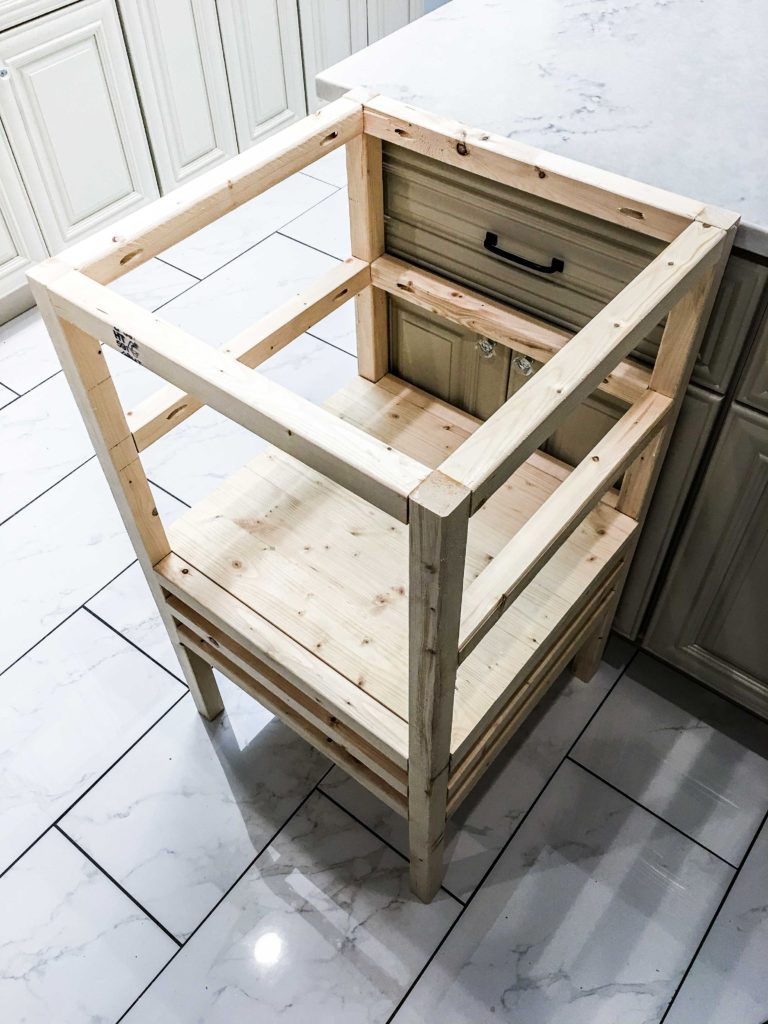
- Dry fit each piece somewhere between the platform and top 2×2 guard rail. We left one side open to allow our kiddo to climb in once he’s old enough. Make sure all three pieces fit. If they’re tight, you might need to use a rubber mallet or hammer to get them into place.
- Our safety cross supports are placed halfway between the 18″ tall platform and top of the stool.
- One safety cross support at a time, add glue to both ends.
- Position the cross support exactly where you want it. Install the PH screws. Repeat for the 2 other cross supports.
- Allow all glue to dry for 24 hours before sanding.

Step 8. Sand for days.
- Sand ALL edges and corners with your orbital sander.
- Run your hand along every edge and corner to make sure they’re rounded enough for toddler use.
- Sand the tough to reach areas with sheet of sandpaper.
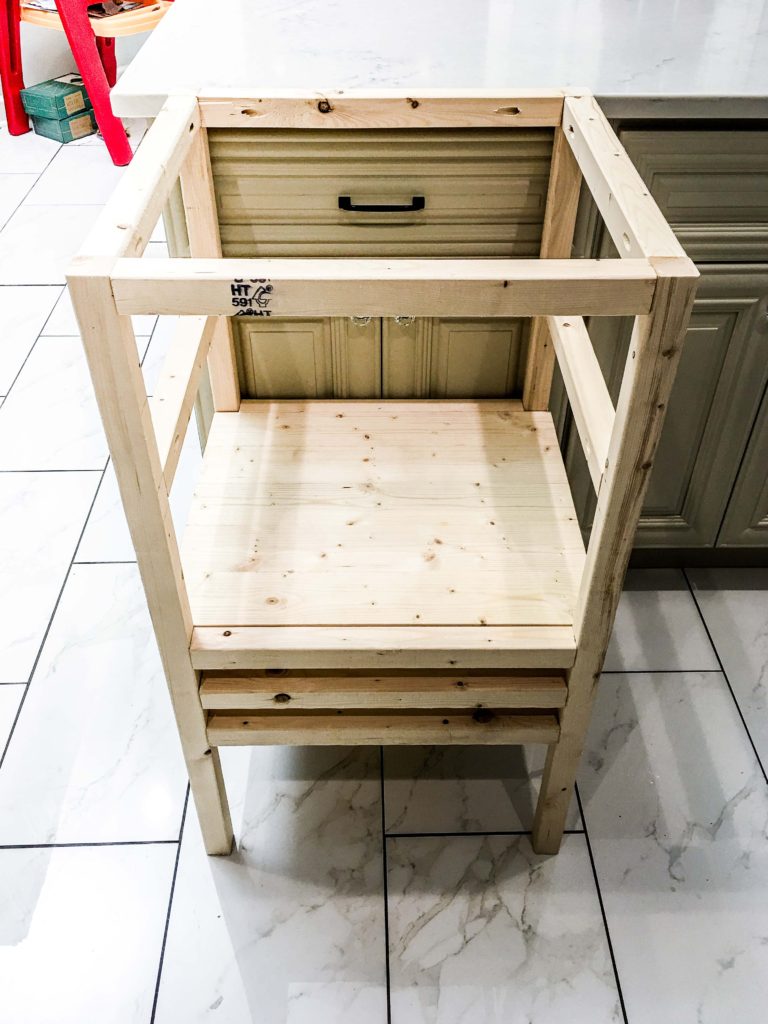
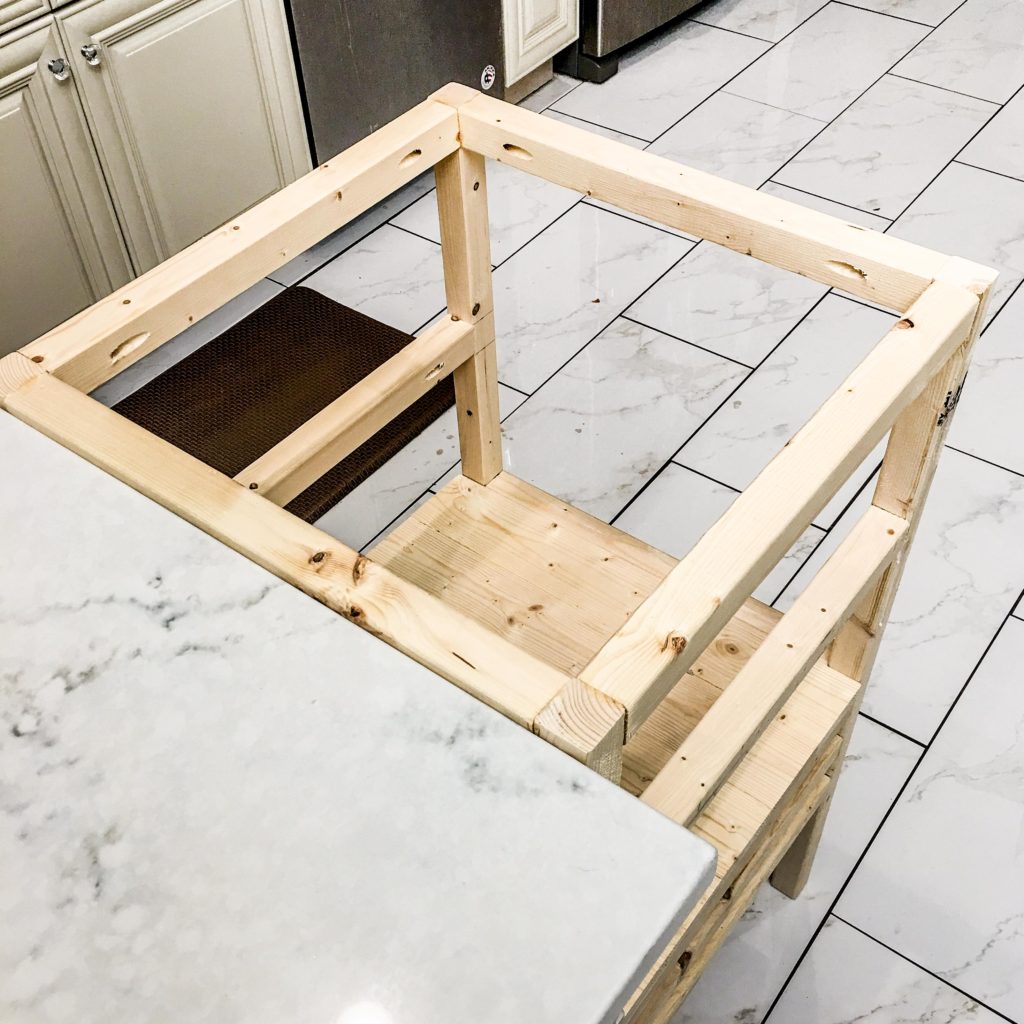
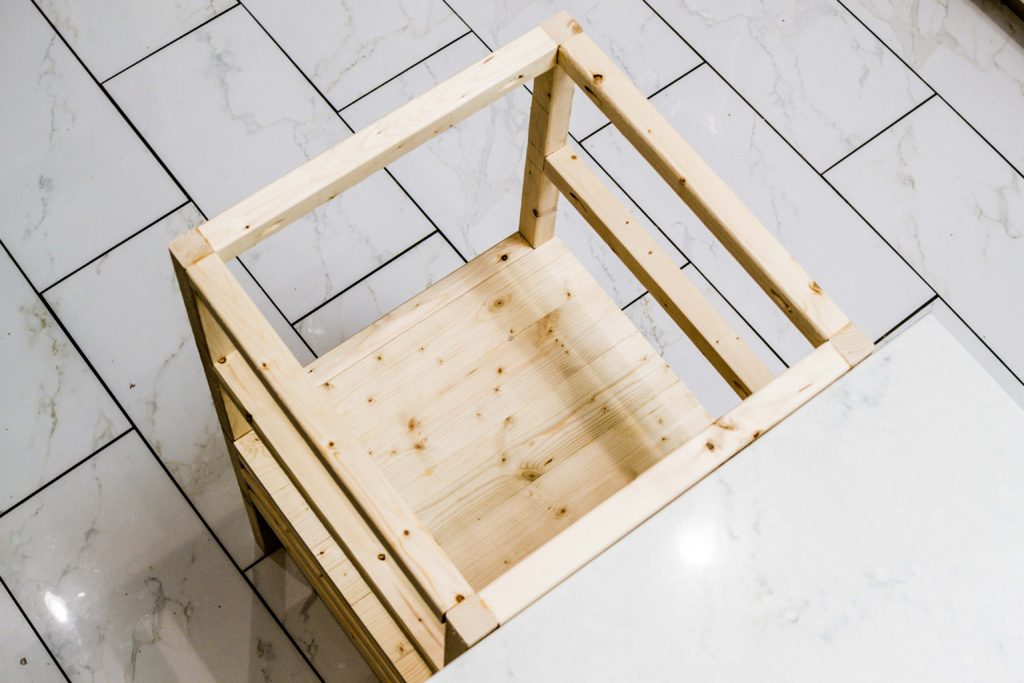

Paint the stool a lovely color.
We painted the entire stool Benjamin Moore Palladian Blue HC-144. A lighter toned teal color to tie into our favorite accent color. Our pillows, coffee bar, hand towels, and so many more accessories are a similar teal.
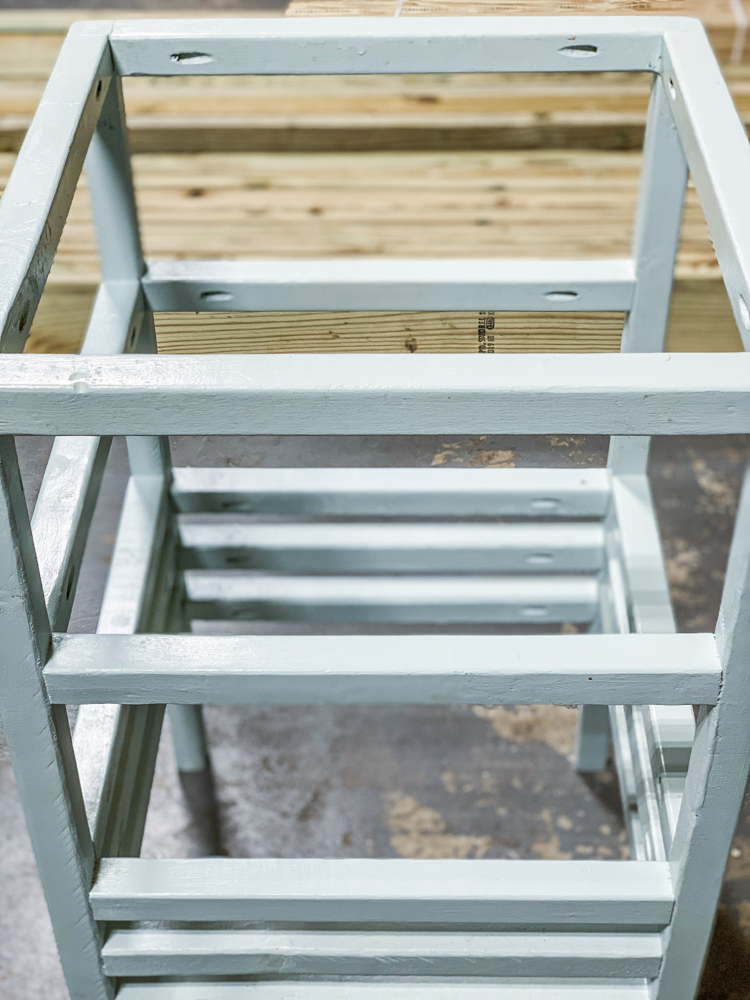
Water-based poly wasn’t enough.
After 2 coats of paint, we applied a few coats of water-based, interior polyurethane. But after a few years of toddler wear and tear, the clear coat started to deteriorate. Especially on the adjustable footer.
Stool finish inspiration.
The stool finishing options are endless. Your home decor accent color in a clean, even coat of paint. Stained. Dry brushed. Whitewashed. Color-washed. Stained, painted and then distressed. Check out our favorite finishes below for some inspo.

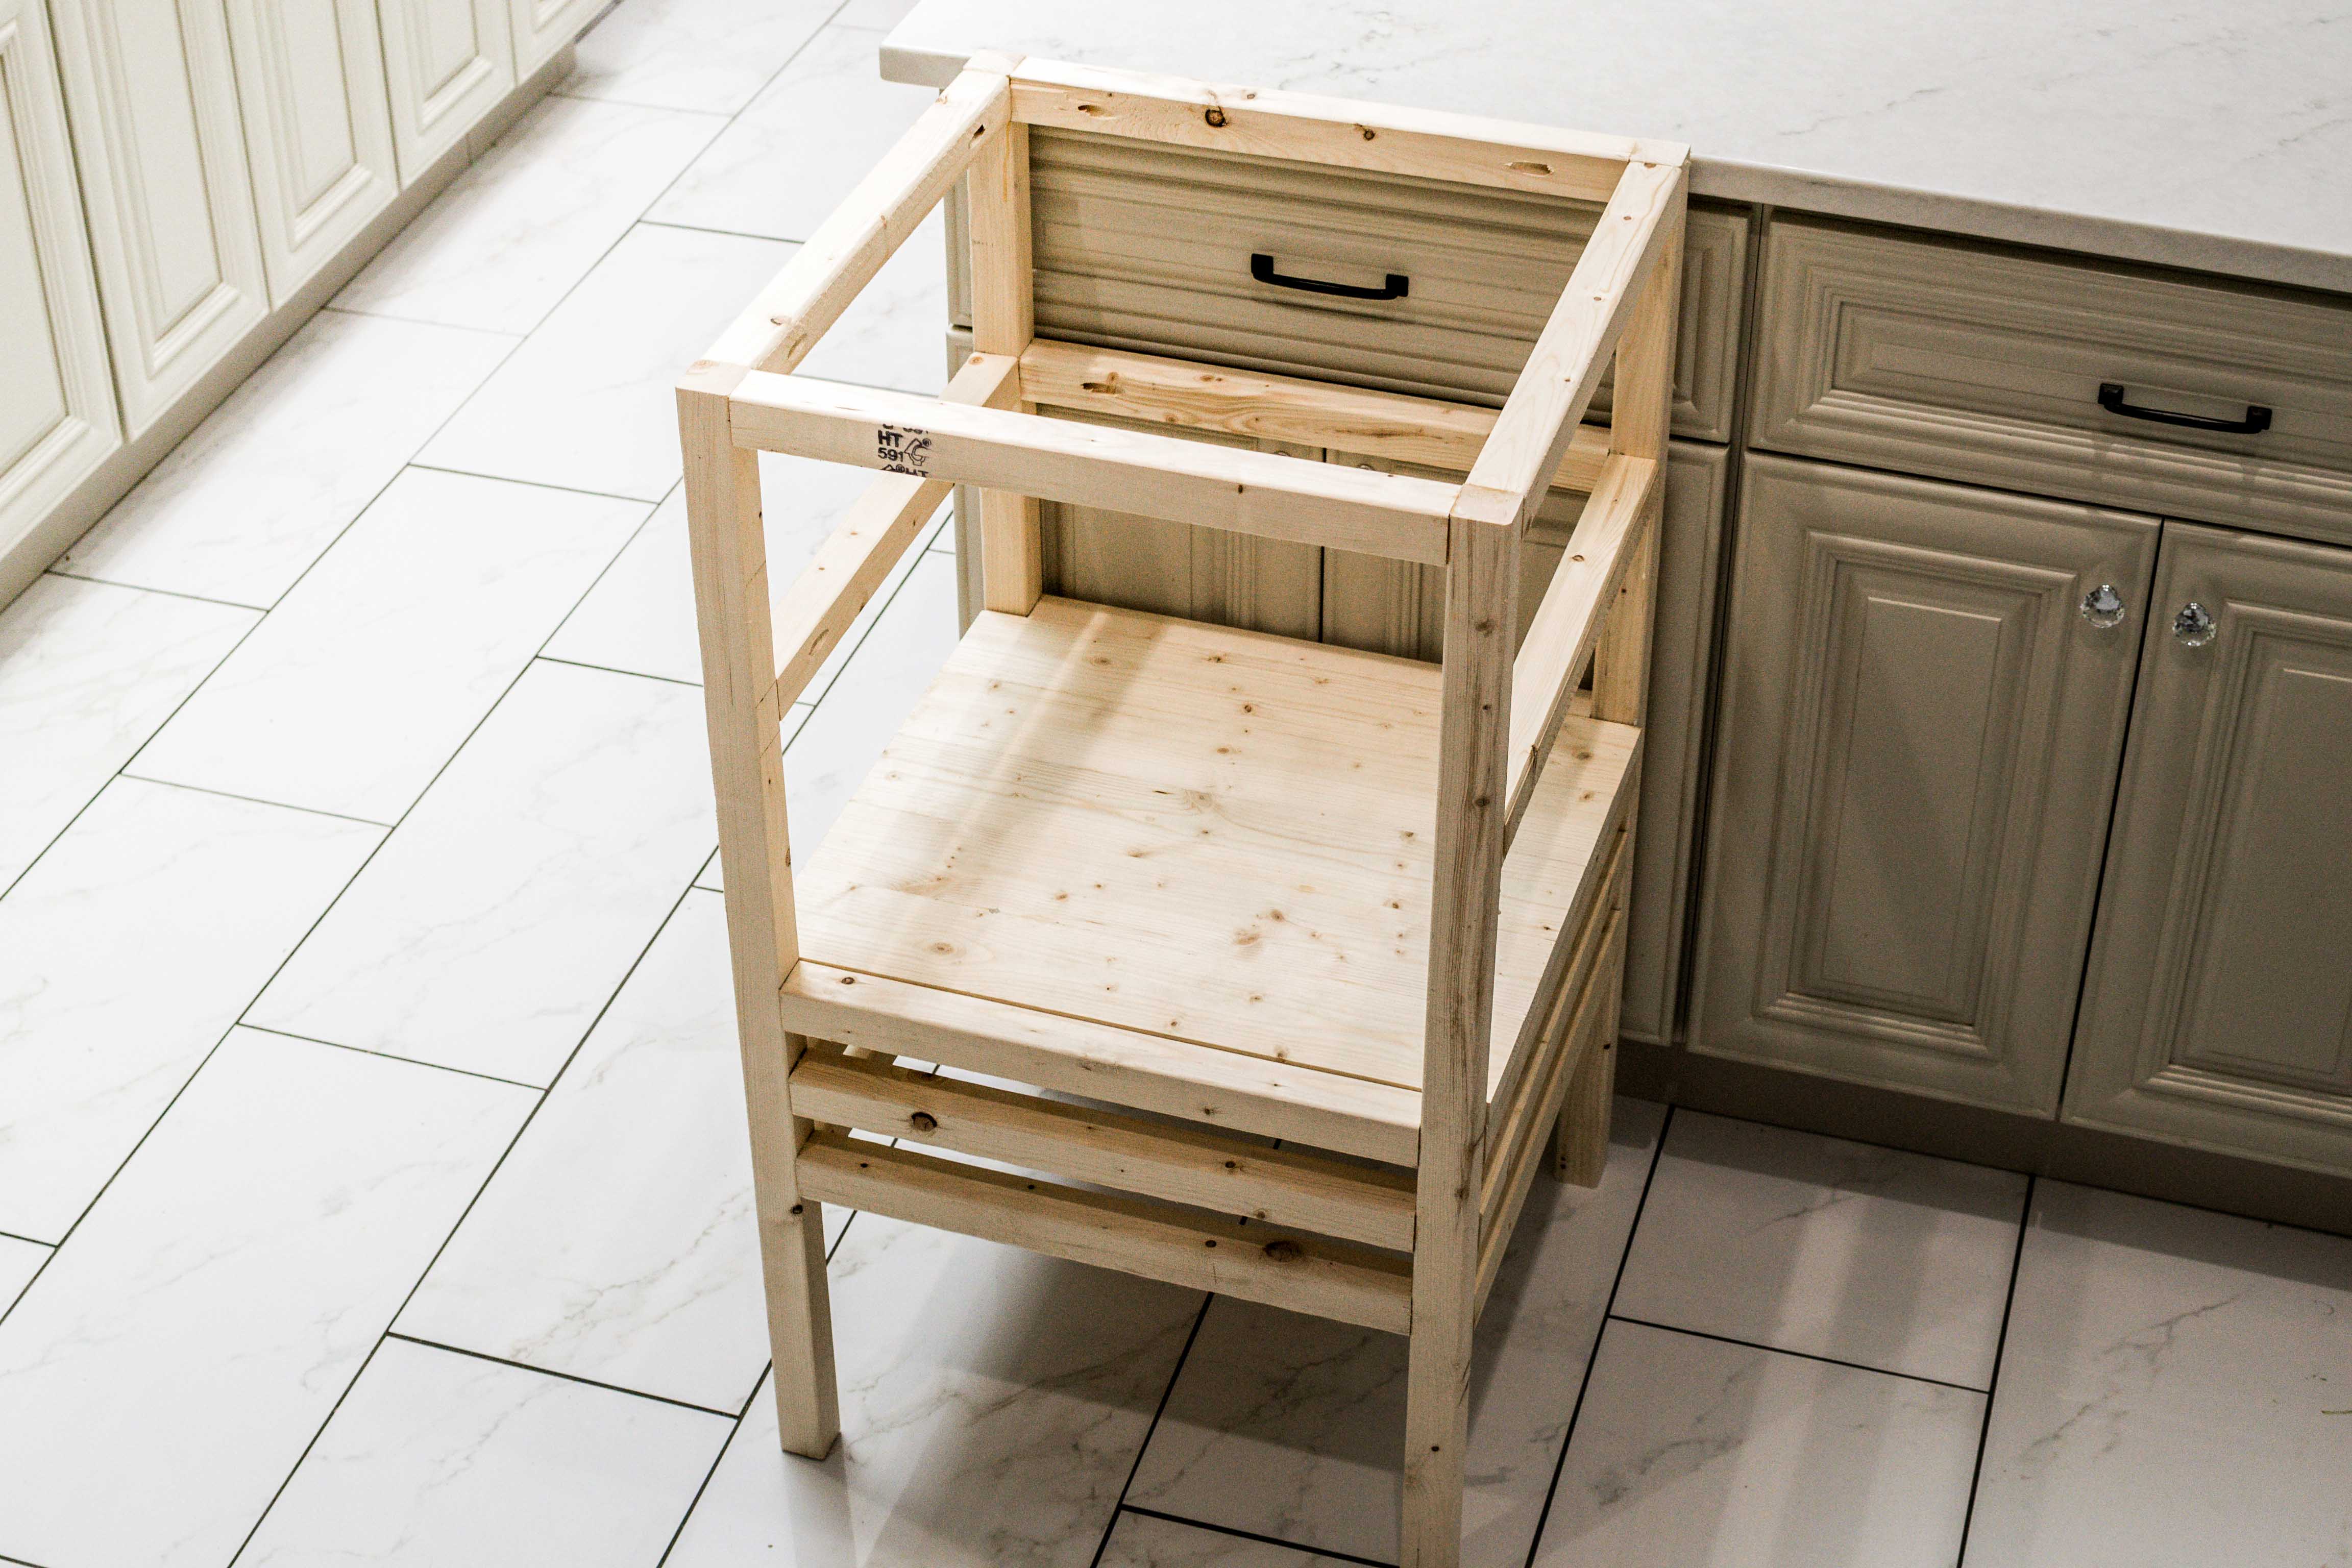


Just wanted to thank you for the project idea and instructions. I am almost finished with the first of 3! Just need to do some sanding and then prime and paint. I just got my first table saw and this seemed like a good project to break it in. I had quite a few 2x4s laying around and could find absolutely no straight furring strips so I just ripped them down the middle and it worked out great! I used some dowel plugs and wood putty on the pocket holes once I put the screws in because my littles tend to use screw holes like cheese graters and I think it will help with sanitation and clean up. Fun project and a great idea thank you!
Heck yeah, Dadx3! Glad to inspire. 3?? That’s impressive.
Great idea on ripping 2x4s. Table saws are equal parts game-changer + terrifying. I actually did a handful of scrap rips on mine too. Furring strips are the worst haha. If you pick through enough, you’ll find some straight ones though.
Good call on the plugs + putty. My issue right now is the durability of the clear coat on the adjustable board. I used like 3 coats of interior water-based poly and it’s getting wrecked. Time to up the ante with some exterior poly. On the other hand, I recently applied waterproofing-stain-and-sealer-paint to my farmhouse front porch and shutters and it’s phenomenal. One coat and the recent month long downpour caused zero damage. I might just use that stuff by itself and see what happens.
Happy building!
Are you just lifting your kiddo into this? Most I’ve seen have had steps.
Hi, Melissa! Definitely lifting our kiddo into it. Once he was two I started teaching him how to climb up on his own. But stairs are a great idea! We opted not to build stairs to take up less space in the kitchen. Now you have me thinking… could retractable stairs be a thing??
Looks like a great stool! I have a dumb question….How do you move the shelves to the lower levels? Thanks!
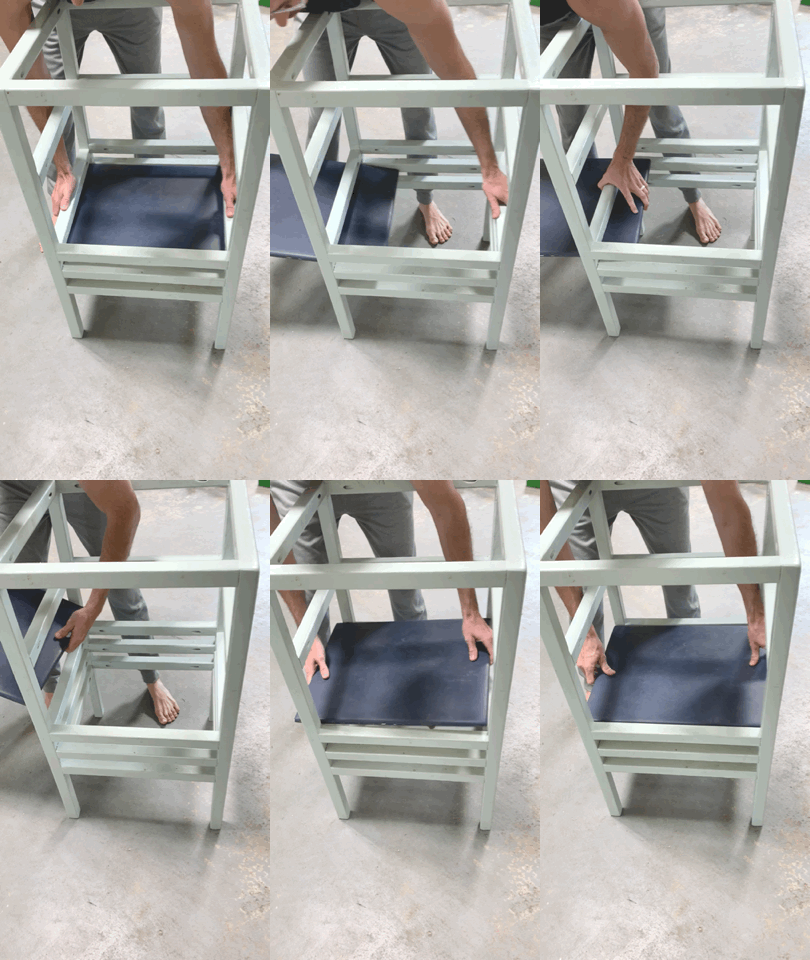
Thanks, Julie! Great question. If on top, it lifts right off. If in one of the 2 lower slots, I lift the platform 3/4 inch up and then move it horizontally through the gap between 2x2s. I made a GIF below. Plus I added it to the end of this blog post just above the comments section.
toddler stool platform level change GIF