Visual home marketing has a strong hold on your psyche. Don’t believe me? You cruise & peruse Restoration Hardware, West Elm and Z Gallerie showrooms (what is this thing you call a “mall”? Never heard of it). You jump on the computing device to glance at some digital eye candy via Wayfair, Overstock, Target, eventually landing on Pinterest for a few minutes max. None of the ethereal electronic exploration happens at work of course. Definitely not in traffic. Never once while laying in bed with the lights out for just a quick browse (oxymoronic).
Design dreaming
I guarantee you have 1 (or 17) different home design pieces dancing through your brain right now (specifically 0-1 for all my one-track-mind menfolk out there. 0 if testosterone caught you staring off into space). In you’re online (not) shopping, you scrolled past a rustic sliding barn door. And. Now. You. Need. One. We’ll discuss needs versus wants in our next segment (no we won’t). Nevermind that you’re not a farmer and don’t have a barn (neither do we…yet…). Doors on hinges are overrated anyway. And you probably won’t daydream about barn doors sporadically throughout your productive day after reading this.
The gorgeous other options
So you’ve decided you “need” one, but how much does a sliding barn door cost? Here’s a solid alder wood sliding barn door on Houzz for $929 (well, poop). Or a Pottery Barn solid stained pine barn door starting at $1,578 (stupid). How about Depot’s Rustica Reclaimed White Wood Barn Door with Arrow Sliding Door Hardware Kit for over $1,100. Well, they do carry a non-budget-blaster Iron Age Gray Barn Door with Rustic Hardware Kit for $399. Even better, a solid raw pine barn door for $199.99 (hardware NOT included, and you still have to paint / stain / finish it yourself).
Our favorite option
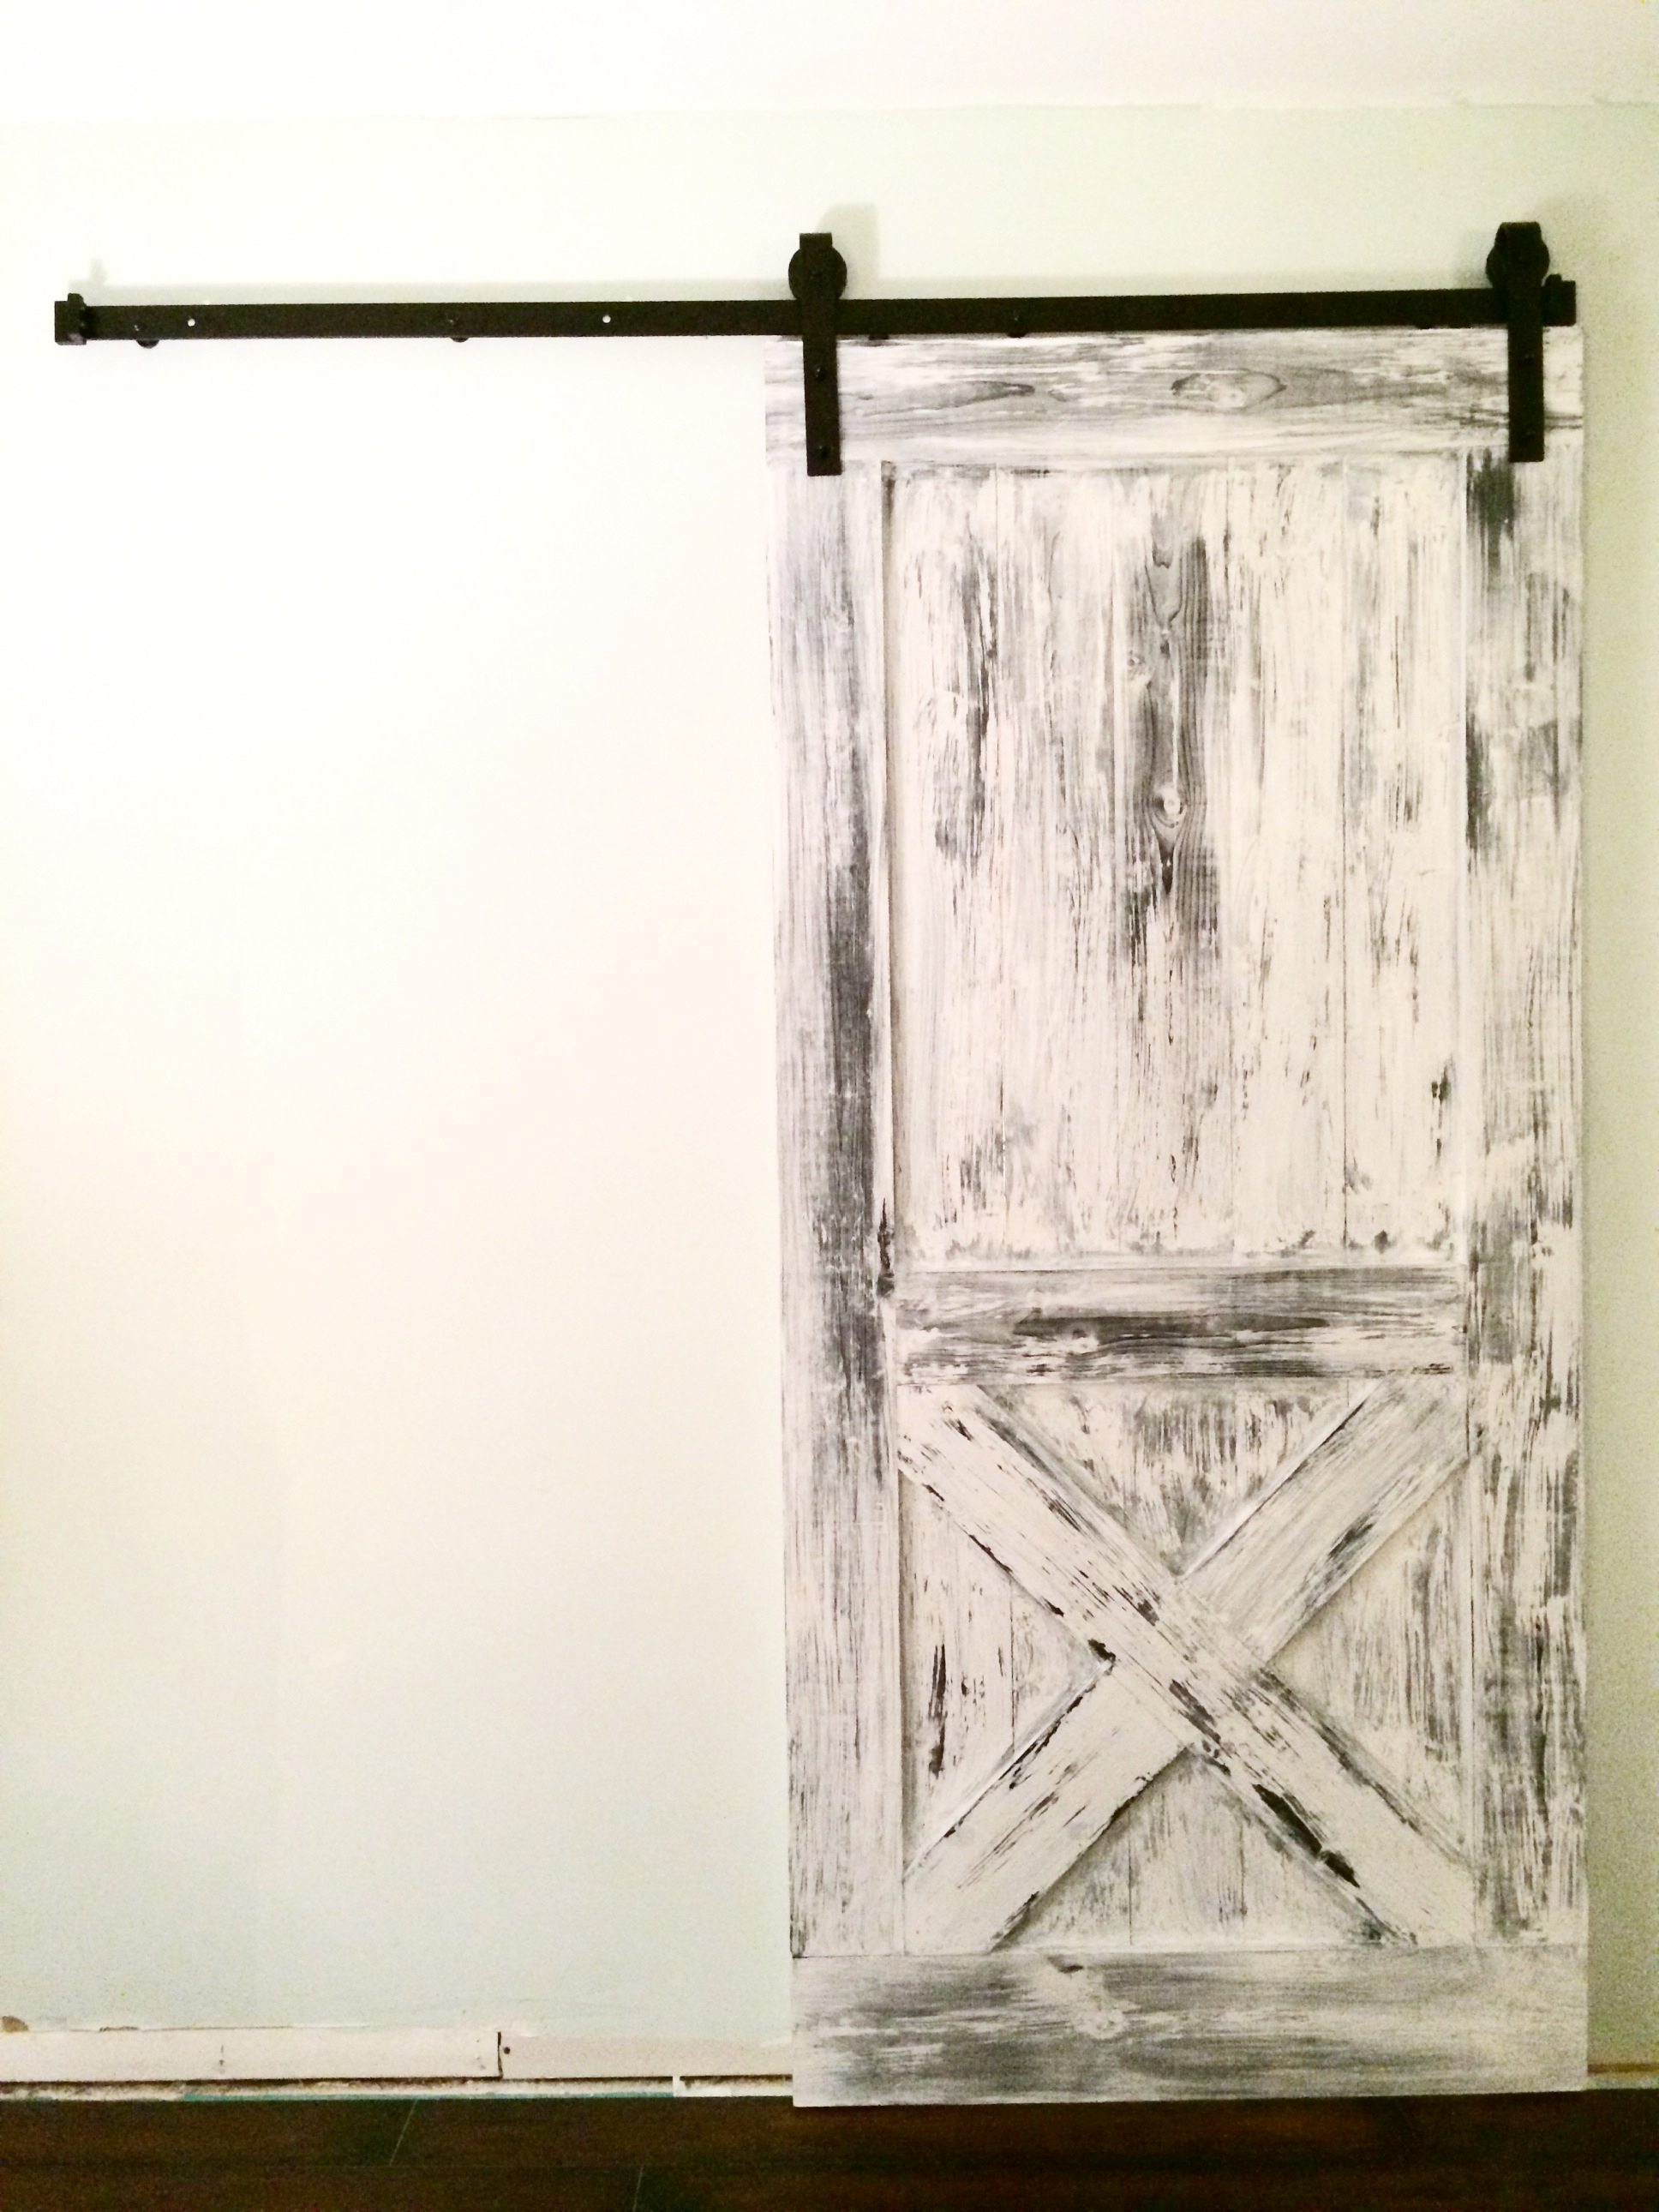
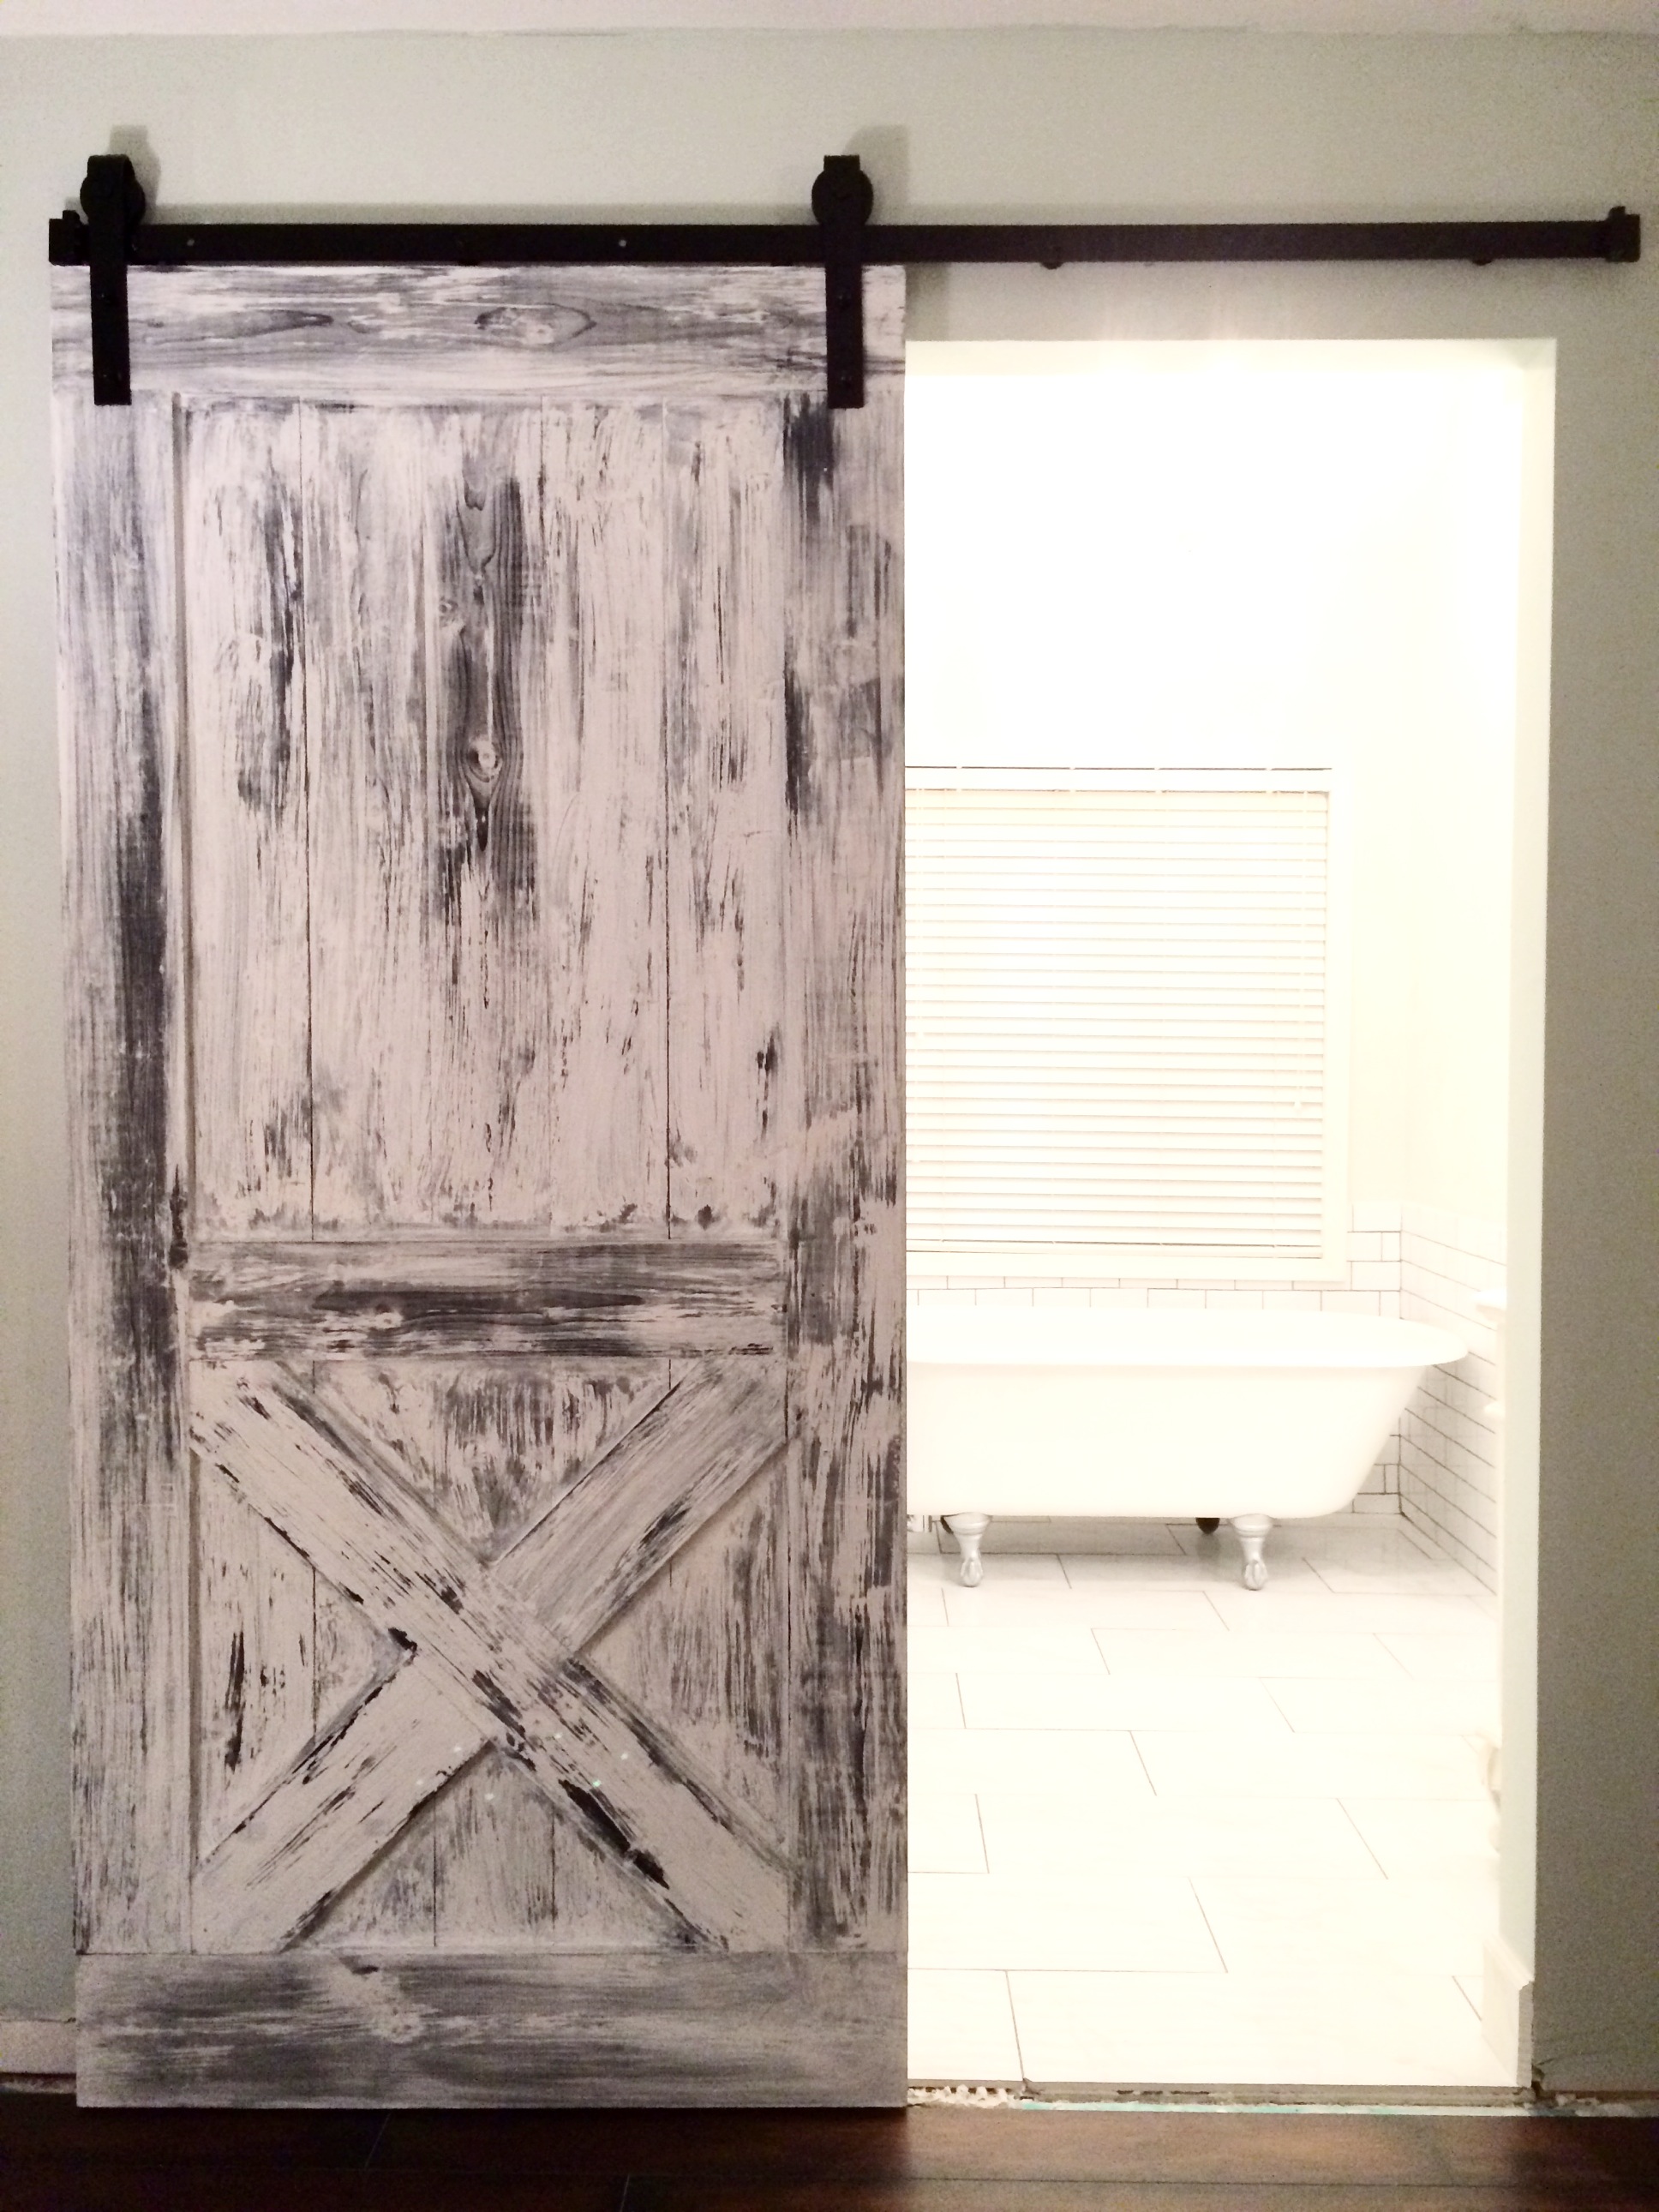
Our custom-built solid pine barn door cost < $150 for building & finishing materials, and another ~$100 for the 72″ black barn door hardware set at Depot. ~$250 all-in for the exact style & finish you’re hoping for. If you’re a DIY regular, you probably already have $50 worth of goodies in your shed.
Sell that hunk o’ burning thereof at Pottery Barn and you just pocketed over a thousand bones. Artisan home-based woodworking shop in your future? Enough motivating. Let’s get down to business (to defeat the home hardware Huns?). Here’s what you need.
Materials
- (11) 1x6x8 boards at $8.07 a piece.
- (1) 1x8x8 board – for the footer. $11.19 a piece.
- 1.25″ bugle head, star drive deck screws. ~184 for $9.37.
- Quart of stain of your choice (Varathane Kona Wood Stain in our case. This is a 2-pack for $15.54). Single can is $8.48. This stain is dark. Real dark. We chose it specifically because we like the look of it with the whitewash on top.
- White-ish paint for whitewashing. Dilute to 50% water & 50% paint.
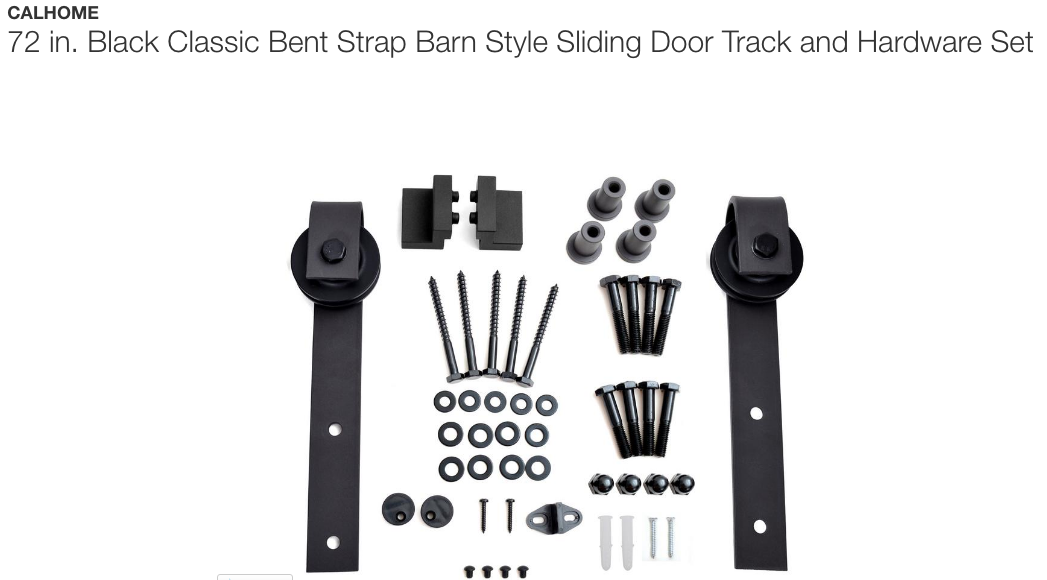
- Hardware kit for $102.56 – to hang the sliding door.
- Barn door handle. Whatever style you dig. We found an antique one at a local shop.
- Blue shop towels for staining. Roll for $6.57. We always keep these on hand. Low lint for low residue. (Cheaper at Depot).
- Nitrile gloves for staining if you don’t want stain on your hand for the next week. $16.88 for a 150-pack.
- (Optional) if you choose to make a thicker door than 1.5″ (this plan), you’ll need to install a “wall mount” board behind the hardware on the wall. Otherwise your door will likely scrape the wall as it slides. This requires an extra 1x4x6, painted black to match your hardware.
Tools
- Miter saw or circular saw. (My fave: Dewalt 12″ double-bevel sliding miter. Best for the price: Ryobi 10″ sliding miter).
- Impact driver (or standard cordless drill). Avoids pre-drilling and prevents screw head stripping with insane amounts of pulsating torque. Here’s the Rigid drill/driver kit I love.
- Orbital sander (optional, for softer edges and smoother feel). Don’t waste your money on the cheaper sanders. We did and regretted it. Give me POWER. (Plus it’s not even that expensive.)
- Socket wrench kit – lag screws for roller track. I linked a cost-effective Husky brand option here – I don’t think I’ve ever had anything Husky break.
- Paint brush.
- Pencil.
- Tape measure. (Mini-version for ease of use, 12 ft max length. Up to a 26+ ft measuring tape to for rooms, framing, joists, etc.)
- Level. 12” length is a great start for shorter projects. It’s magnetic to attach to your sliding hardware for a hands-free approach.
- Stud finder (not your spouse, Mr. DadBod. Don’t be a tool).
Budget
- $141.26 for all materials (not including the hardware kit).
- $102.56 for the hardware kit.
- Total = $243.82
- Get hype on money savings.
Our demo before building the barn door
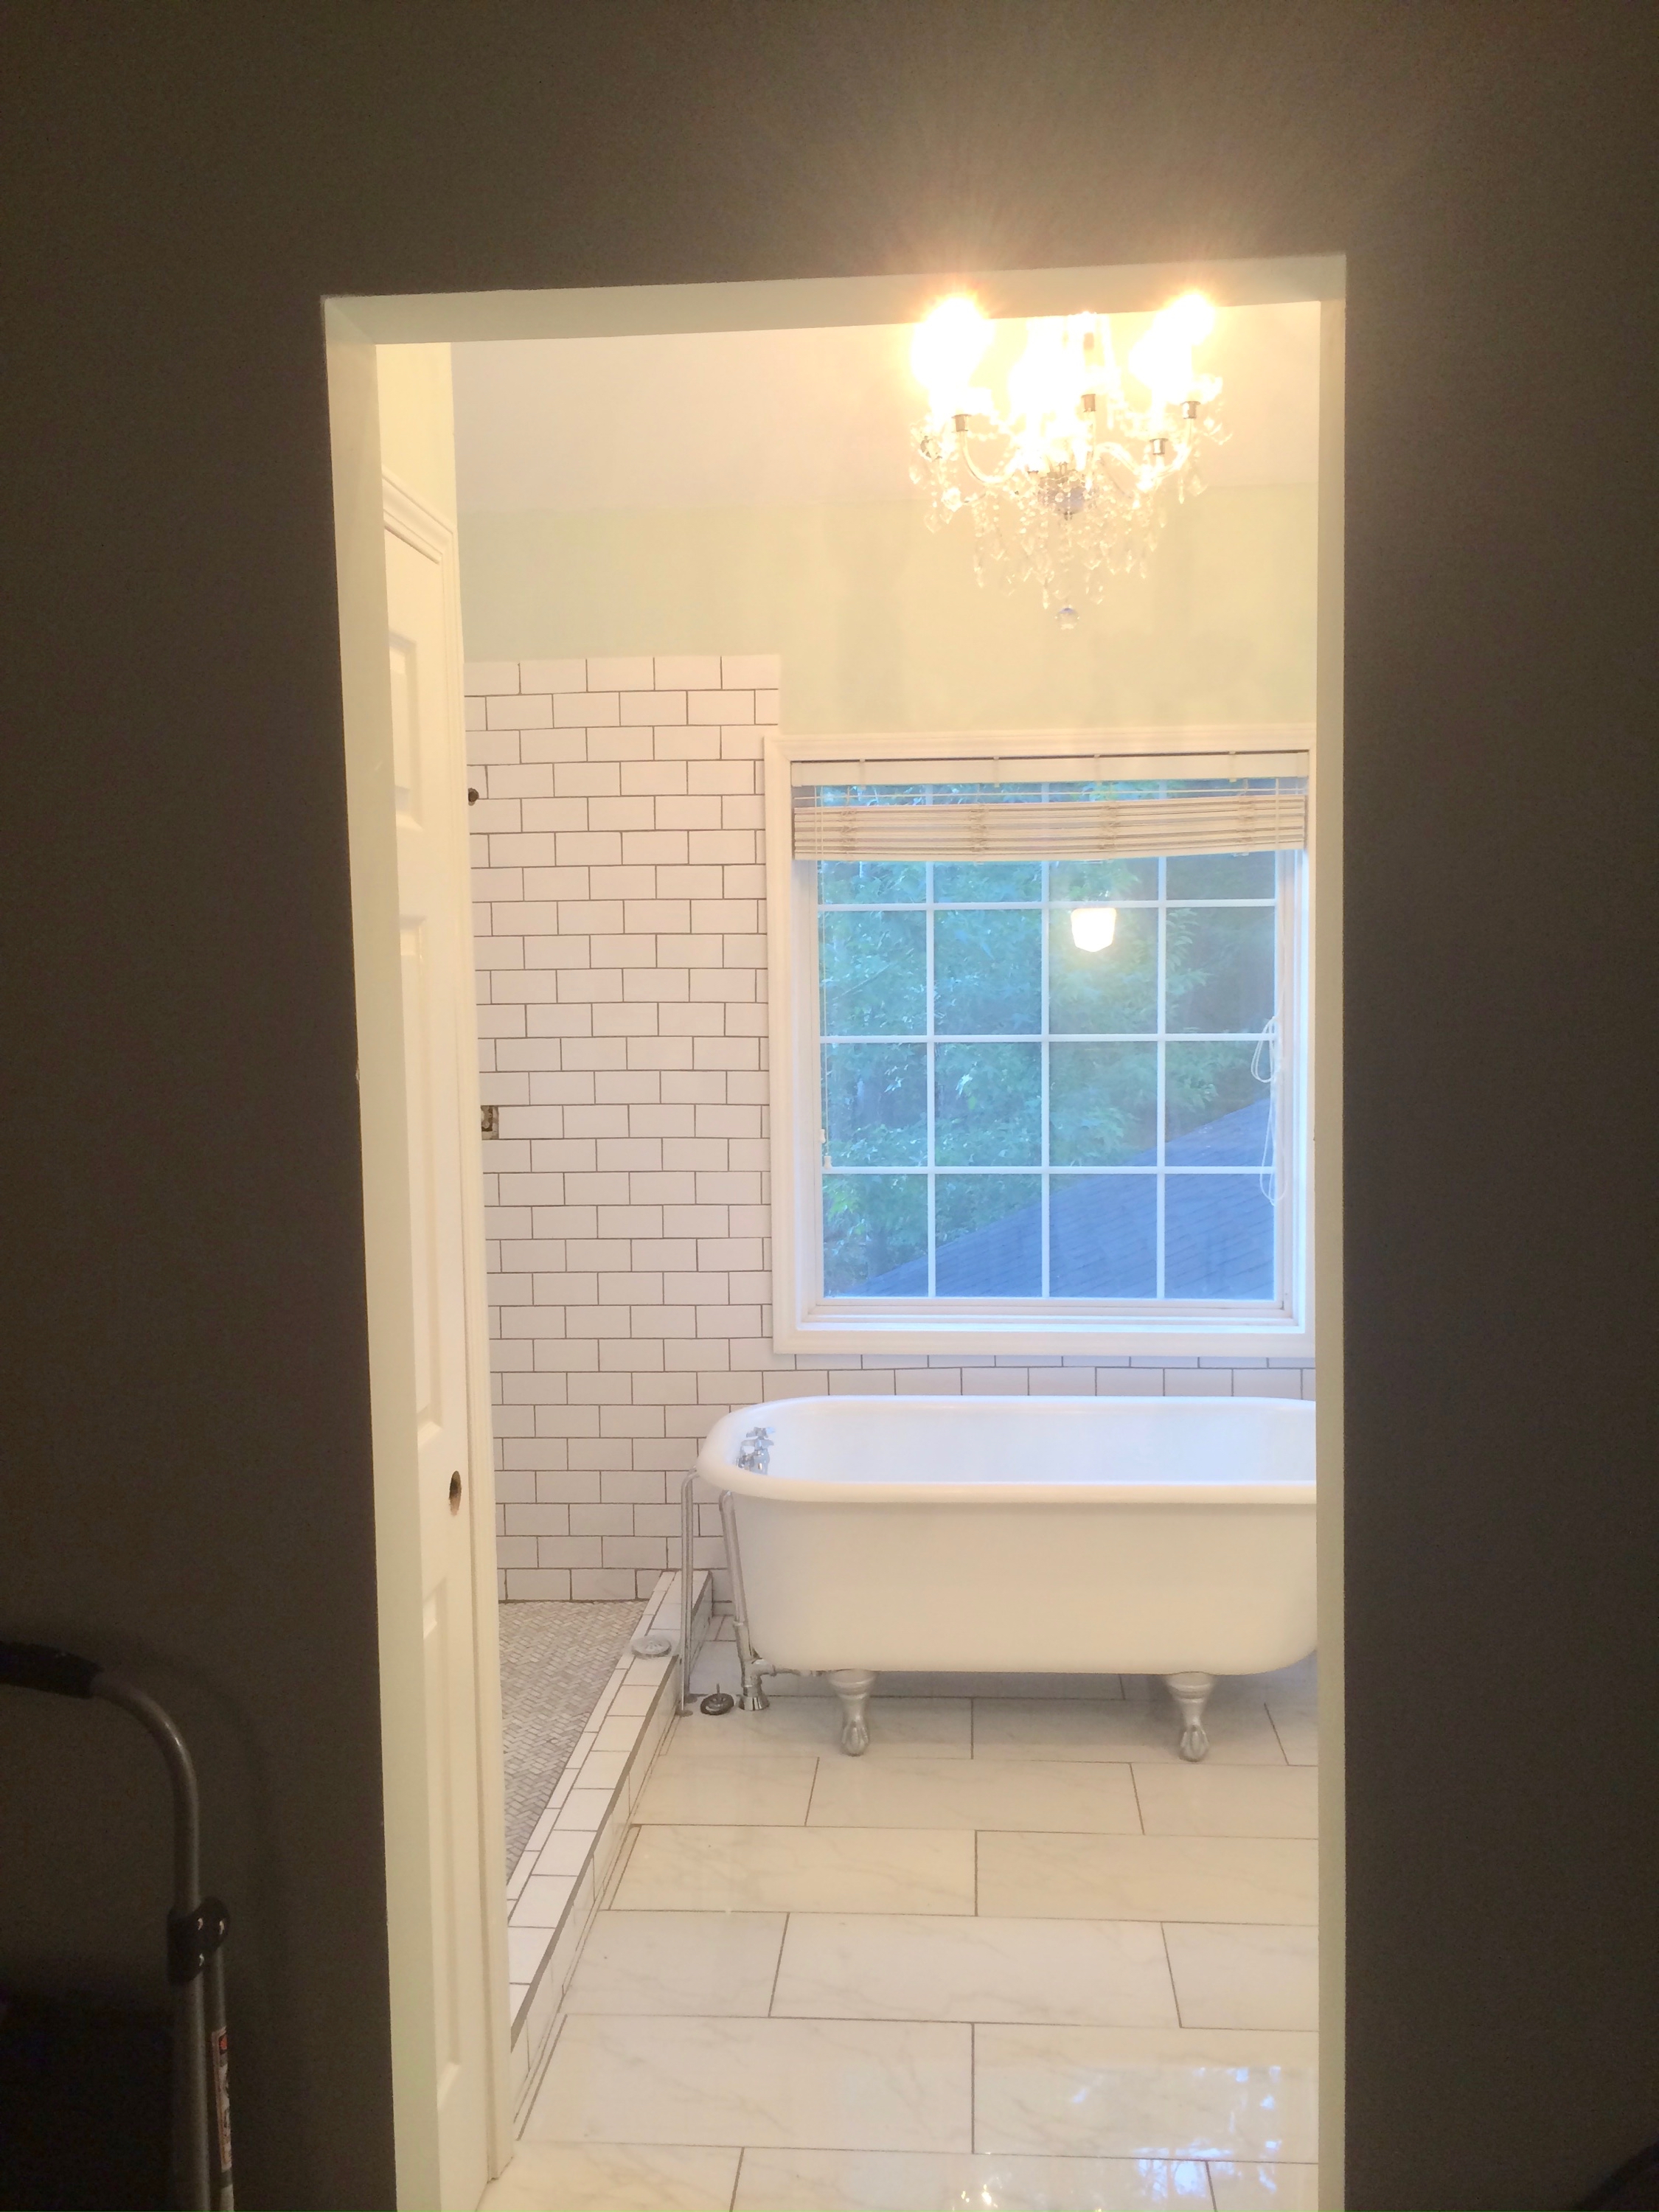
Before we dive into building and installing a sliding barn door, check out our demo and rebuild process! We moved the doorway over to make room for a longer vanity in the master bathroom. Along with a full blown bath reno. More to come on the clawfoot tub, quadruple-sized shower, larger linen closet, heated floors, marble topped vanity, and tile everywhere.
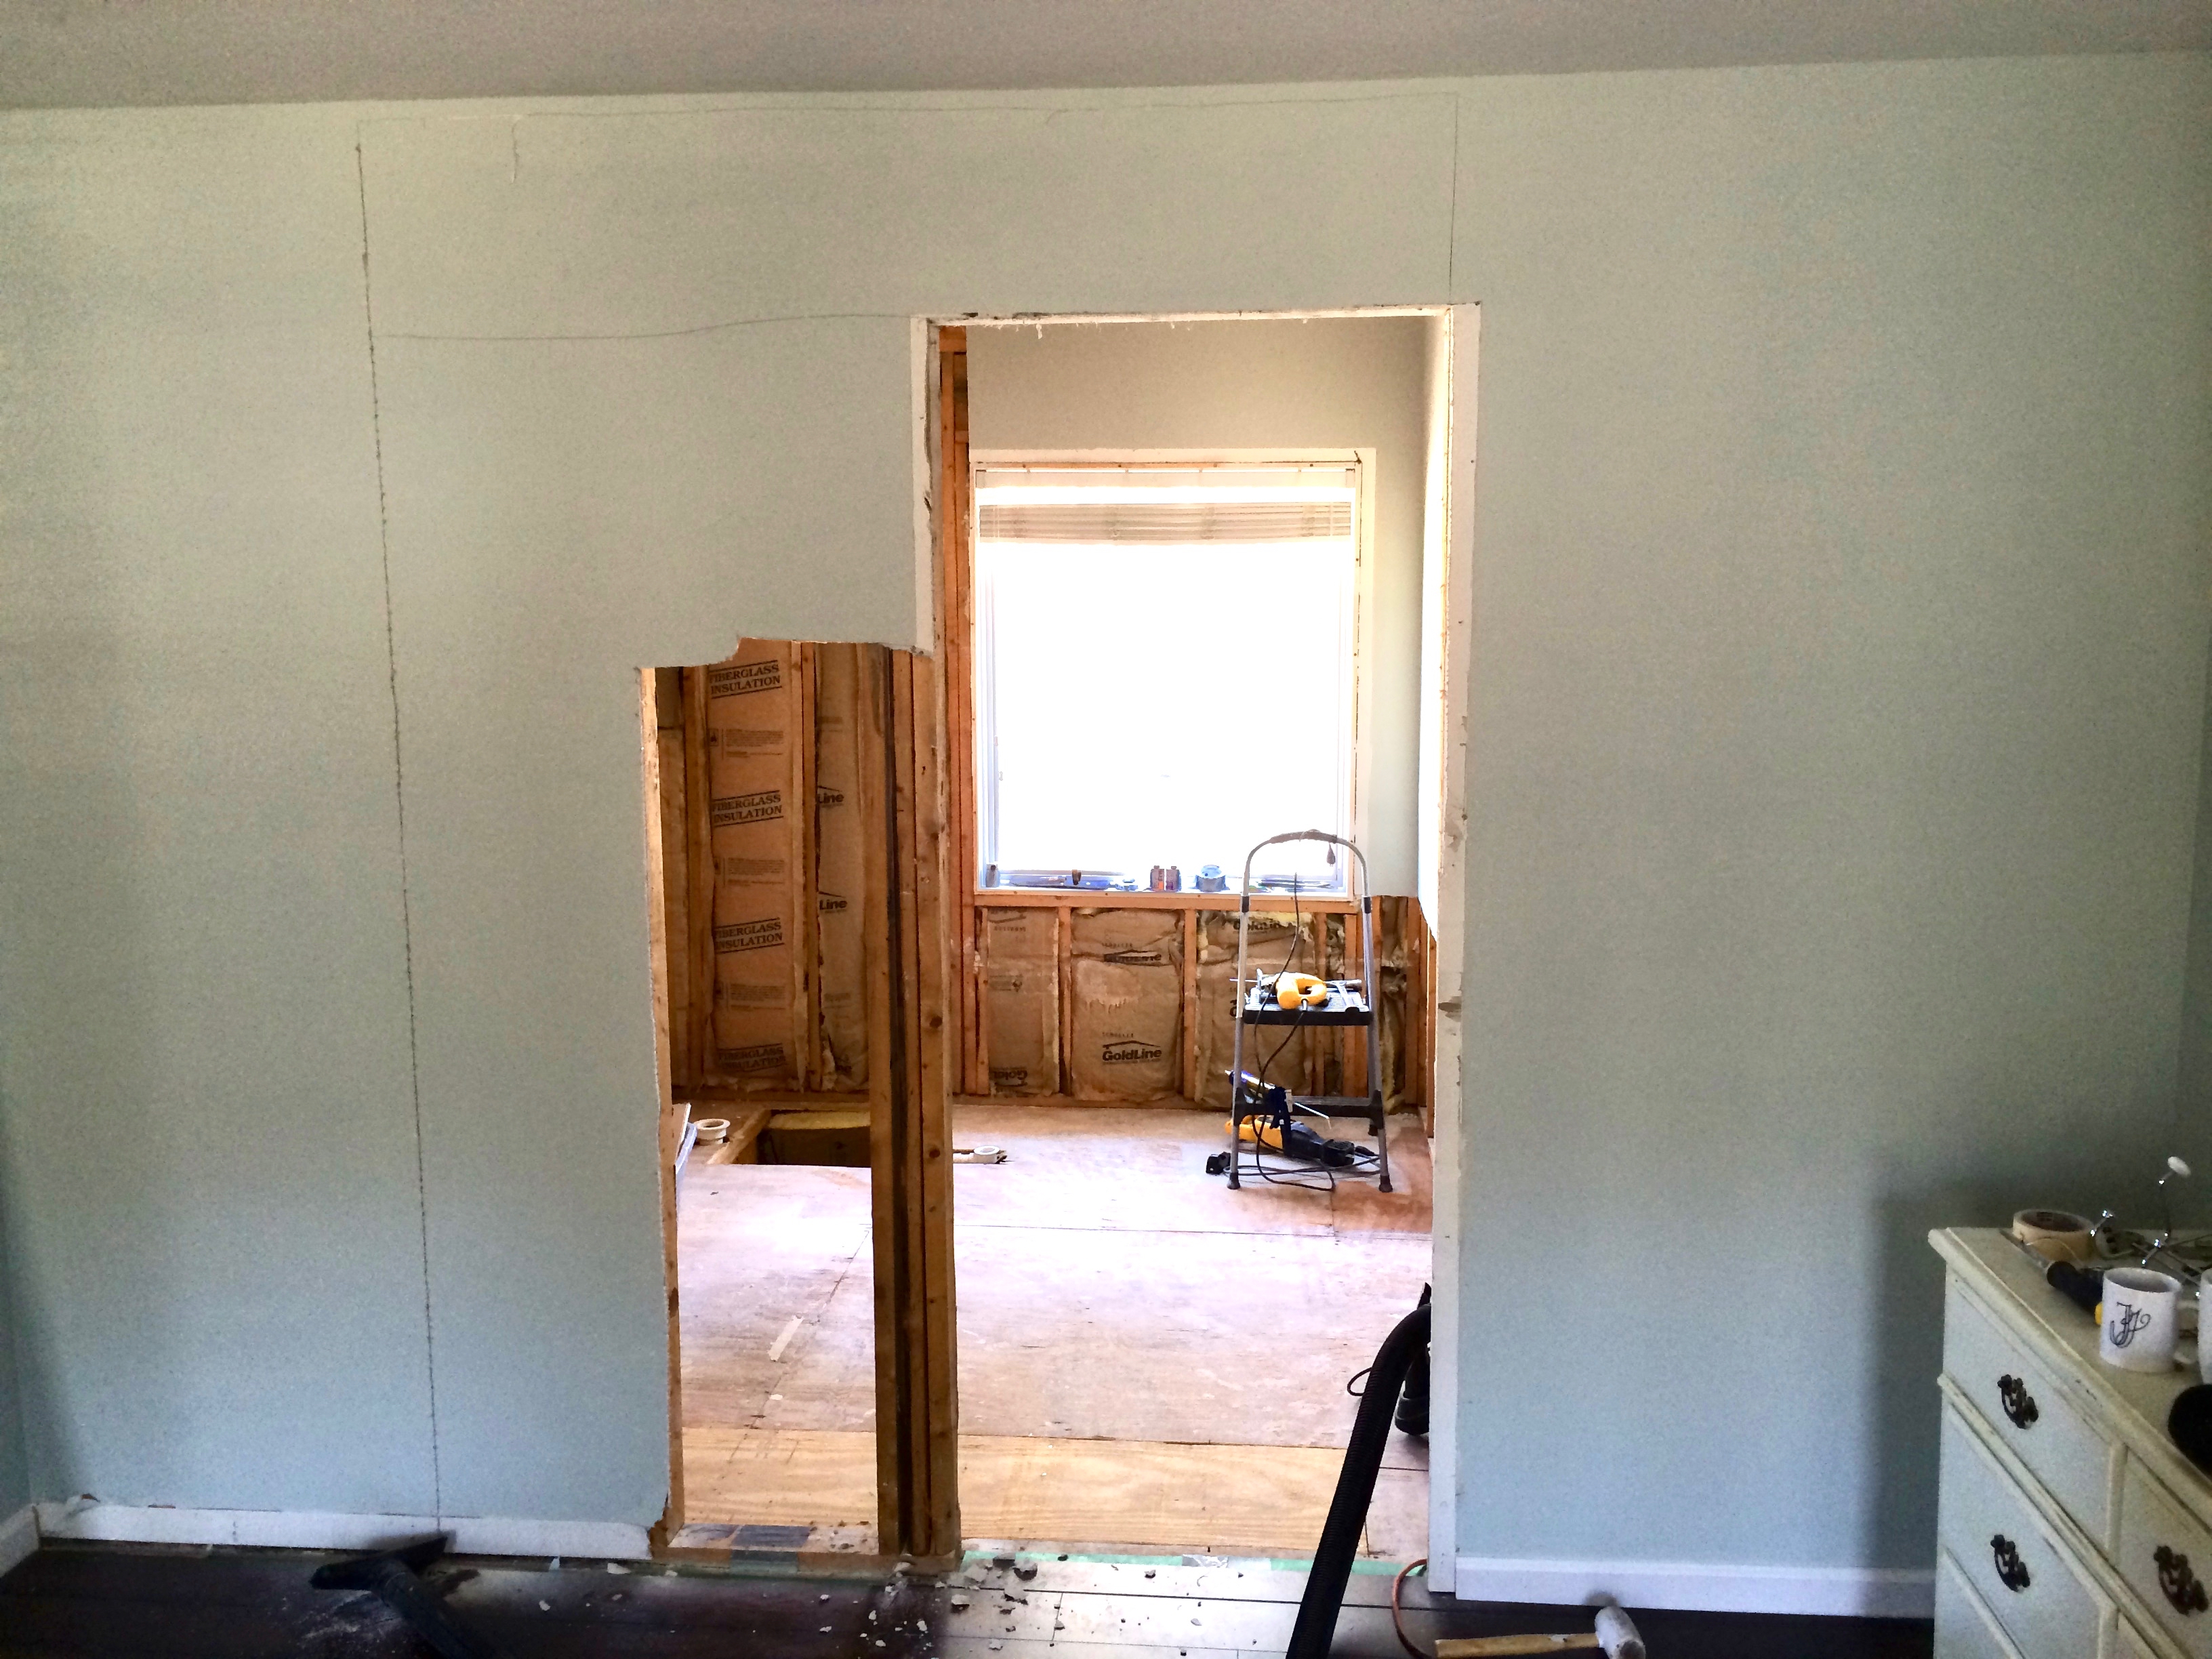
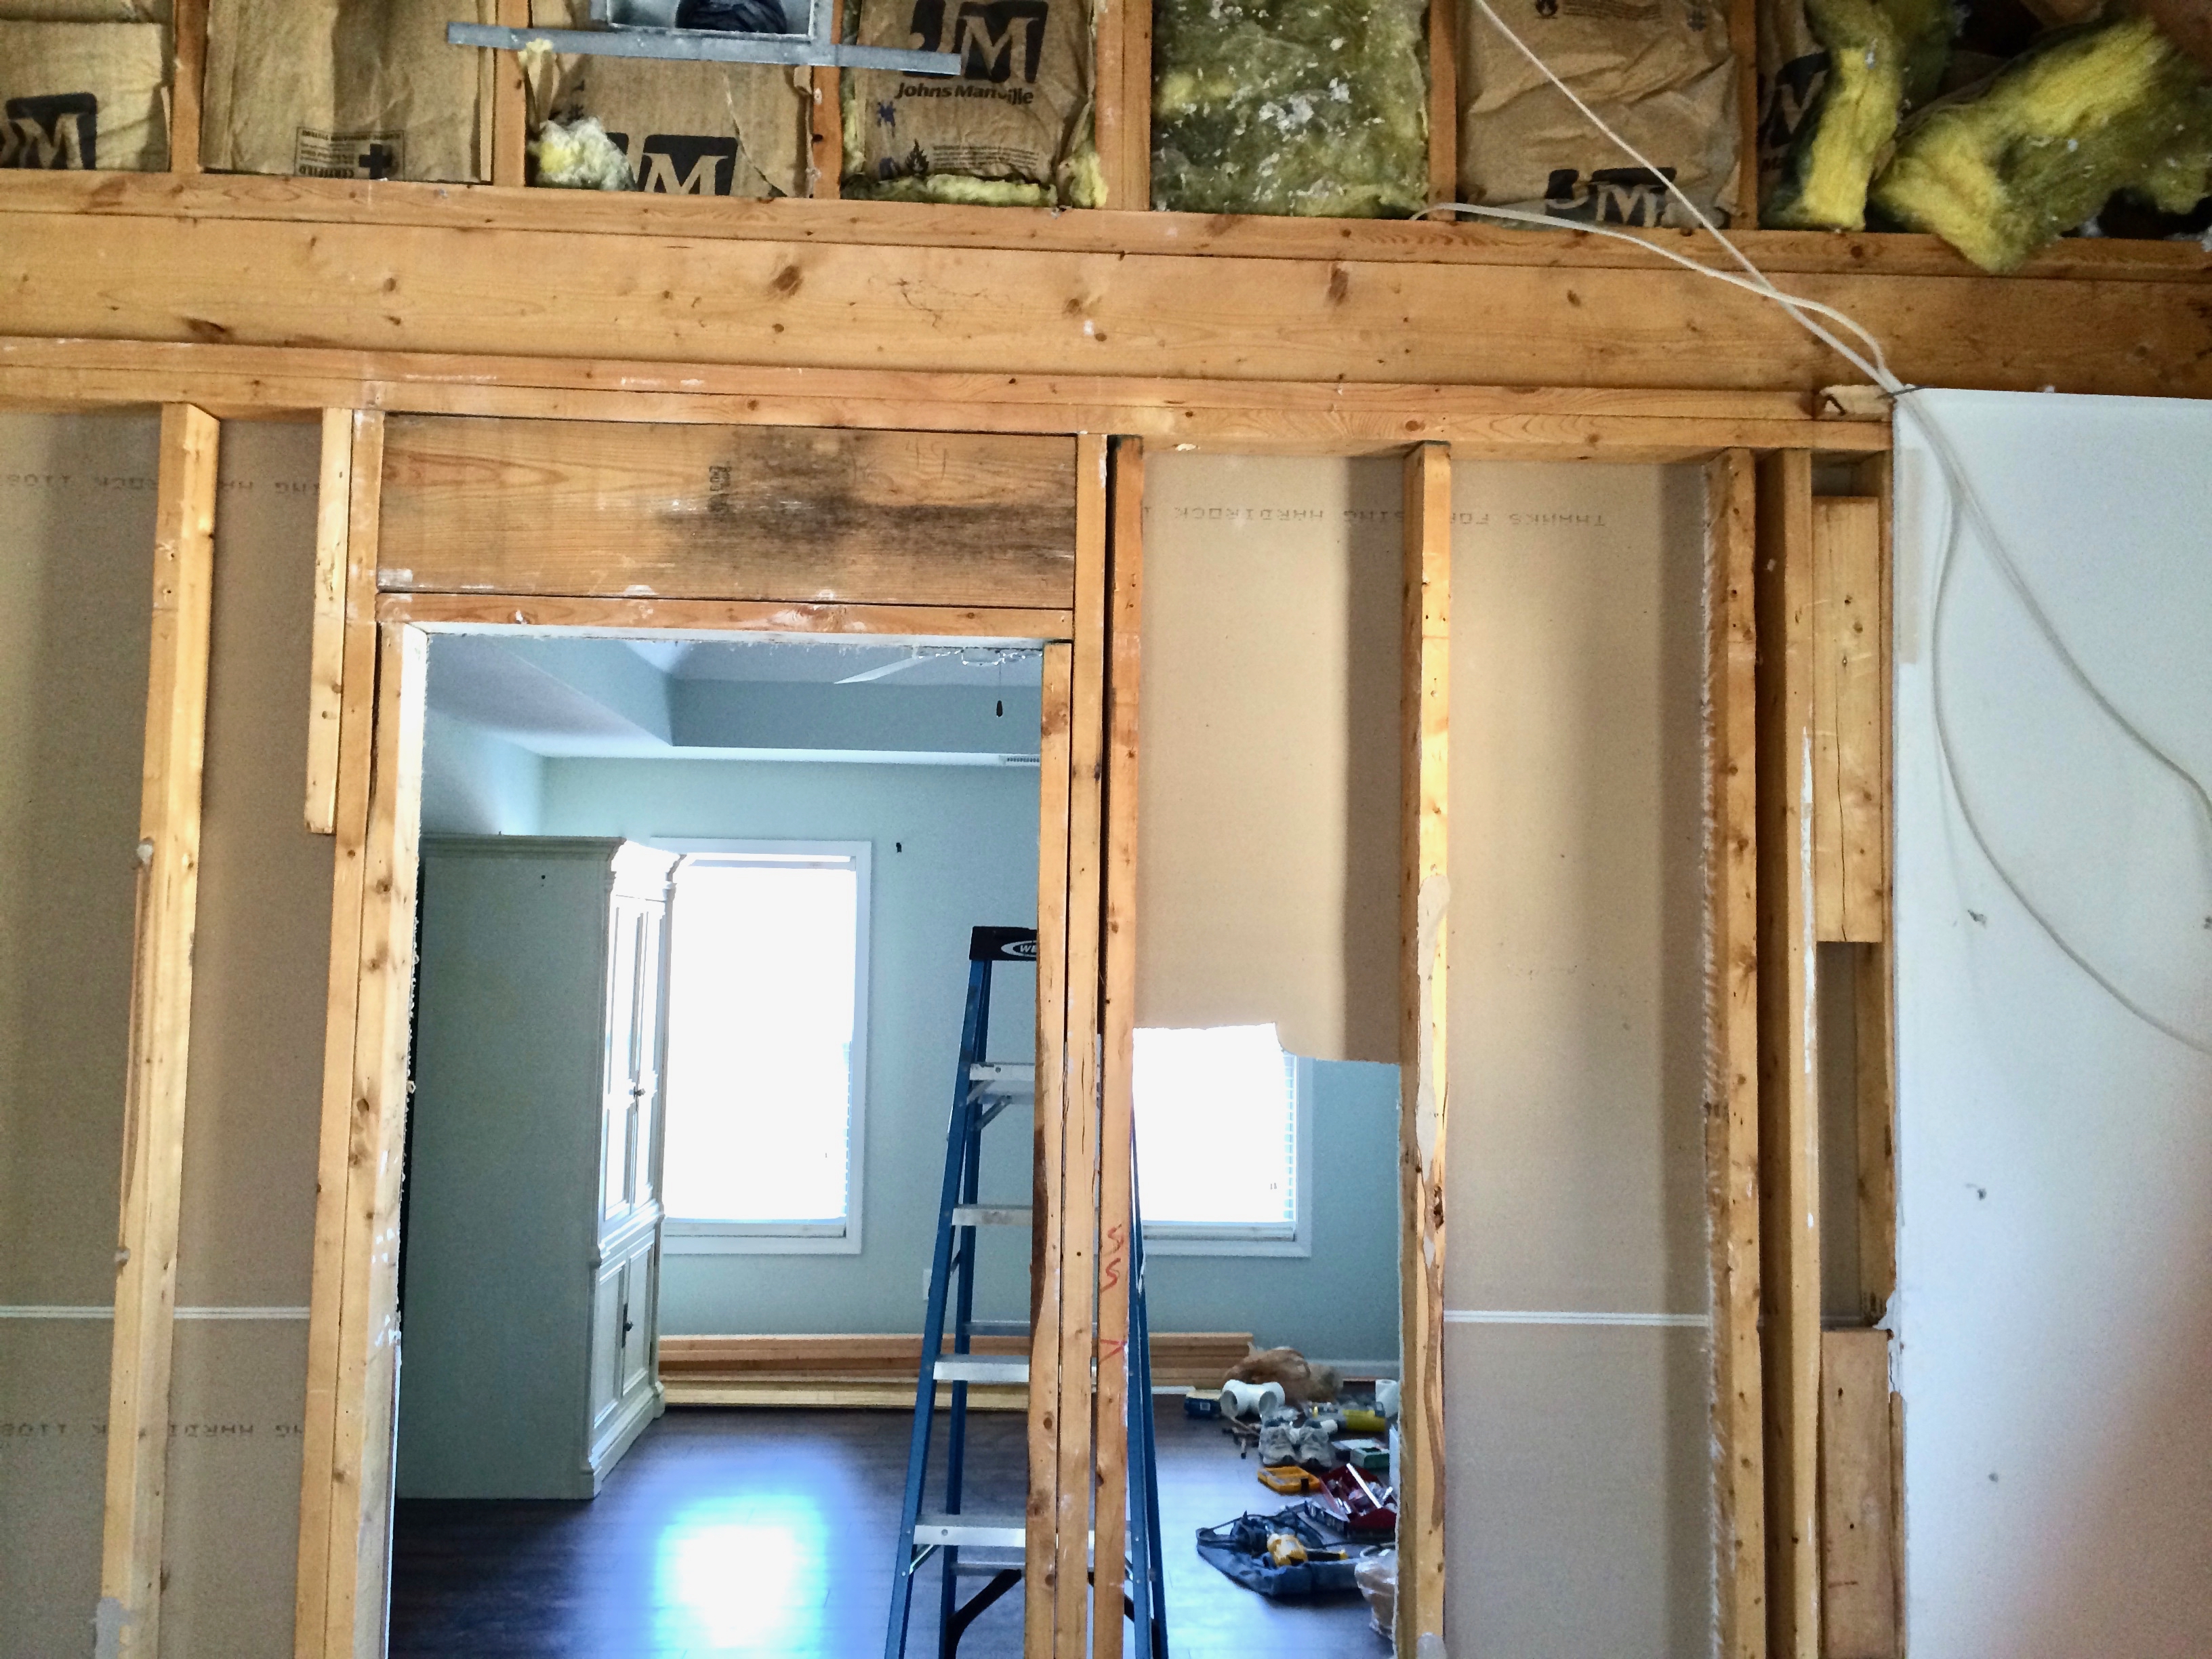
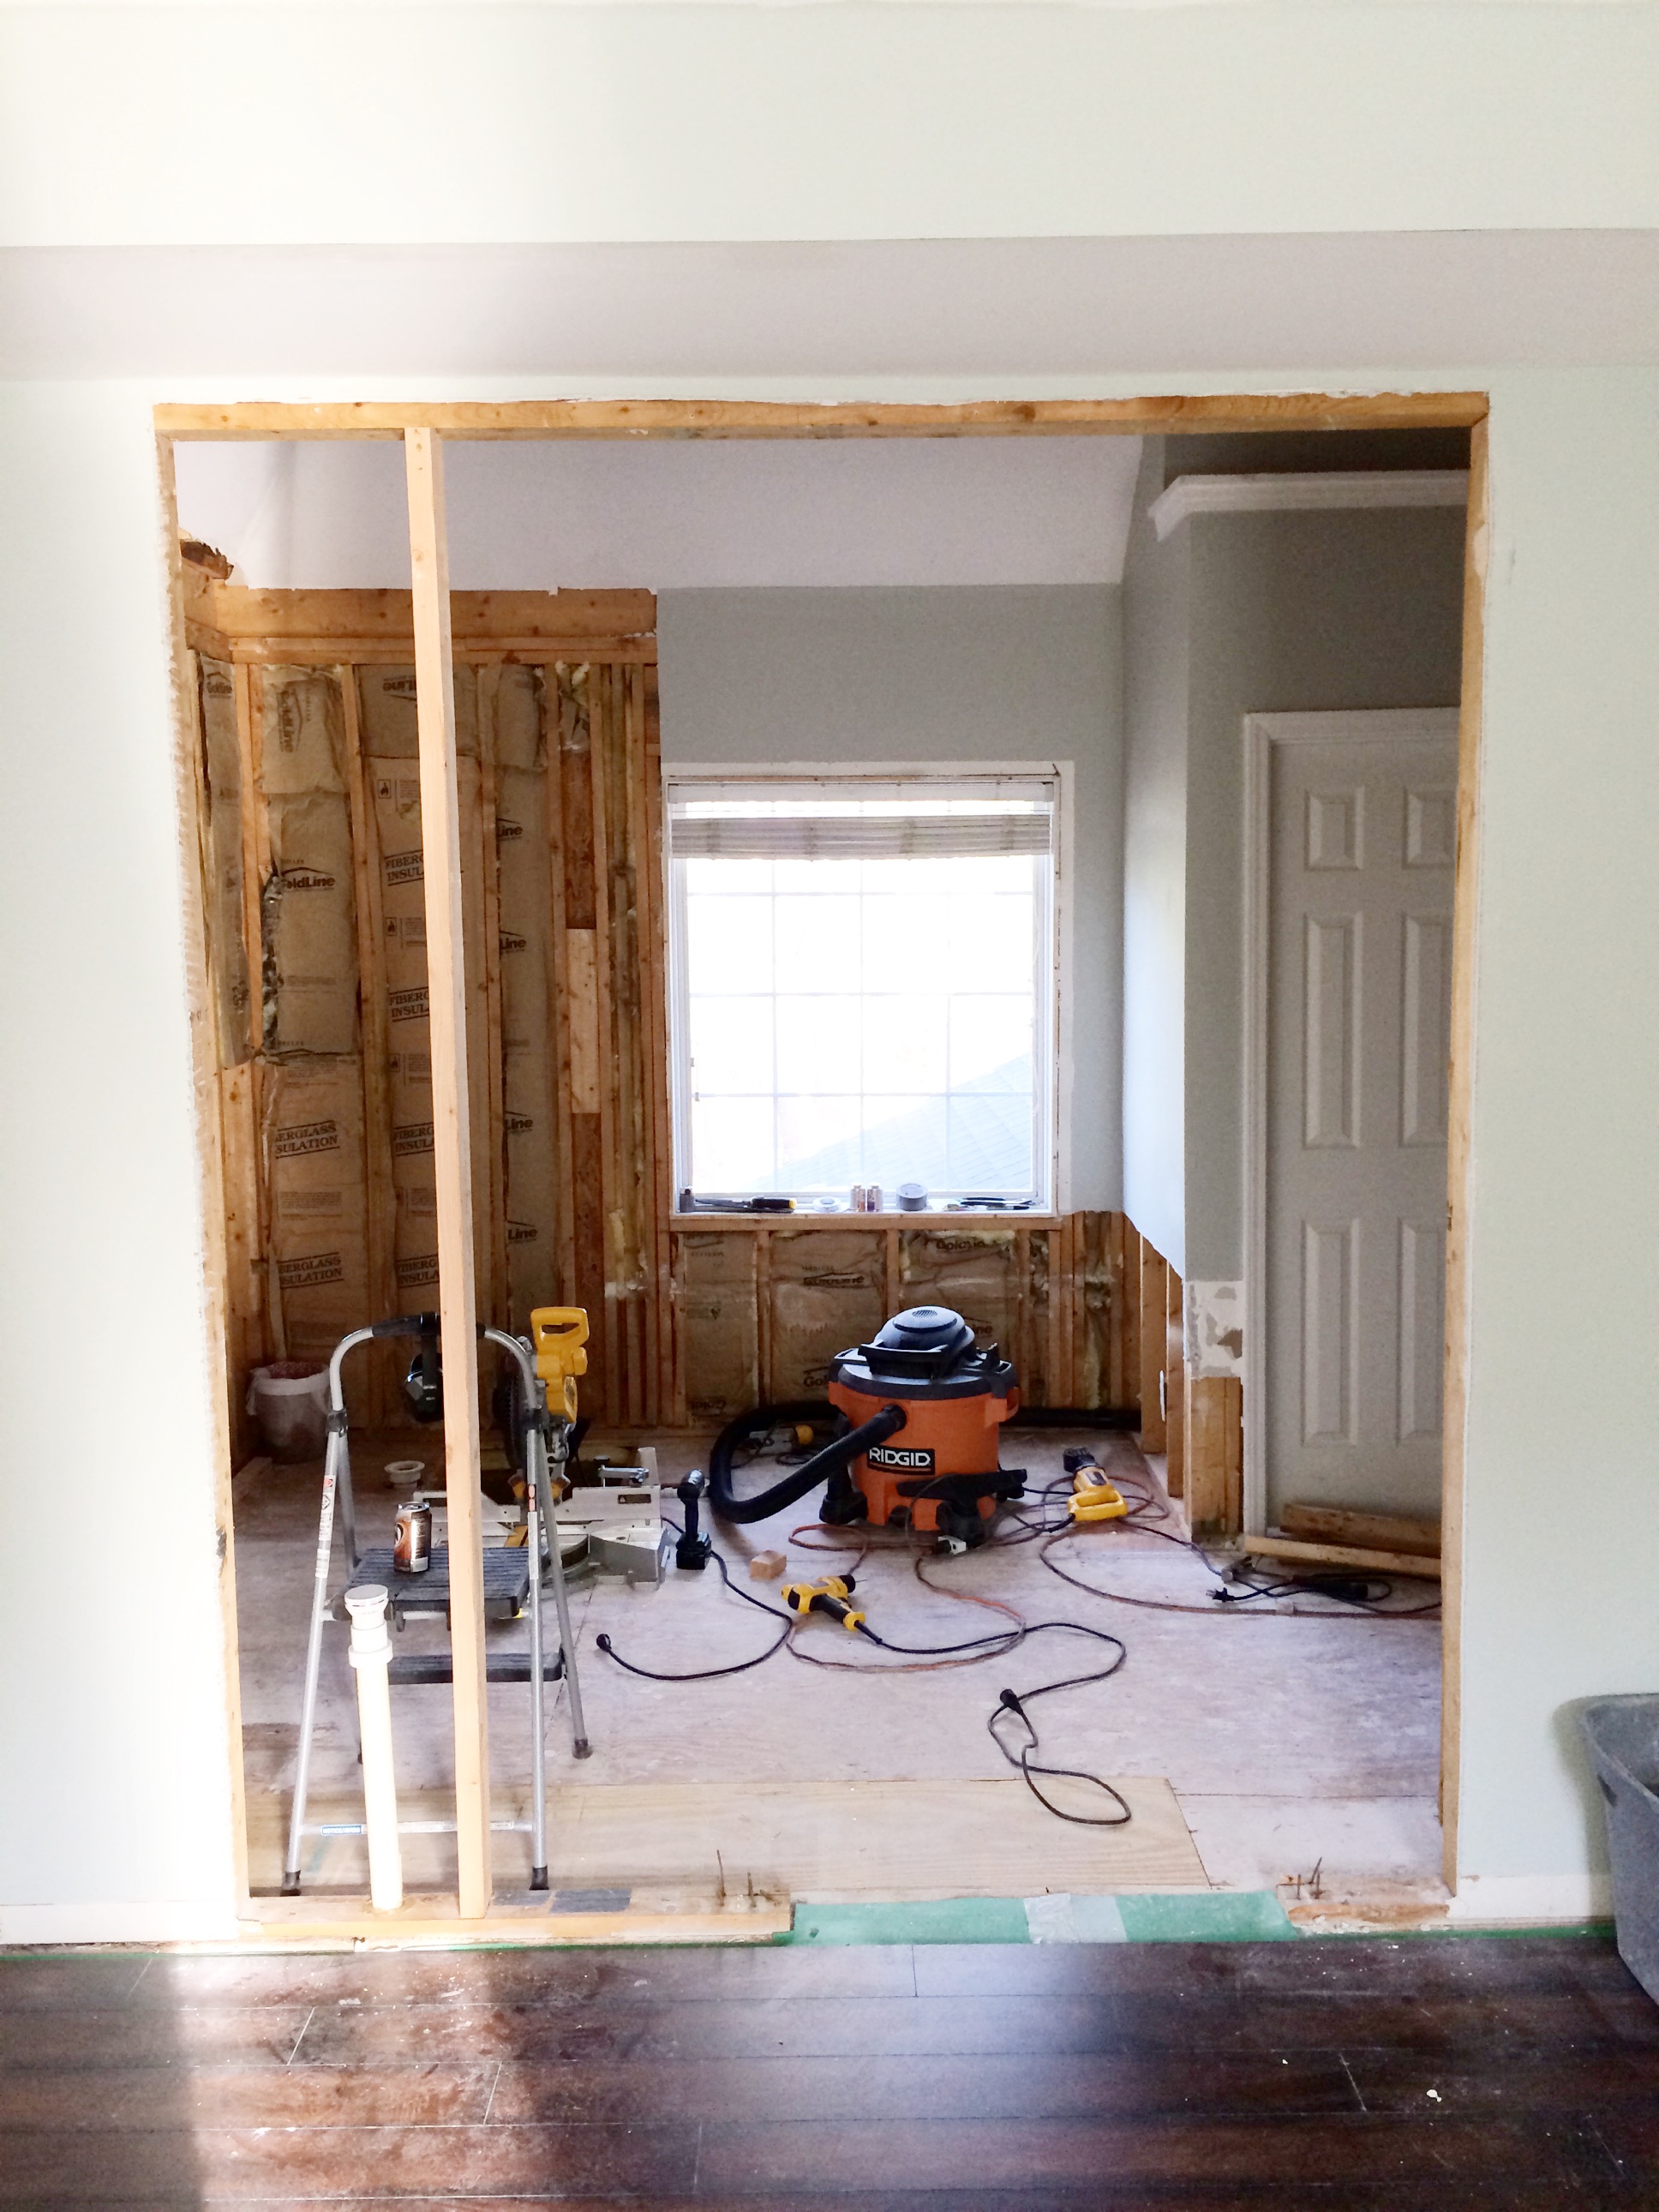
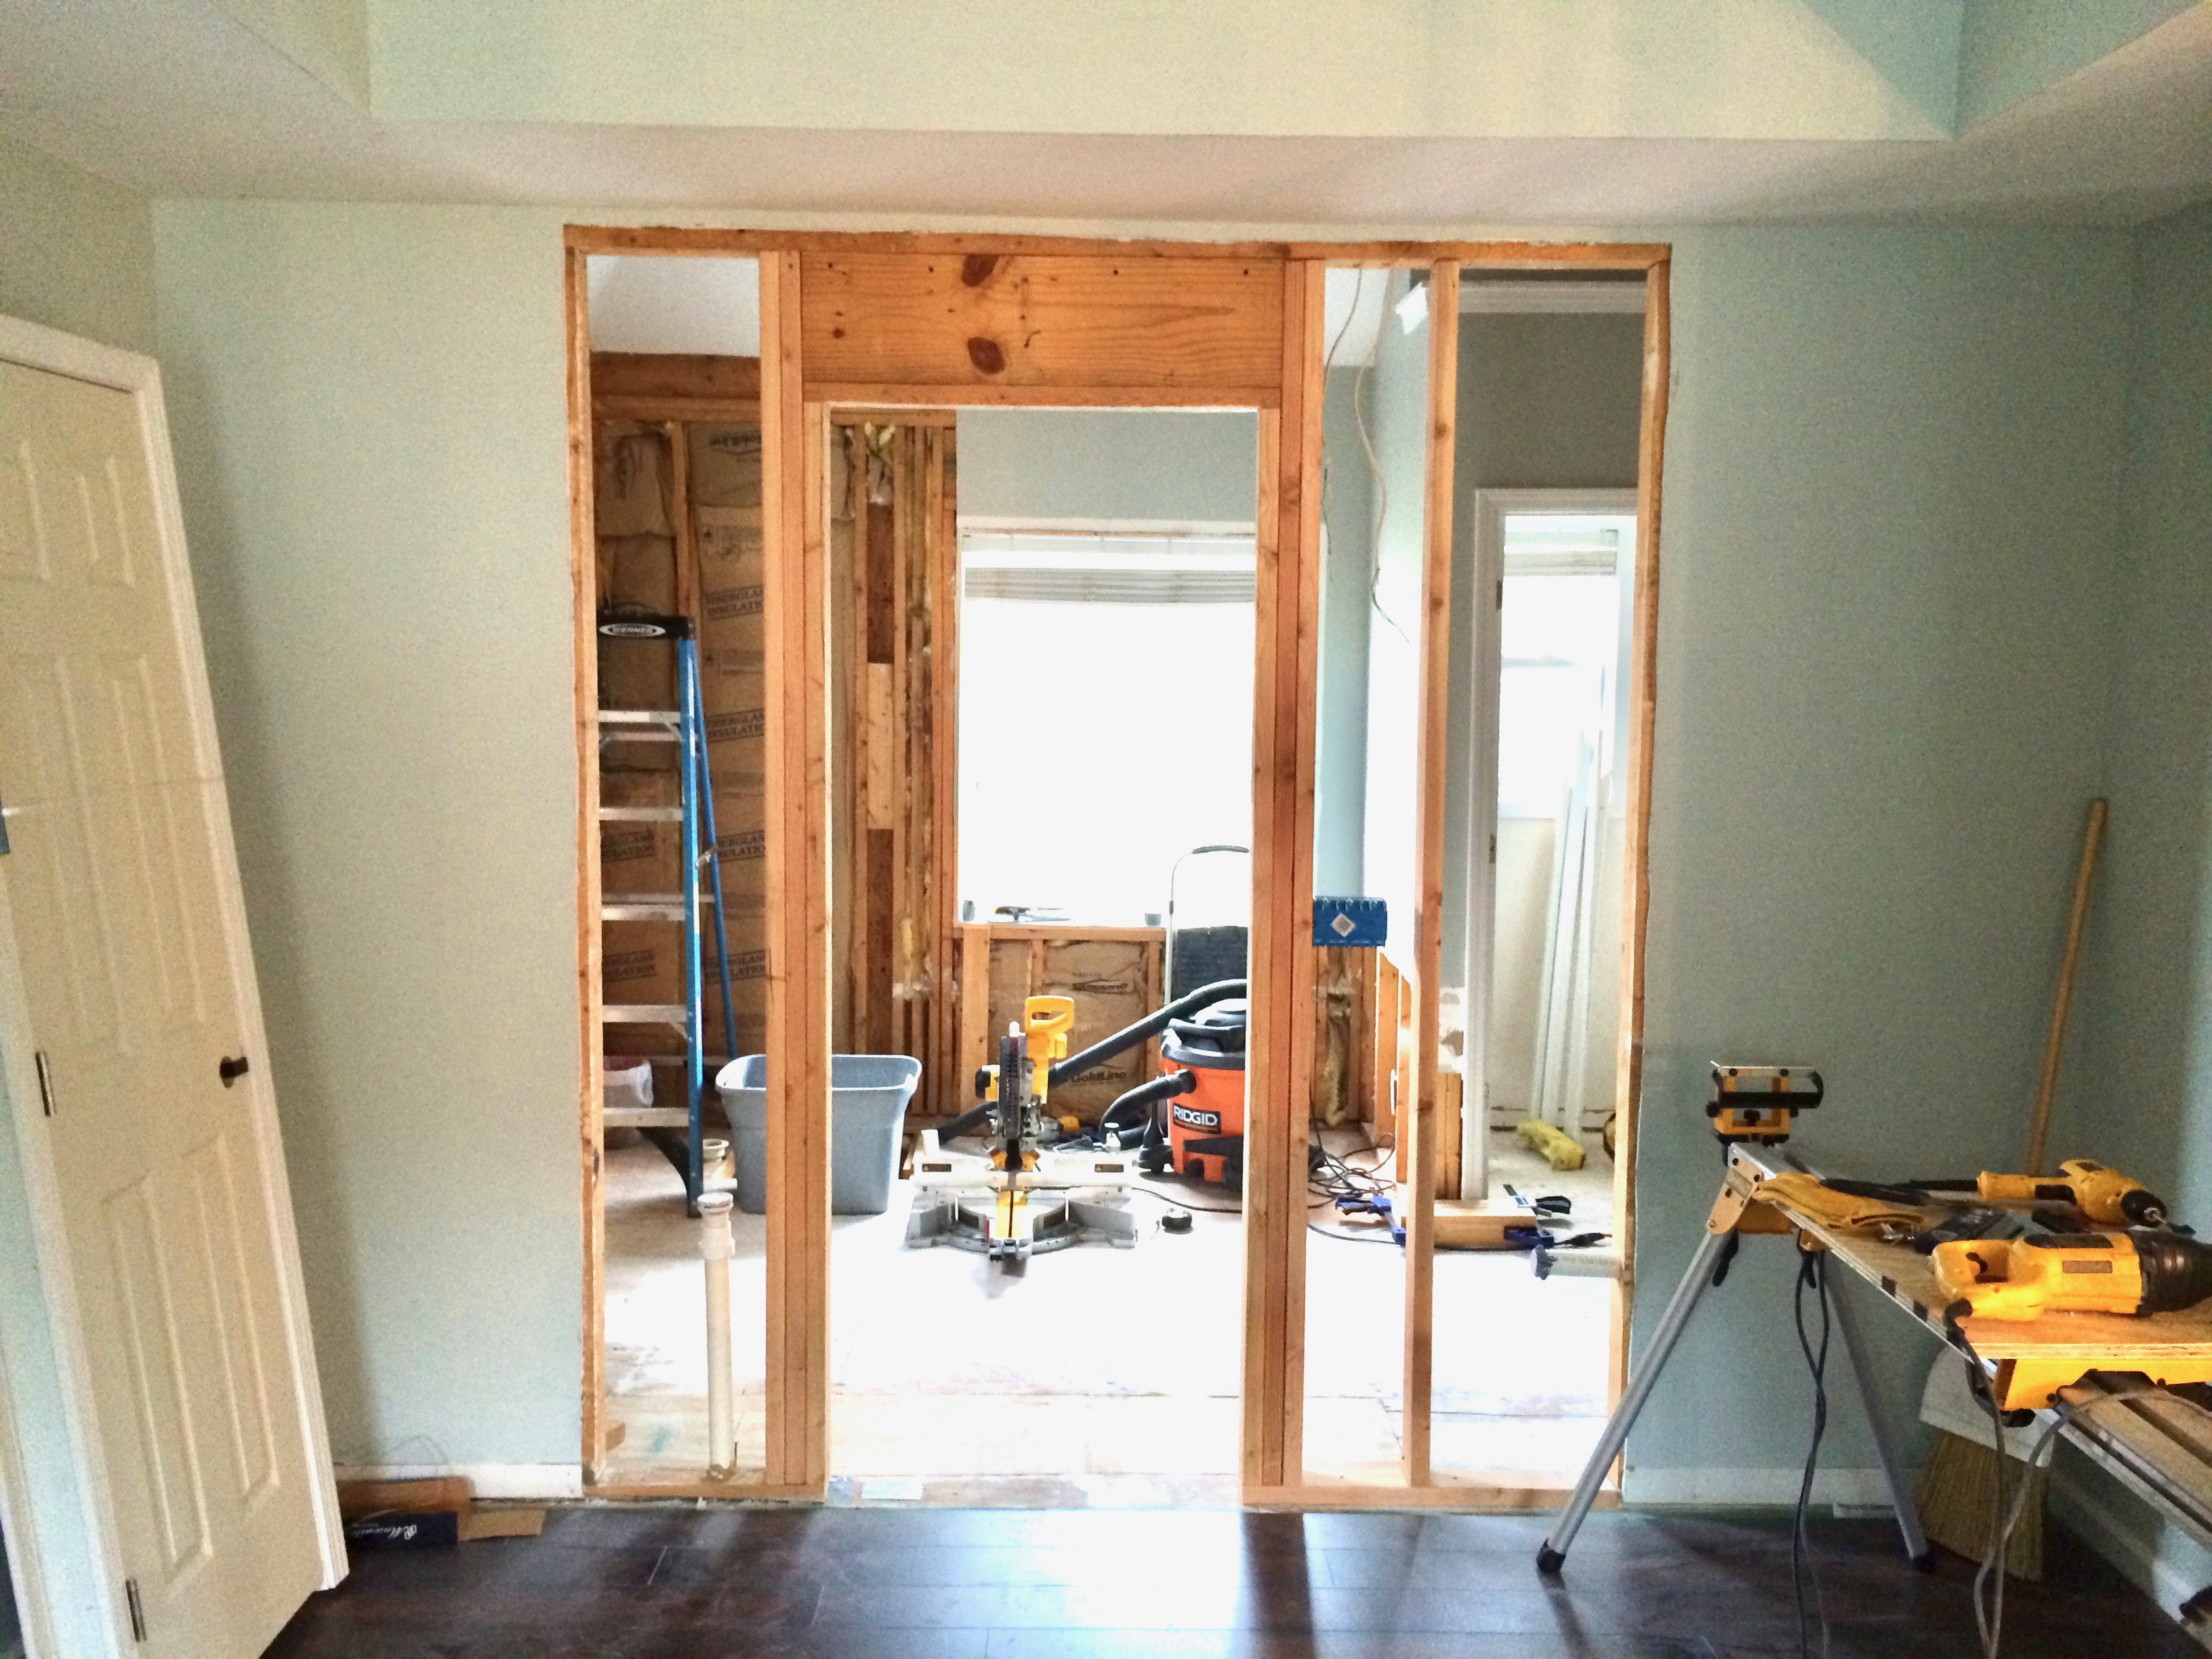
How to build & install a barn door
Step 1. Measure your opening & plan materials accordingly.
I didn’t offer any cut lengths because door heights vary. How tall is your door opening? 78 inches? Plan to have your barn door 1/4 inch above the floor. Any less and your room for error might be too slim. Especially if your floor isn’t level. Any more and you’ll start to see light peaking through the crack.
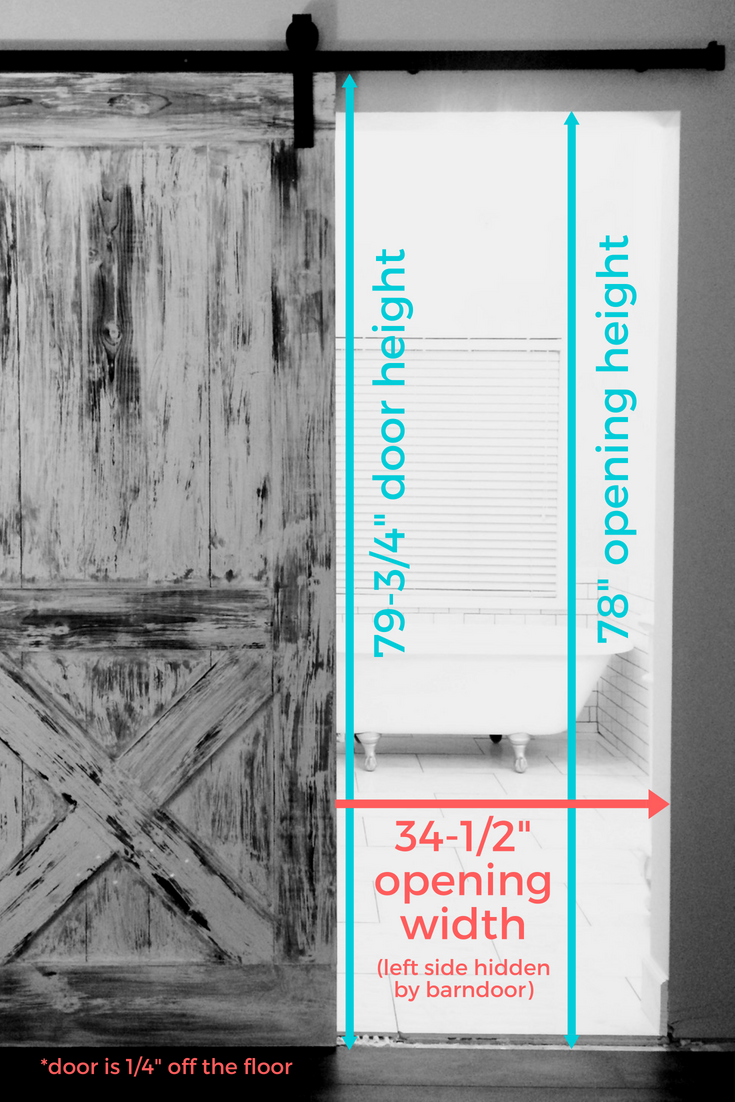
When your barn door completely covers the opening, aim for a 2 in overhang on both sides and on top (our opening has no casing). Or you can simply measure to the outer edge of the door casing (trim) on those three sides. Remember to subtract the 1/4 inch gap for the height. E.g. if my opening width is 34.5 inches, add 2 x 2 inches, and my actual barn door width should be 38.5 inches (plan above without ripping any boards). If your opening height is 78 inches, add 2 inches for coverage and subtract 1/4 in (gap) – actual barn door height would be 79-3/4 in.
*Tip: draw a sketch of your barn door with ALL measurements to double check yourself before buying materials.
Step 2. Hit up Depot & snag some materials.
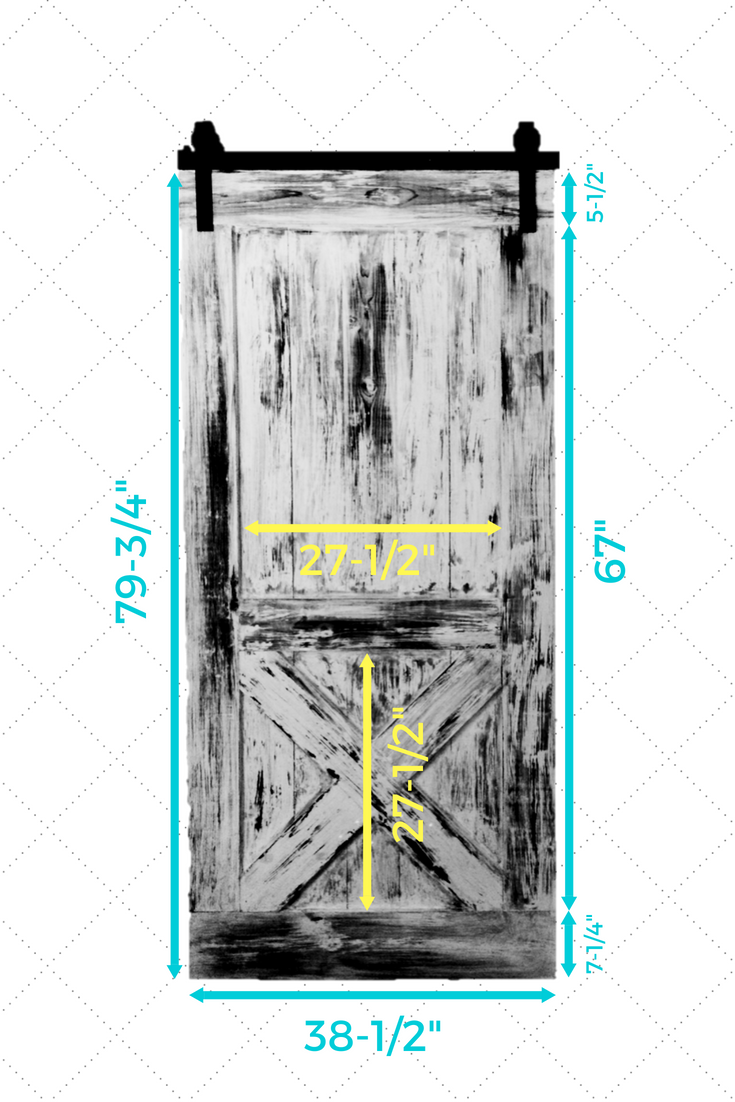
If you’re happy with a 38-1/2 in wide door per the materials list above, then you’re ready to road trip to Depot. If not, redesign. You will customize your door height to the opening height with the use of your miter saw. However, adjusting door width is a little more tricky: ripping each and every board to the same width through a table saw.
*Here’s a pro-tip for choosing lumber: you’re essentially handcrafting furniture using dimensional lumber that was never designed to be seen by the nakie eye. So you must be very selective with each and every board. Pick it up, gaze straight down the length of the board with face up, and again with edge side up. Do you observe any twisting? Warping? Cupping? Bending? Toss it back. Wonky boards = wonky door. Sort through countless boards until you find the best (11) 1x6x8s in the pile, or mad close.
Step 3. Cut the wood.
Base your cut lengths on your custom door opening measurements. Here’s a guideline based on the above case study. E.g. door height is 79-3/4 in & door width is 38.5 in. Cut list:
- (7) 1x6x79-3/4 in – entire backside of door.
- (2) 1x6x67 in – left and right side door trim.
- (1) 1x6x38-1/2 in – header trim.
- (1) 1x6x27-1/2 in – center horizontal trim.
- (1) 1x8x38-1/2 in – footer trim.
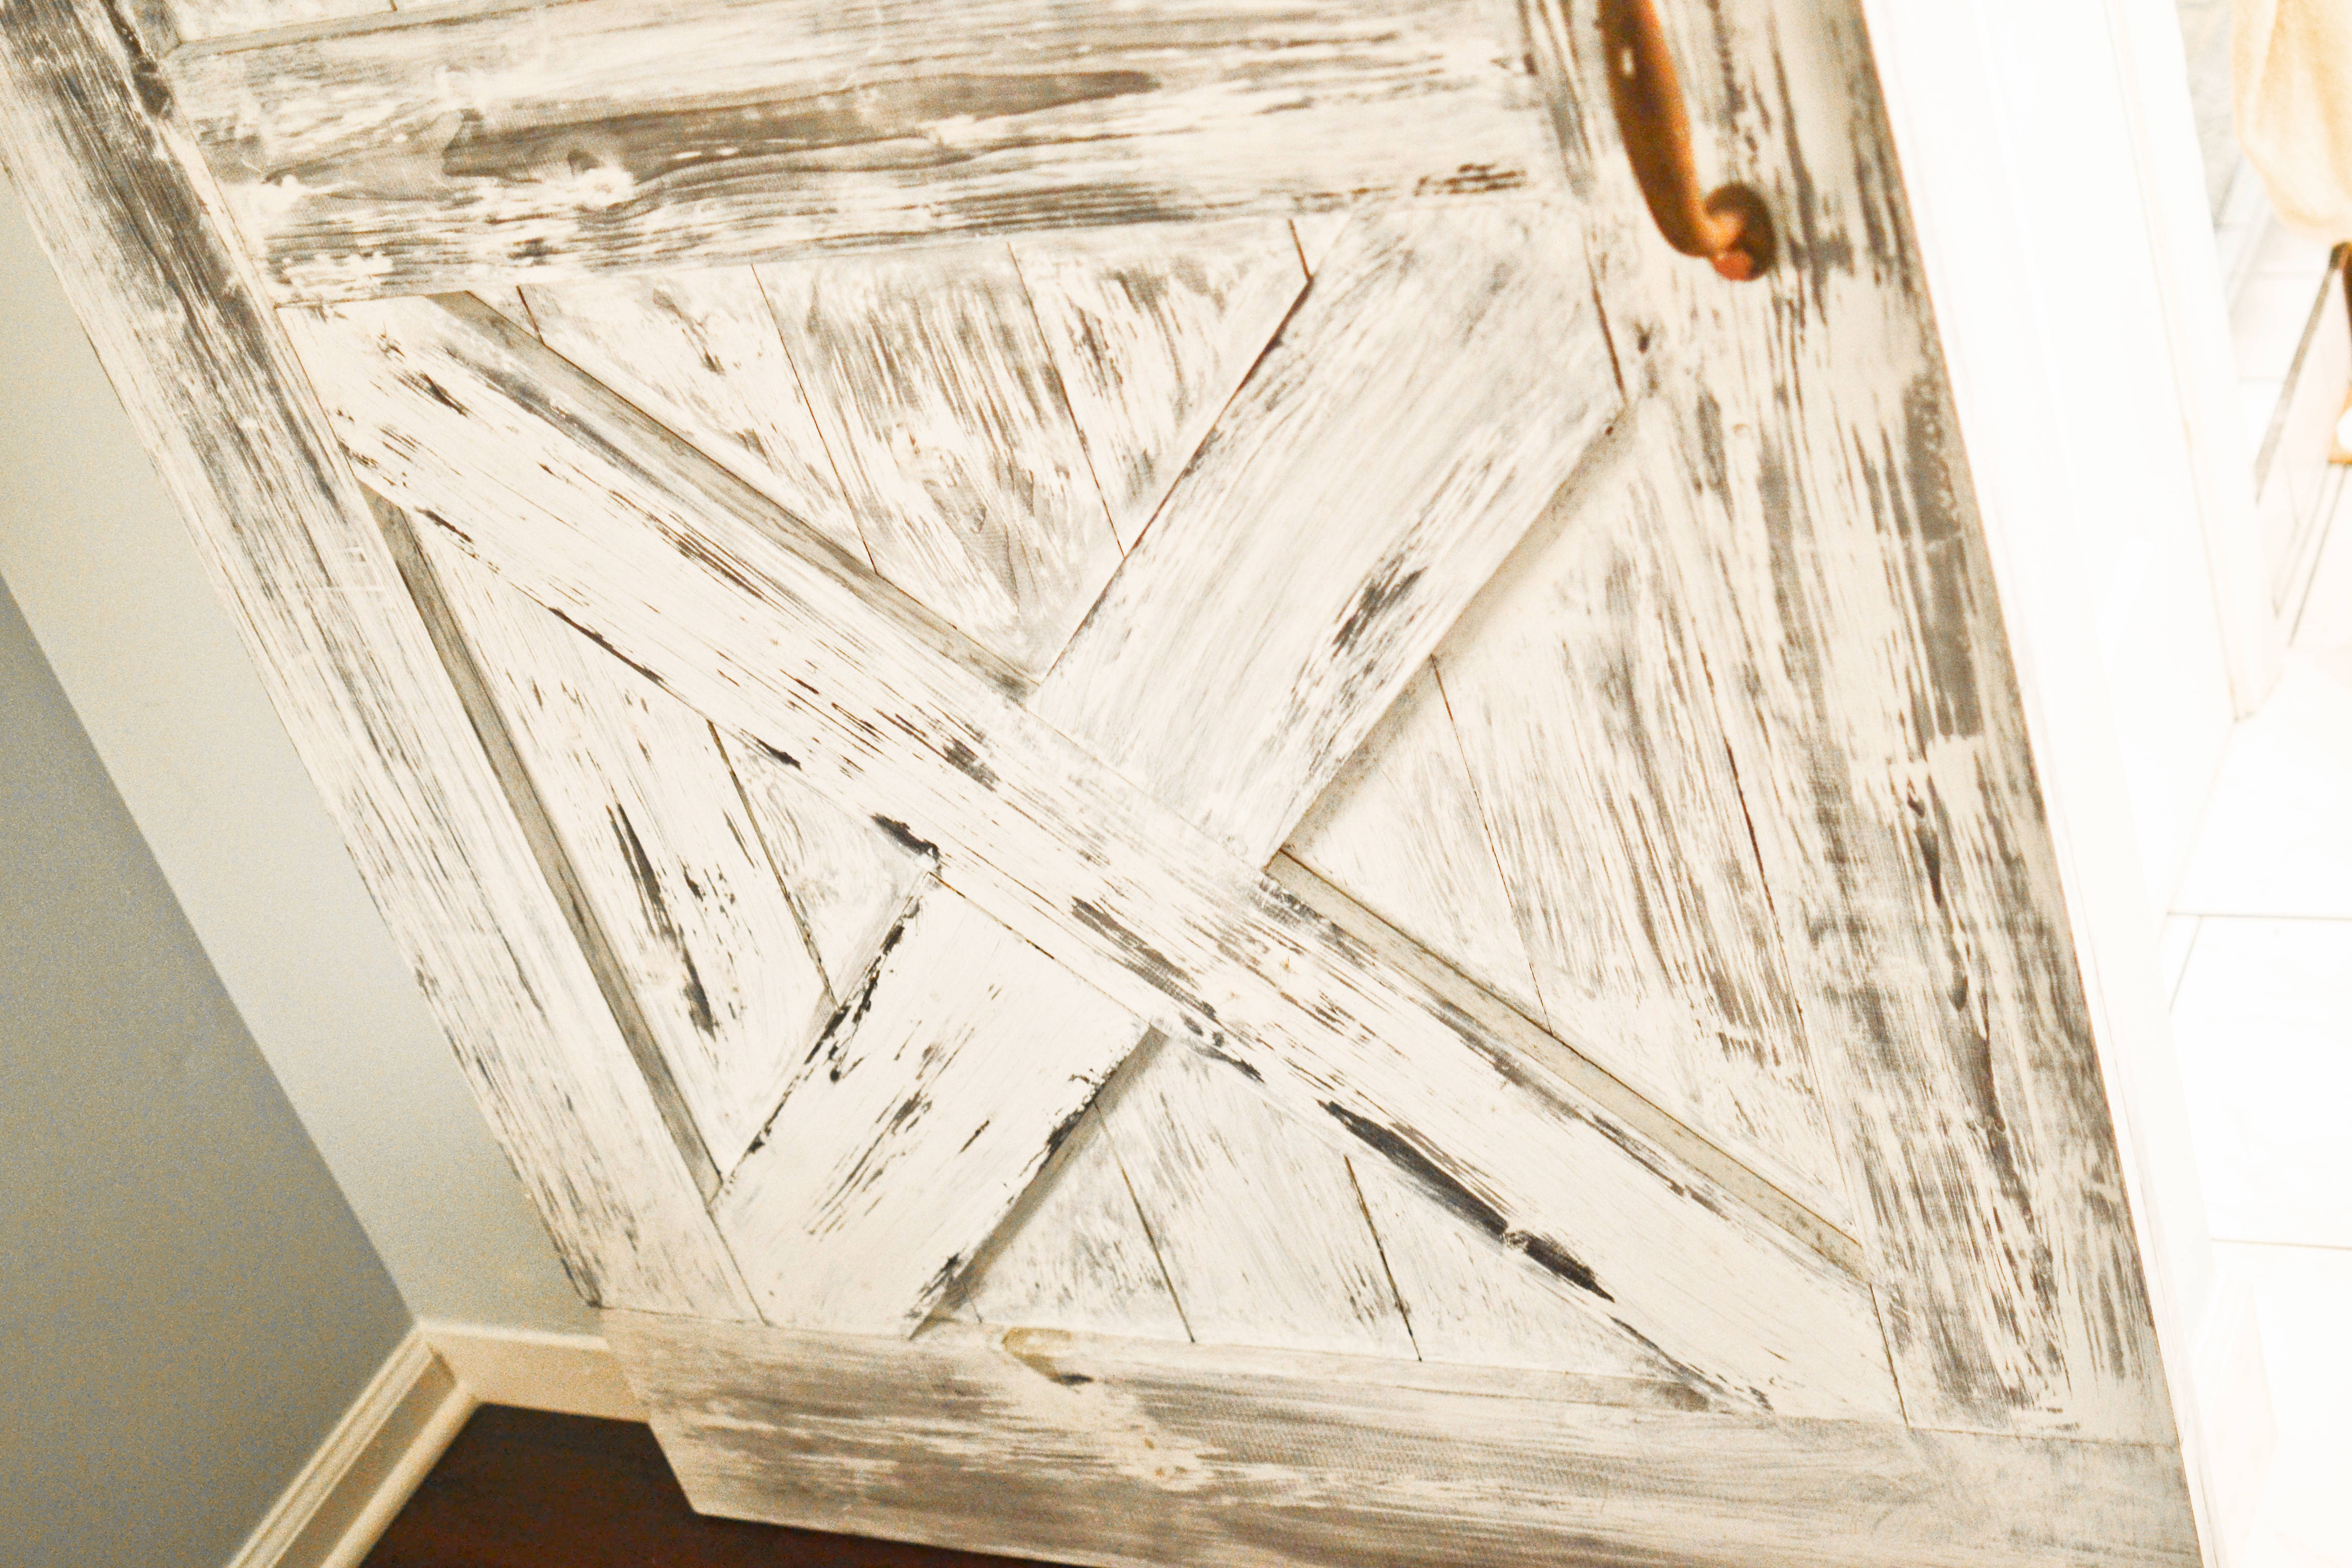
- (3) 1x6s mitered to fit the “x” trim. 1 longer, 2 shorter.
Step 4. Assemble wood (example assembly is based on above door opening measurements ONLY. Measure your opening!).
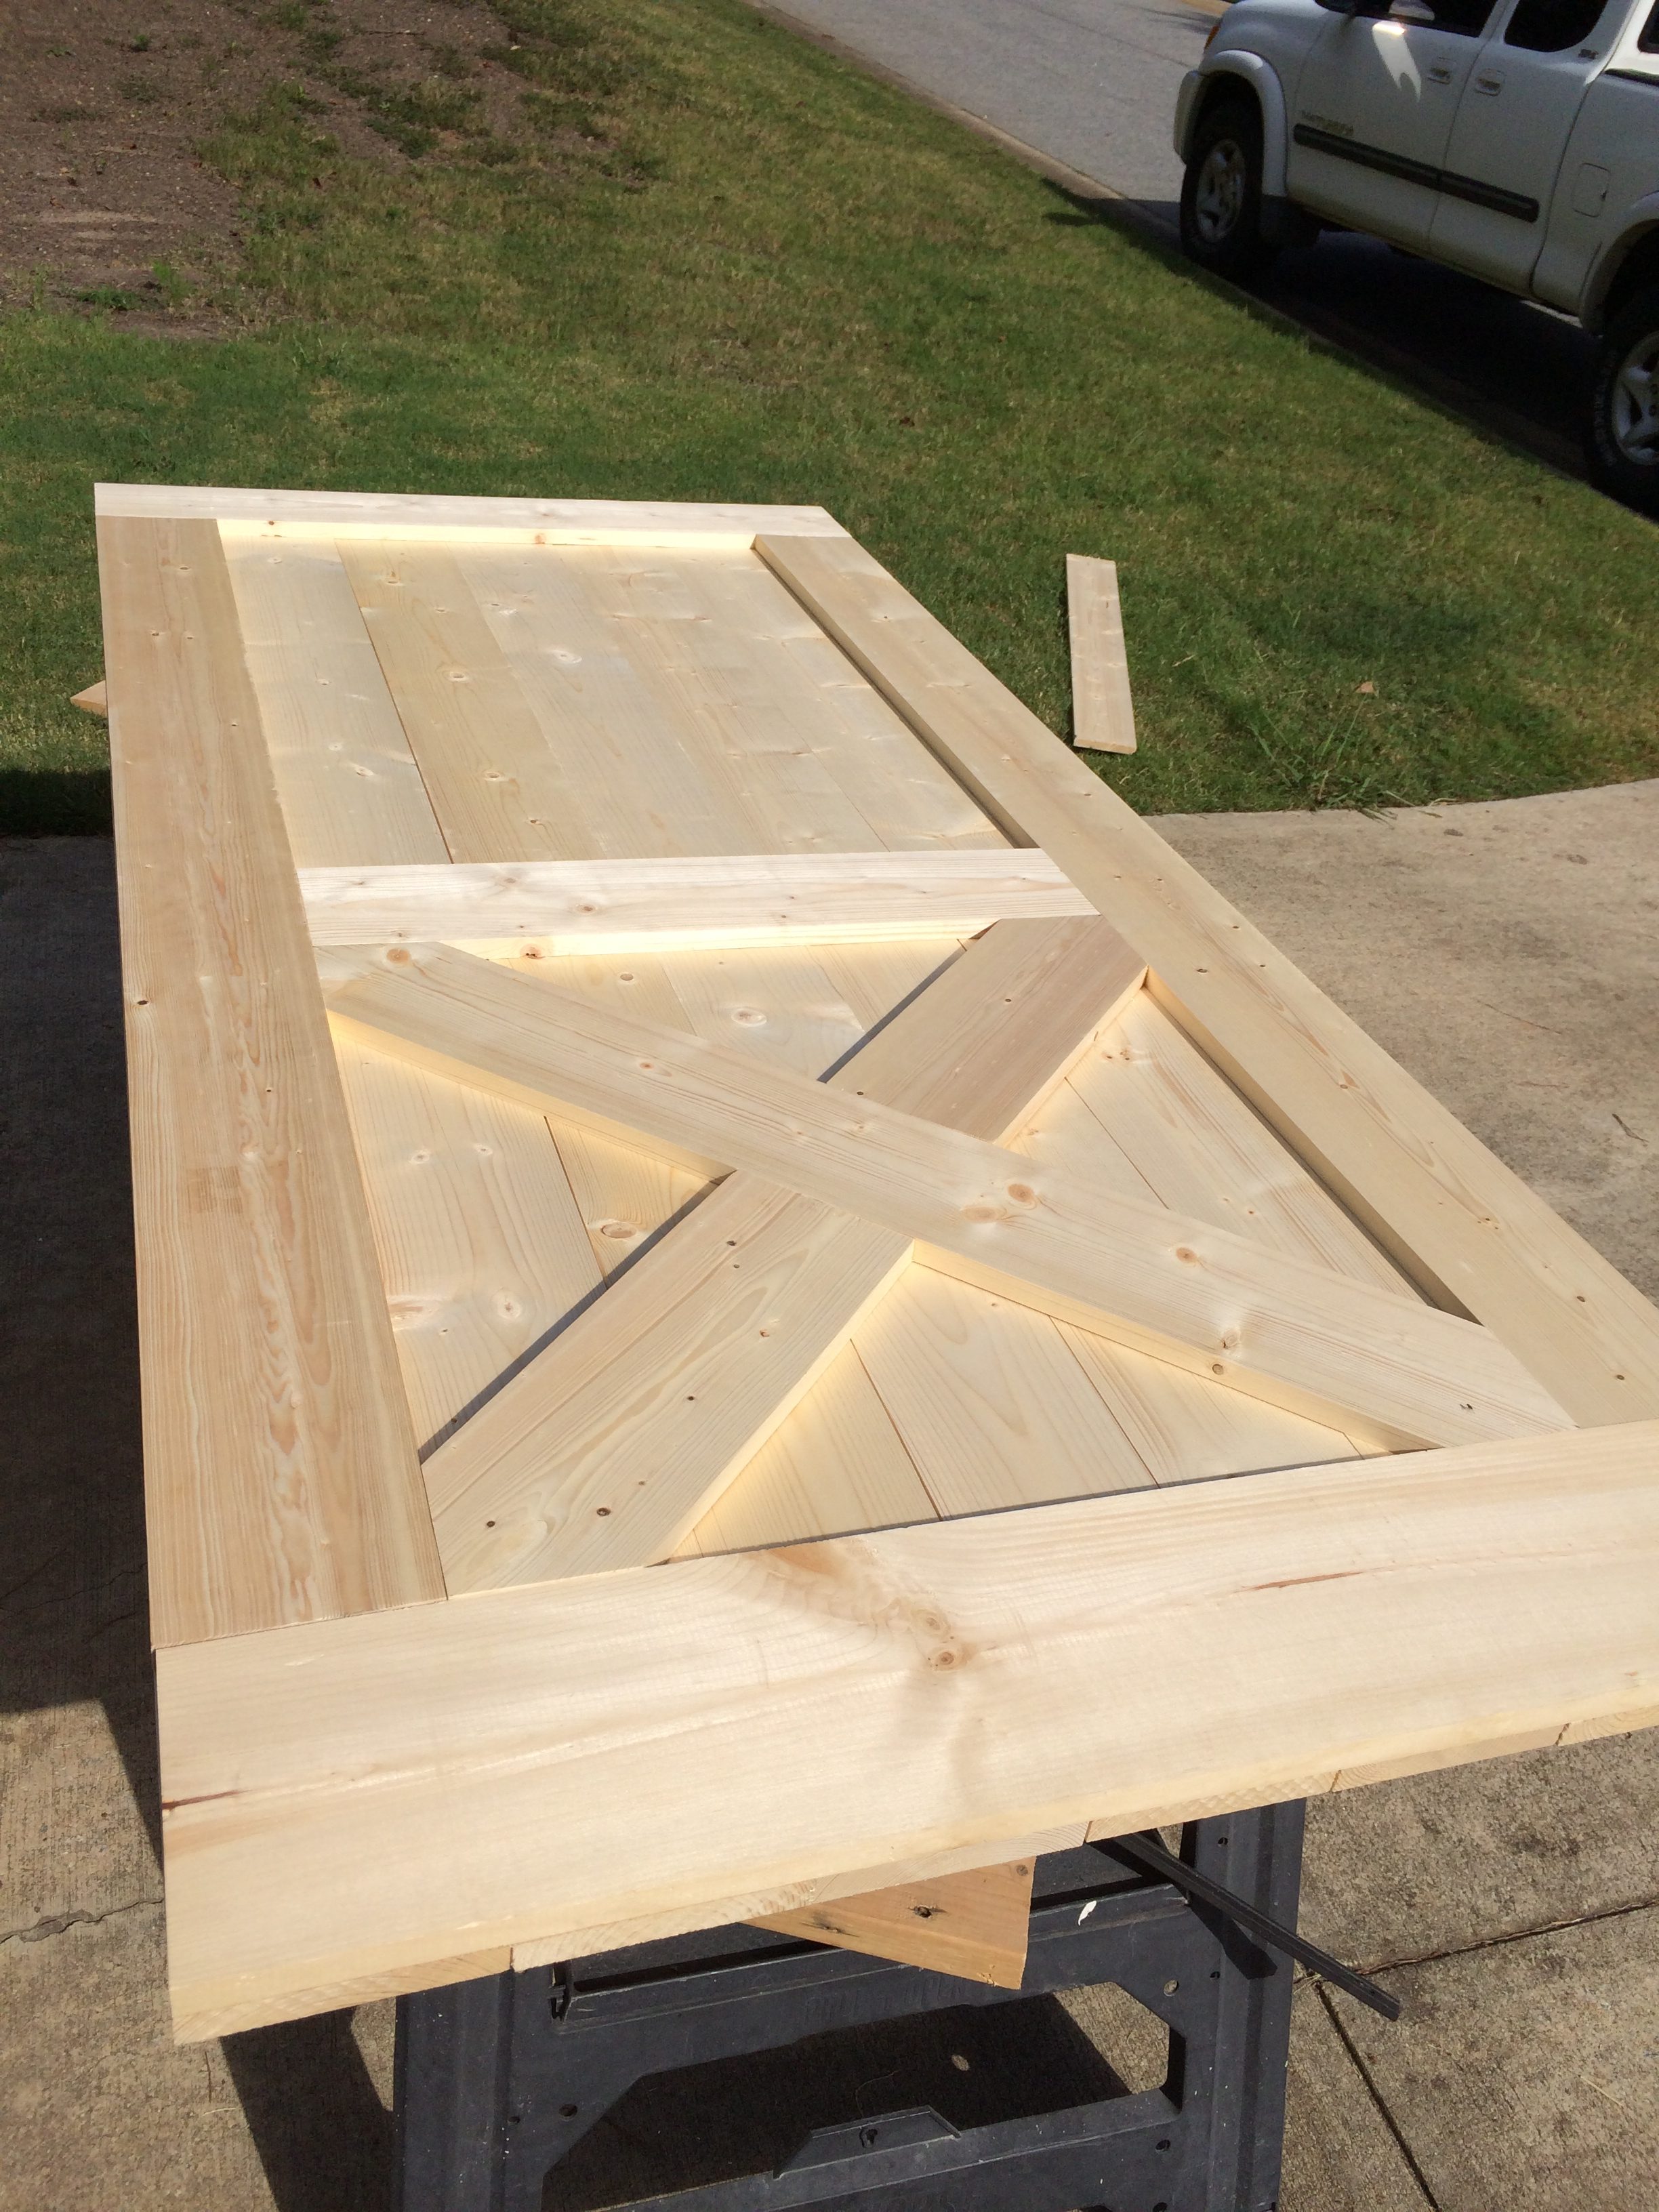
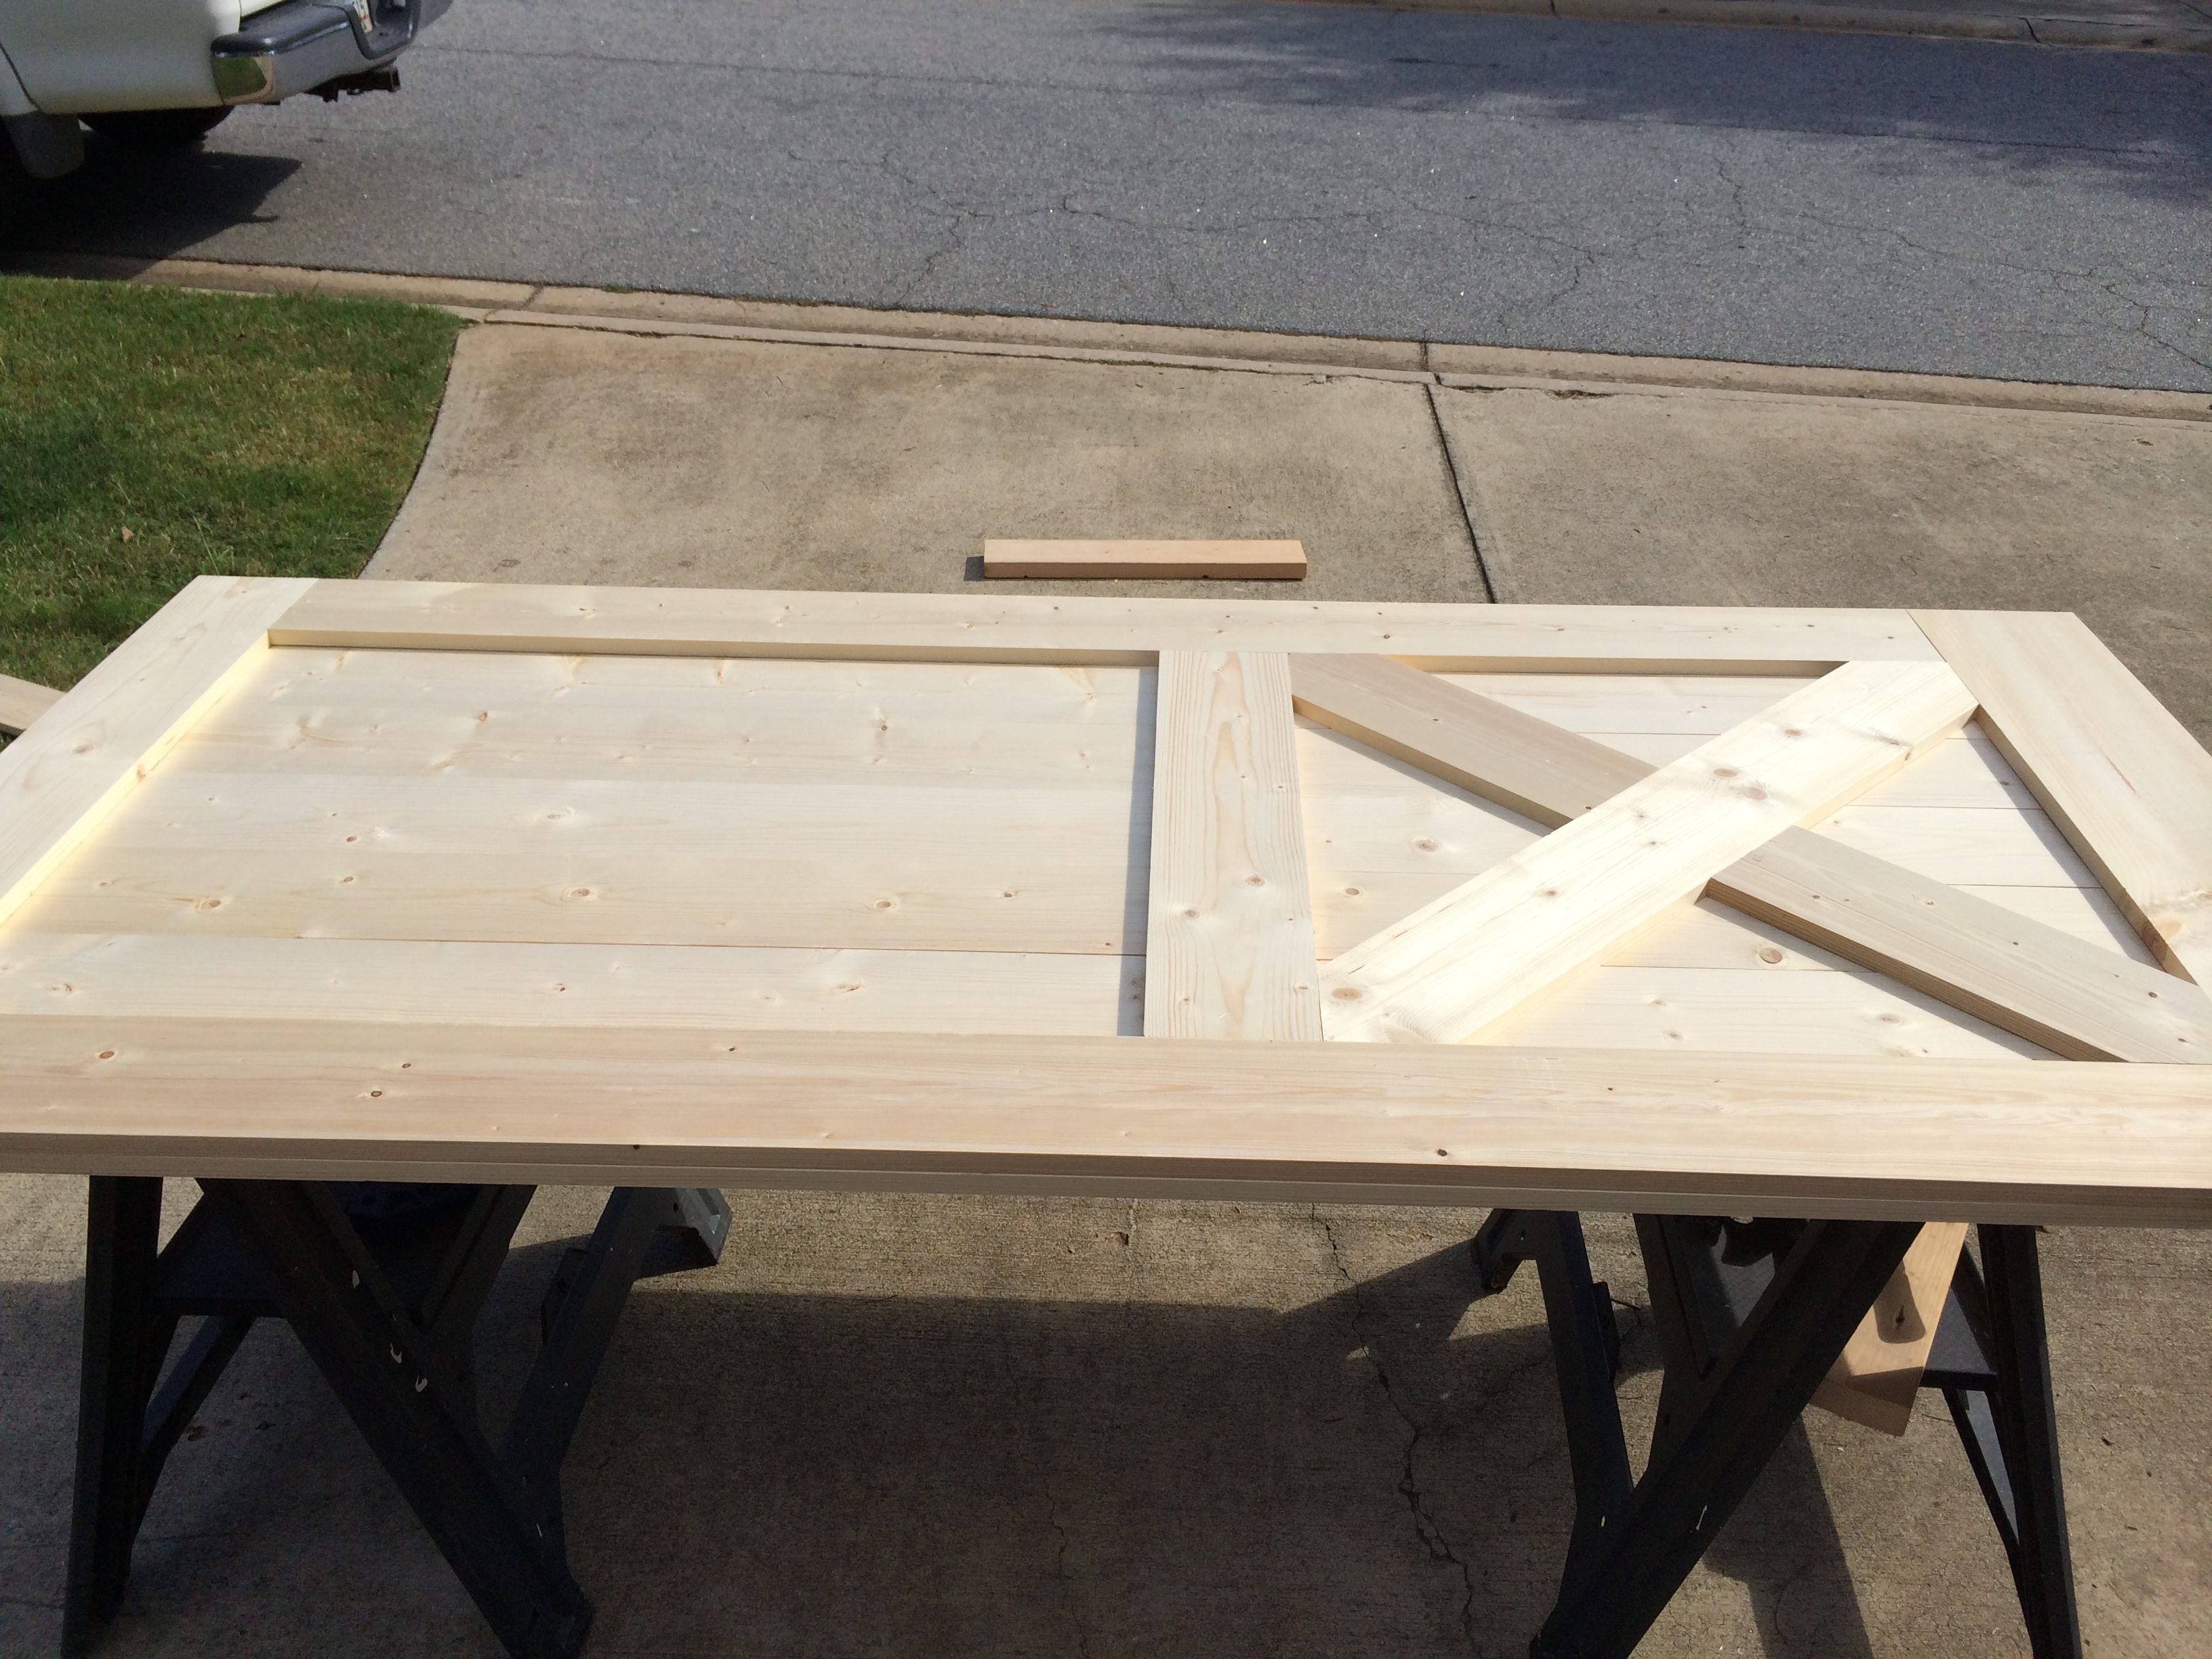
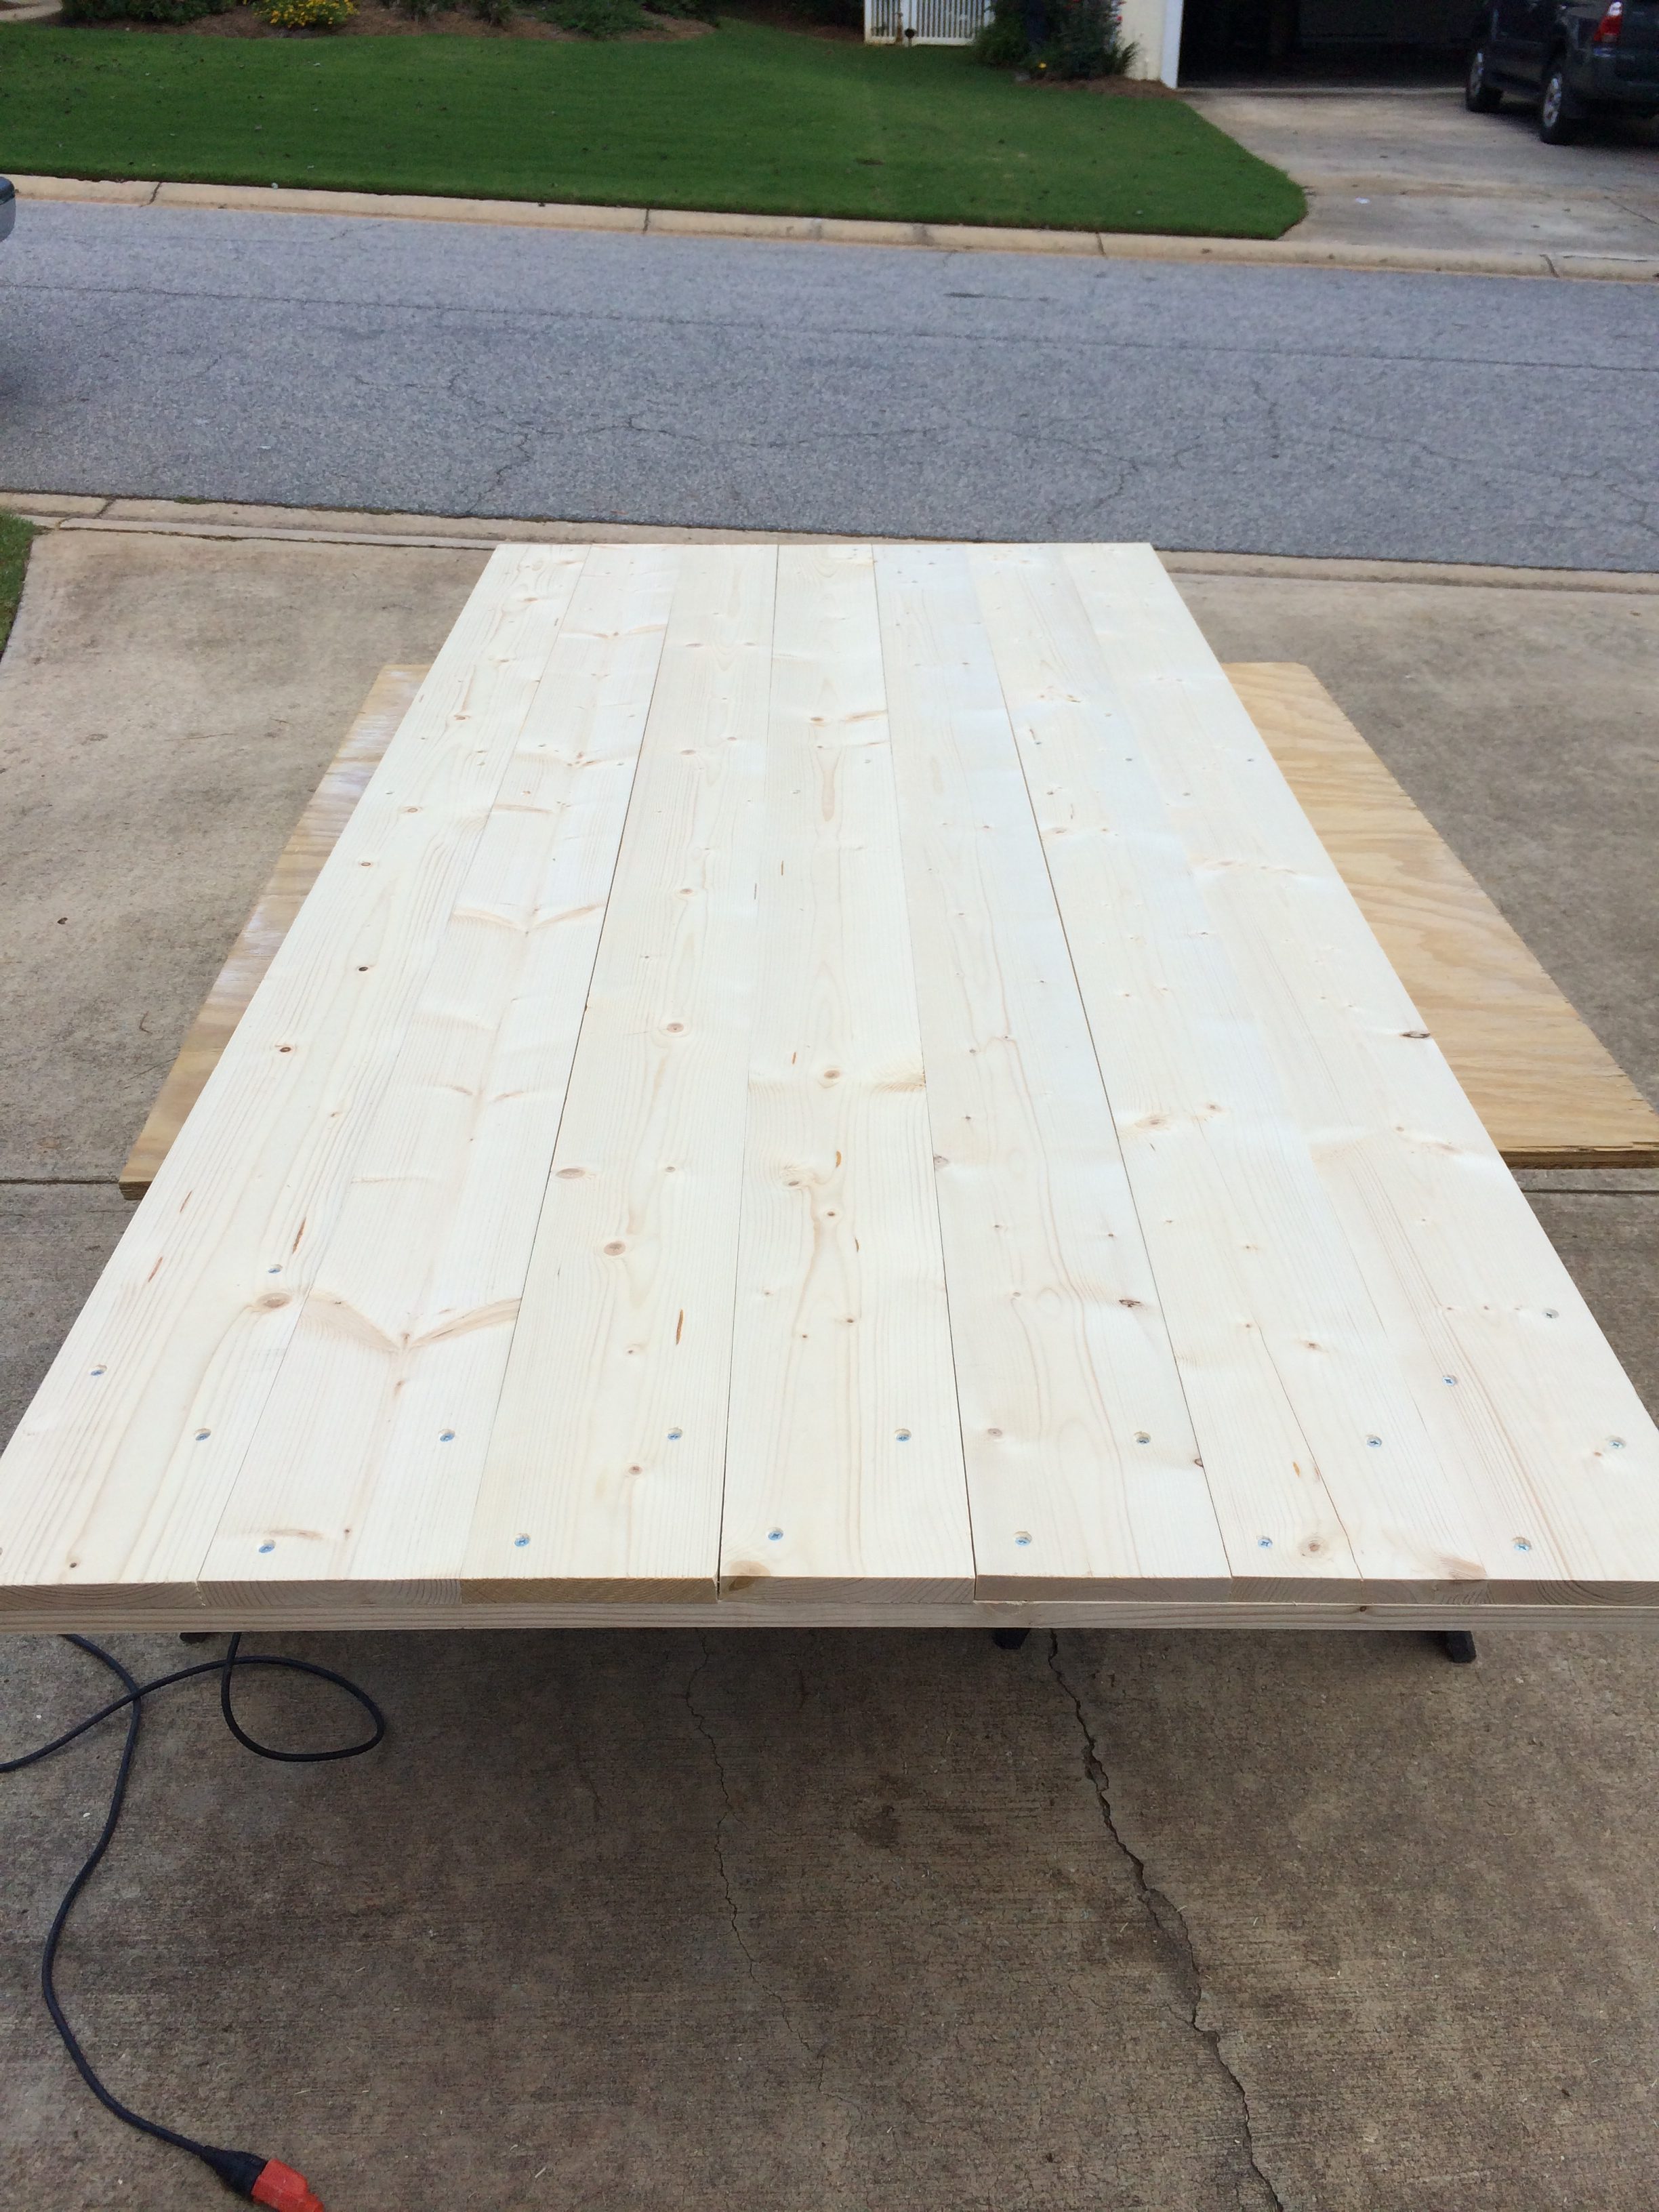
- Place the 1×6 header trim piece and 1×8 footer trim piece on your garage floor (or the flattest surface you have access to). Add left and right side 1x6x67 in trim to make a rectangle. Tightly lay the 1x6x79-3/4 in pieces (for the backside) perpendicular to the header and footer, directly on top of them. Screw in at least 2 screws per backside board into each header / footer trim piece. Add 4 screws for each side trim.
- Flip the door over and add the center horizontal trim 27-1/2 inches above the edge of the footer trim to make a perfect square. Clamp it, have a friend hold it in place, or cut 2 more pieces of scrap wood to 27-1/2 inches and use them as spacers. More screws from the backside!
- Cut your longer “x” trim piece to a 45º arrow on one end only. Dry fit it in the square and mark with a pencil where the other arrow cuts need to be made (by eye). Trial and error until it fits perfectly.
- Repeat with the 2 shorter “x” trim pieces. Each will start with a 45º arrow end, but these will have a 90º crosscut on the other side to butt up to the longer “x” trim piece.
Step 5. Pretty it up with stain.
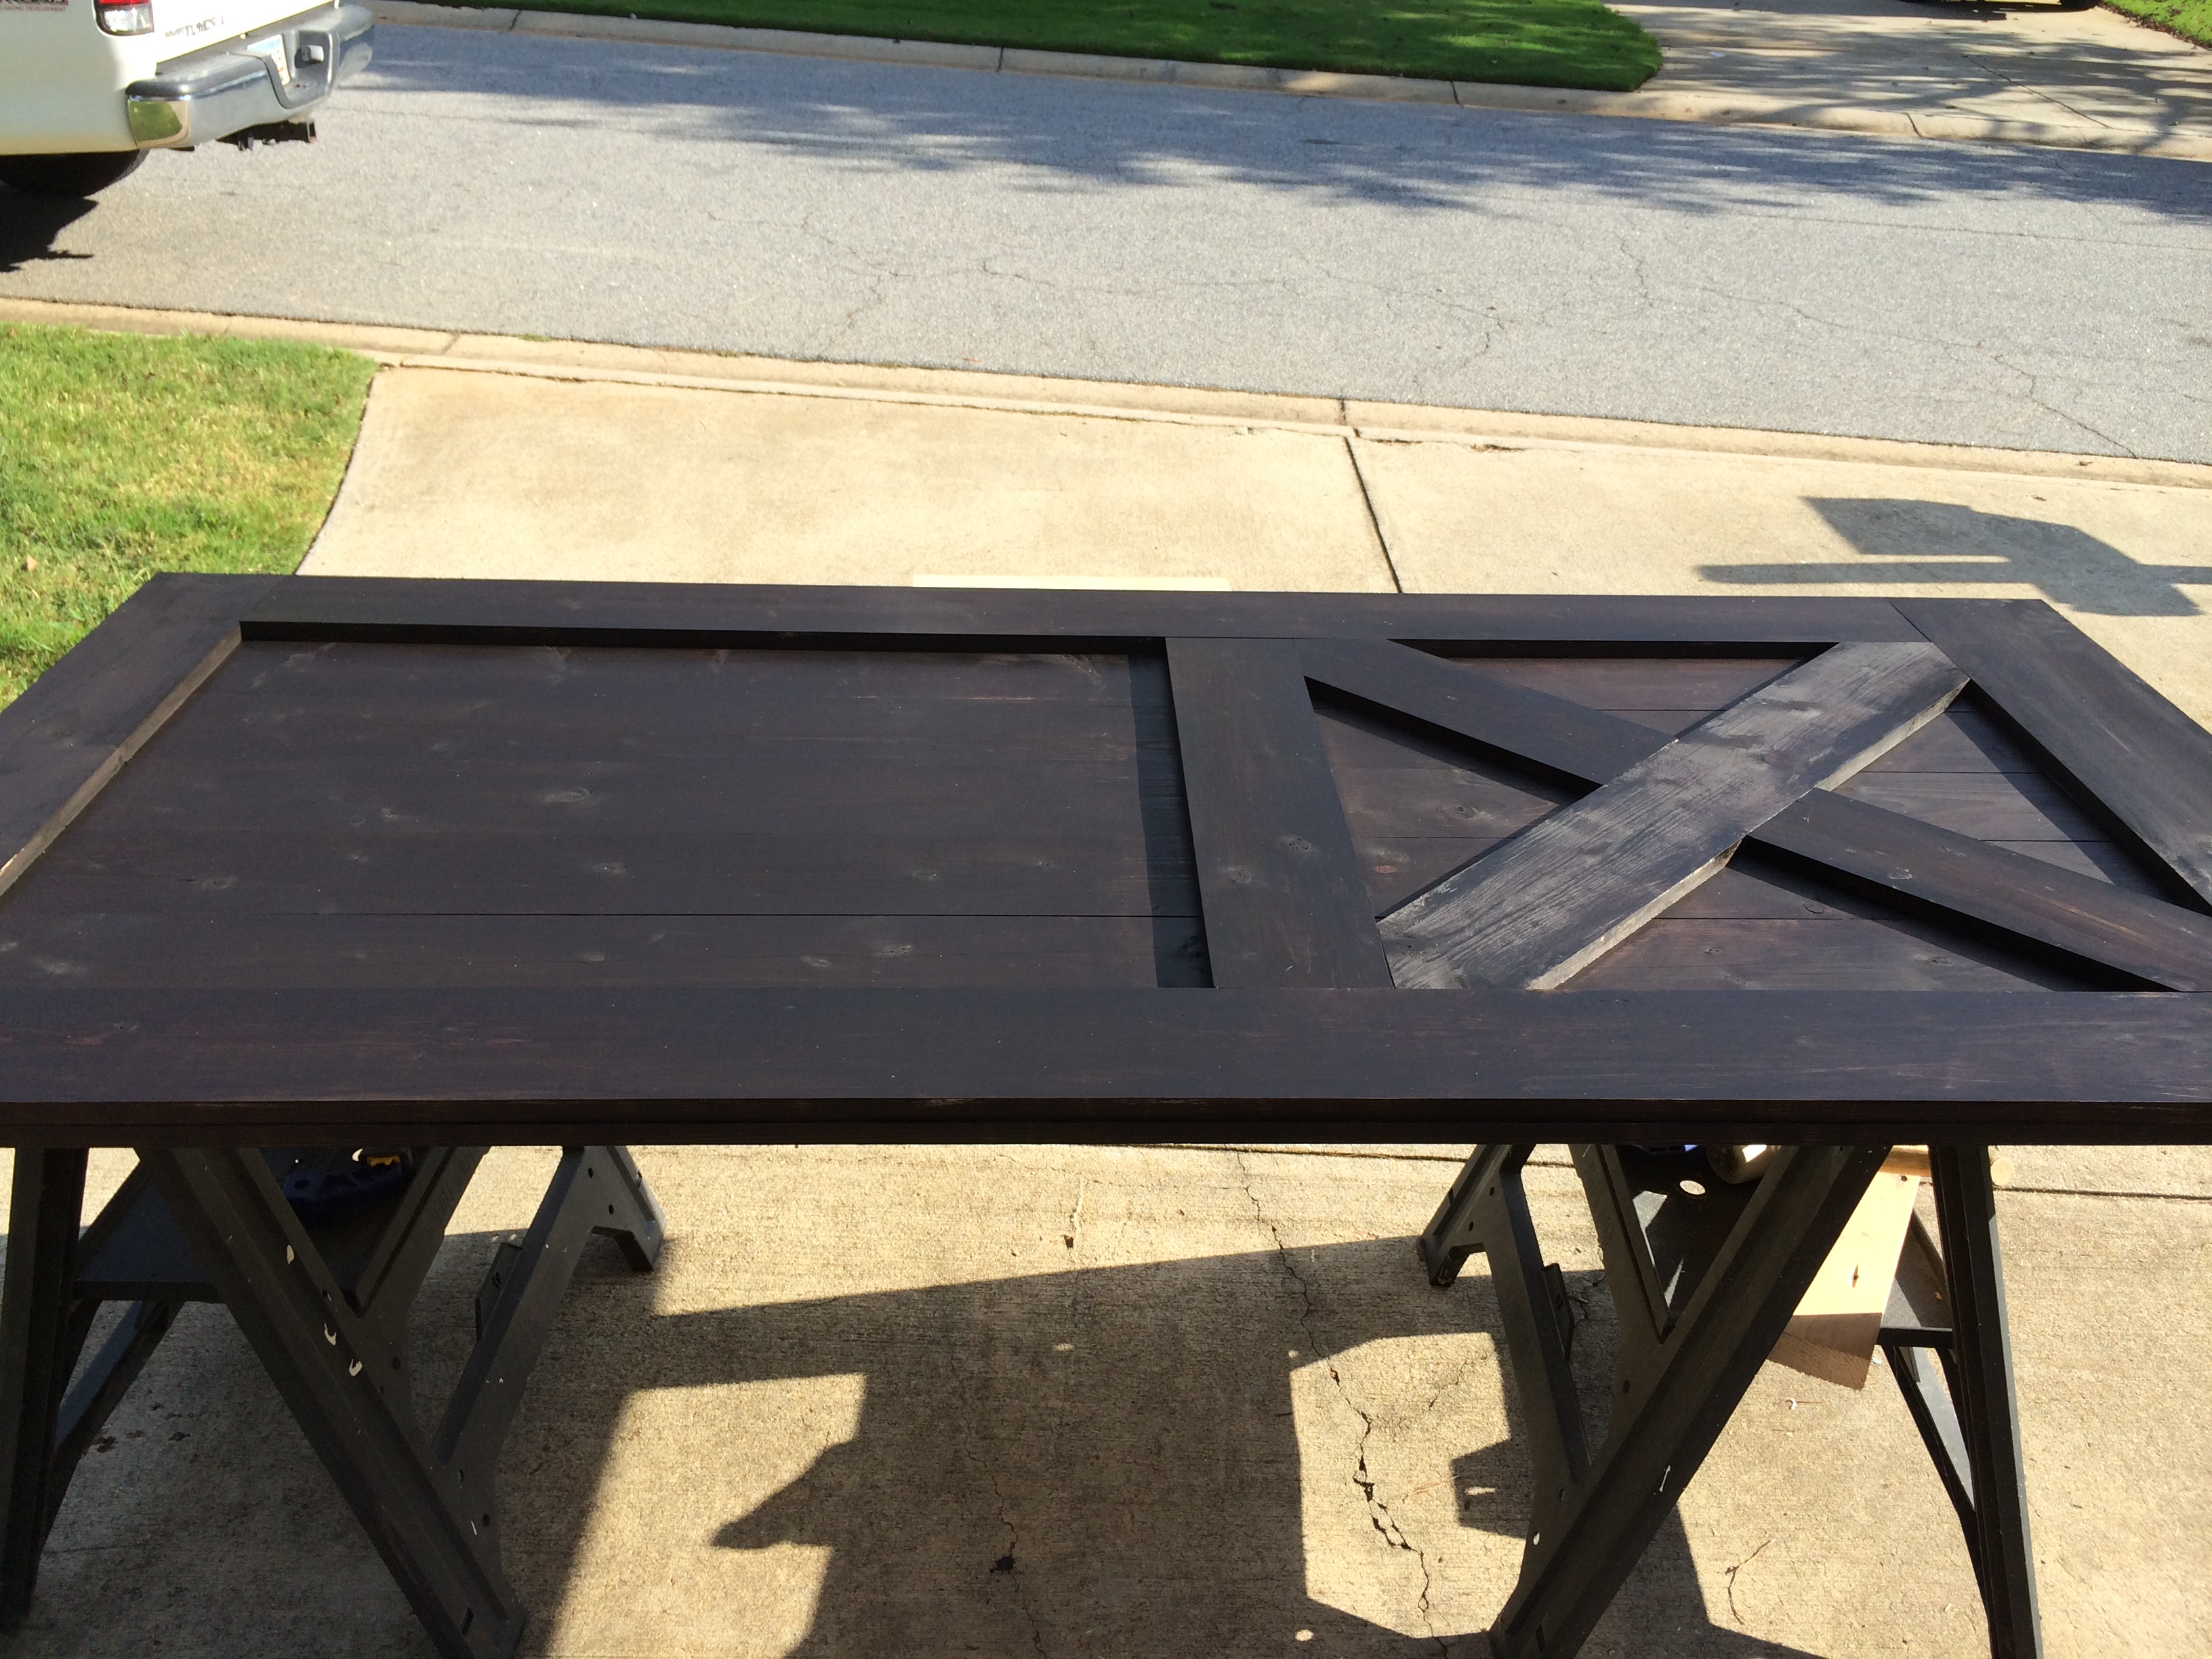
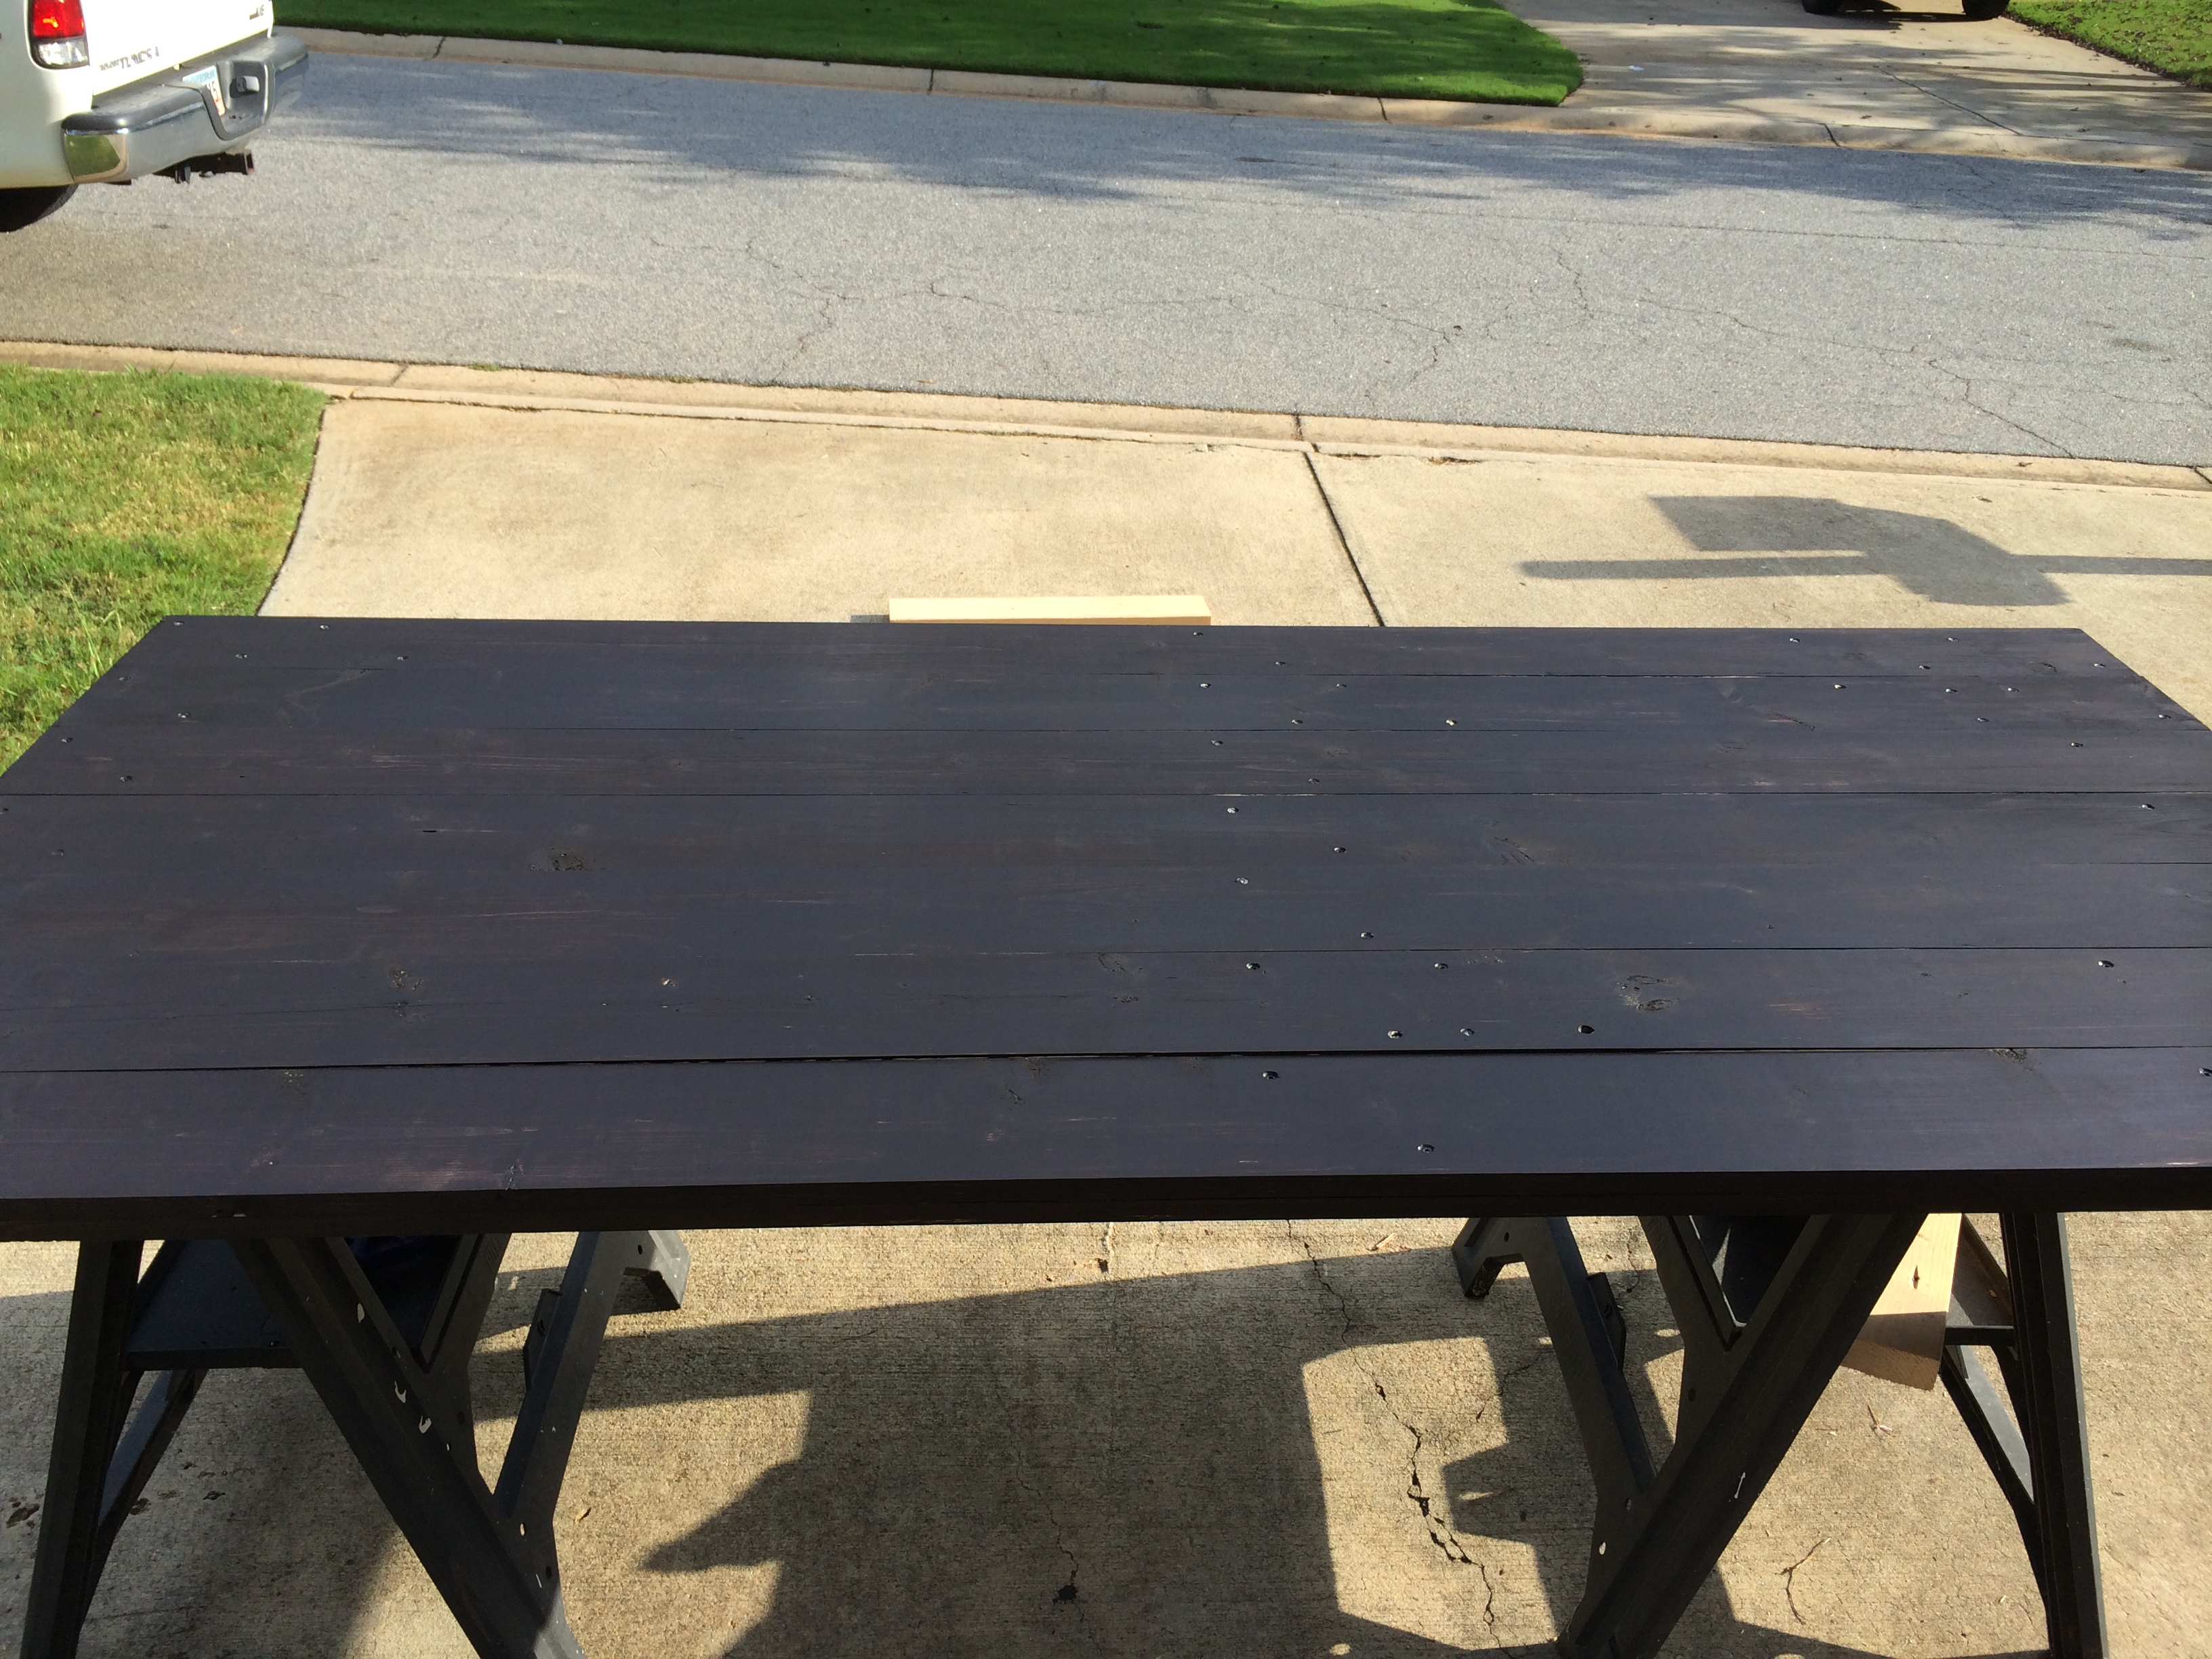
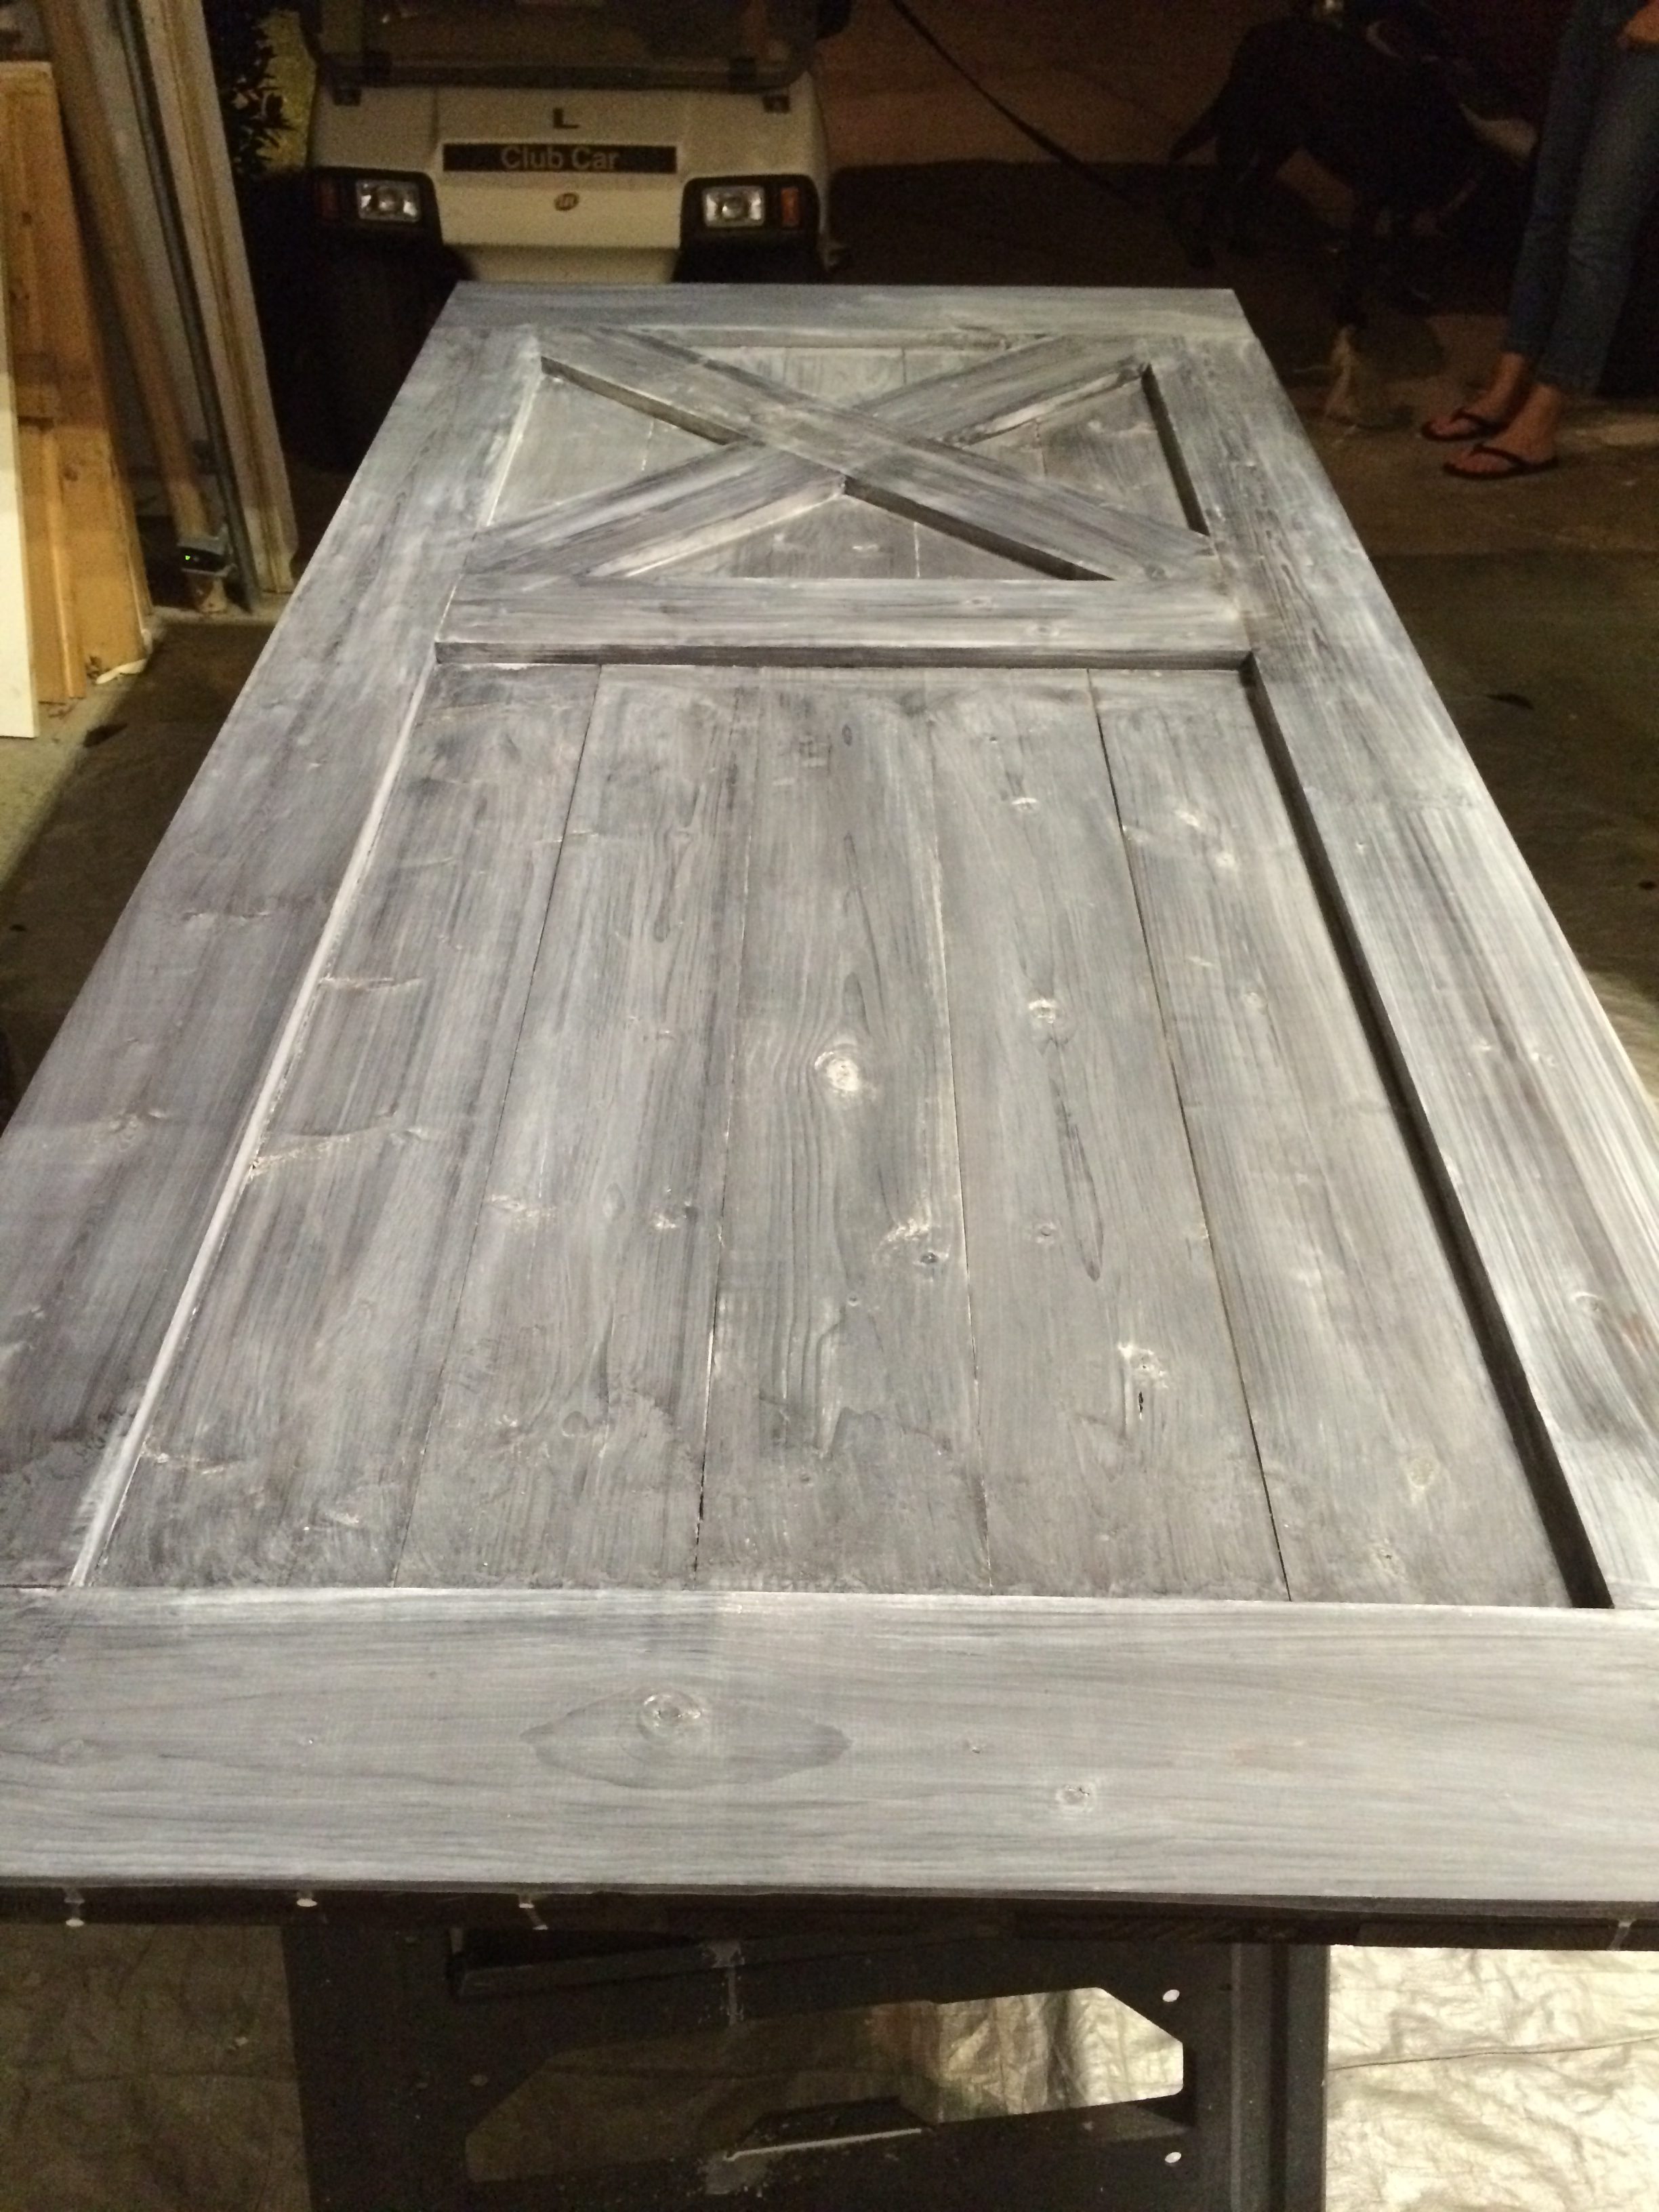
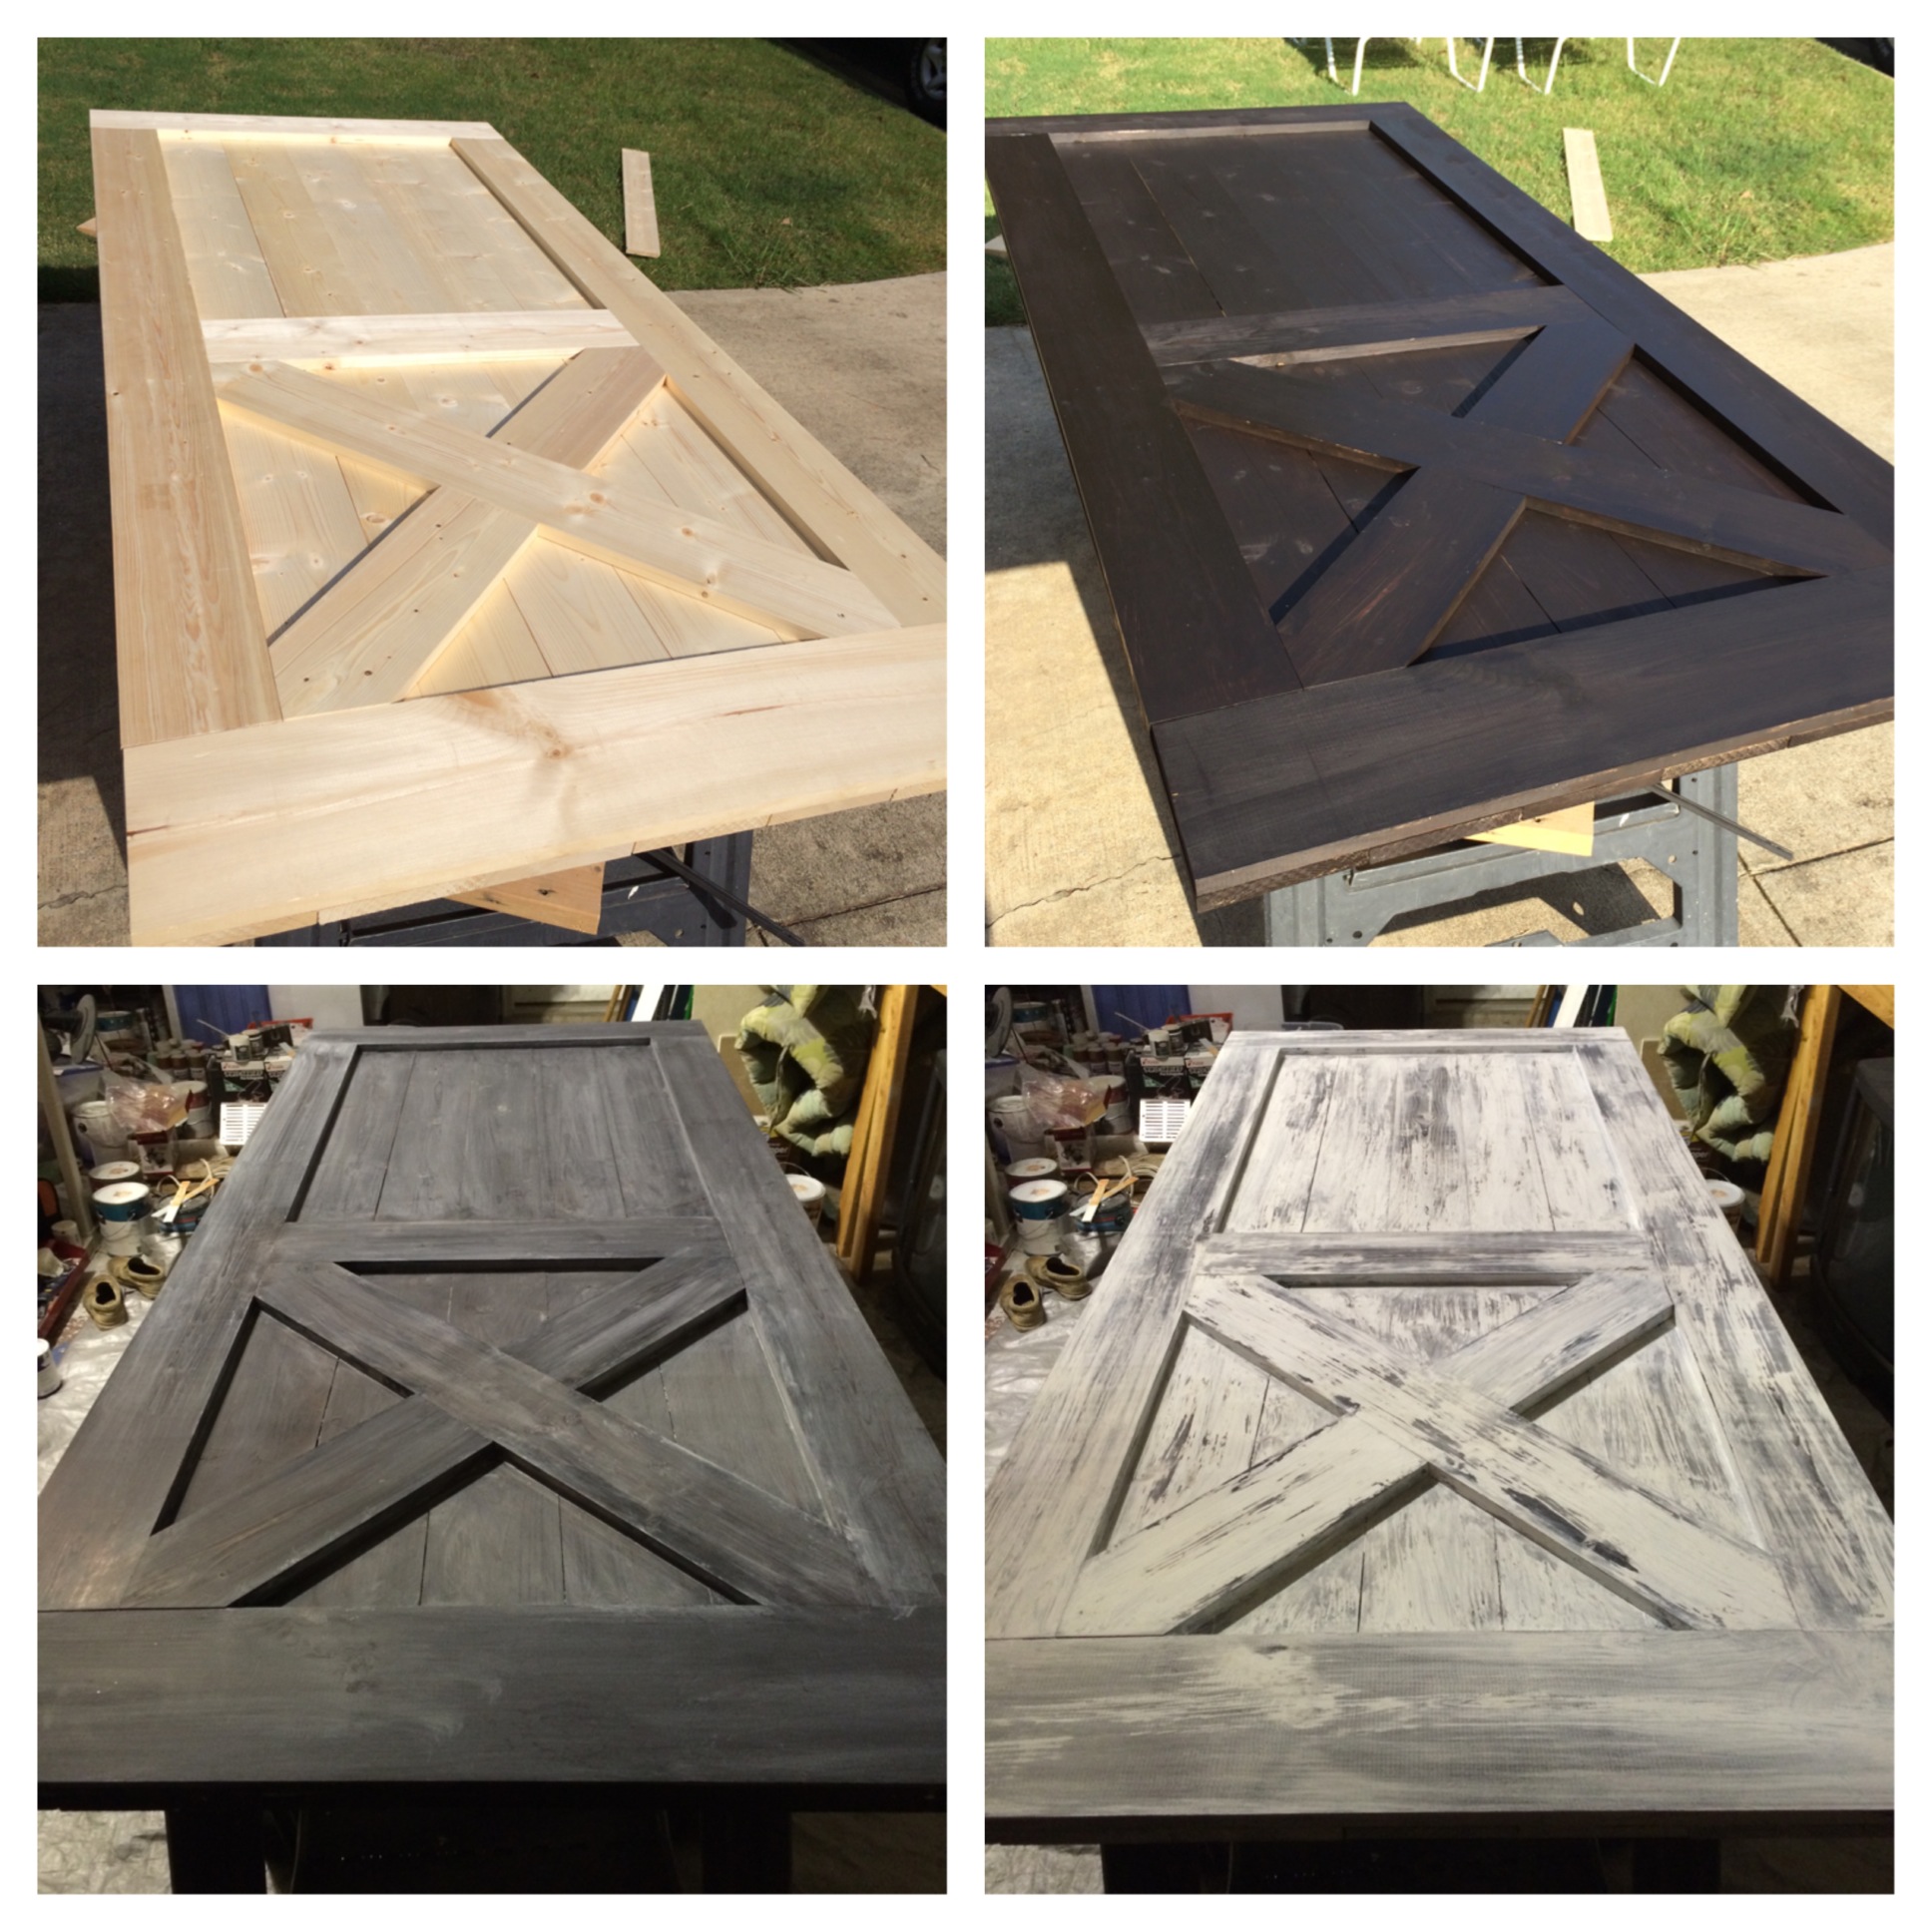
- Nitrile glove on. Stain is like permanent marker’s weird uncle that sticks around at least a couple days past expectations. Consider laying newspaper or a tarp to protect the ground. Place your door with the backside up (this lets you test out your stain/finish on the less visible side of the door and ensures you finish your last coat with the pretty side up or a longer dry time). Blue shop towels at the ready. Bust open a can of stain, stir well, dip your blue shop towel into the stain and rub it into every nook, cranny, crevice and crack. Don’t forget the outer sides and inner trim sides. Wait 5 minutes for stain to seep into the grain.
- Grab a new shop towel and wipe off the excess stain. Push hard. Any extra stain that isn’t wiped off will dry sticky and mess up your upcoming layer of whitewash. Let it dry for at least an hour (or per the can instructions).
- Flip it over and repeat step 2. Let dry another hour.
Step 6. Now a little paint whitewashing.
- In a separate container, mix your white paint with water. One part paint to one part water. (We like to wash out and save old plastic containers like sour cream containers for this purpose).
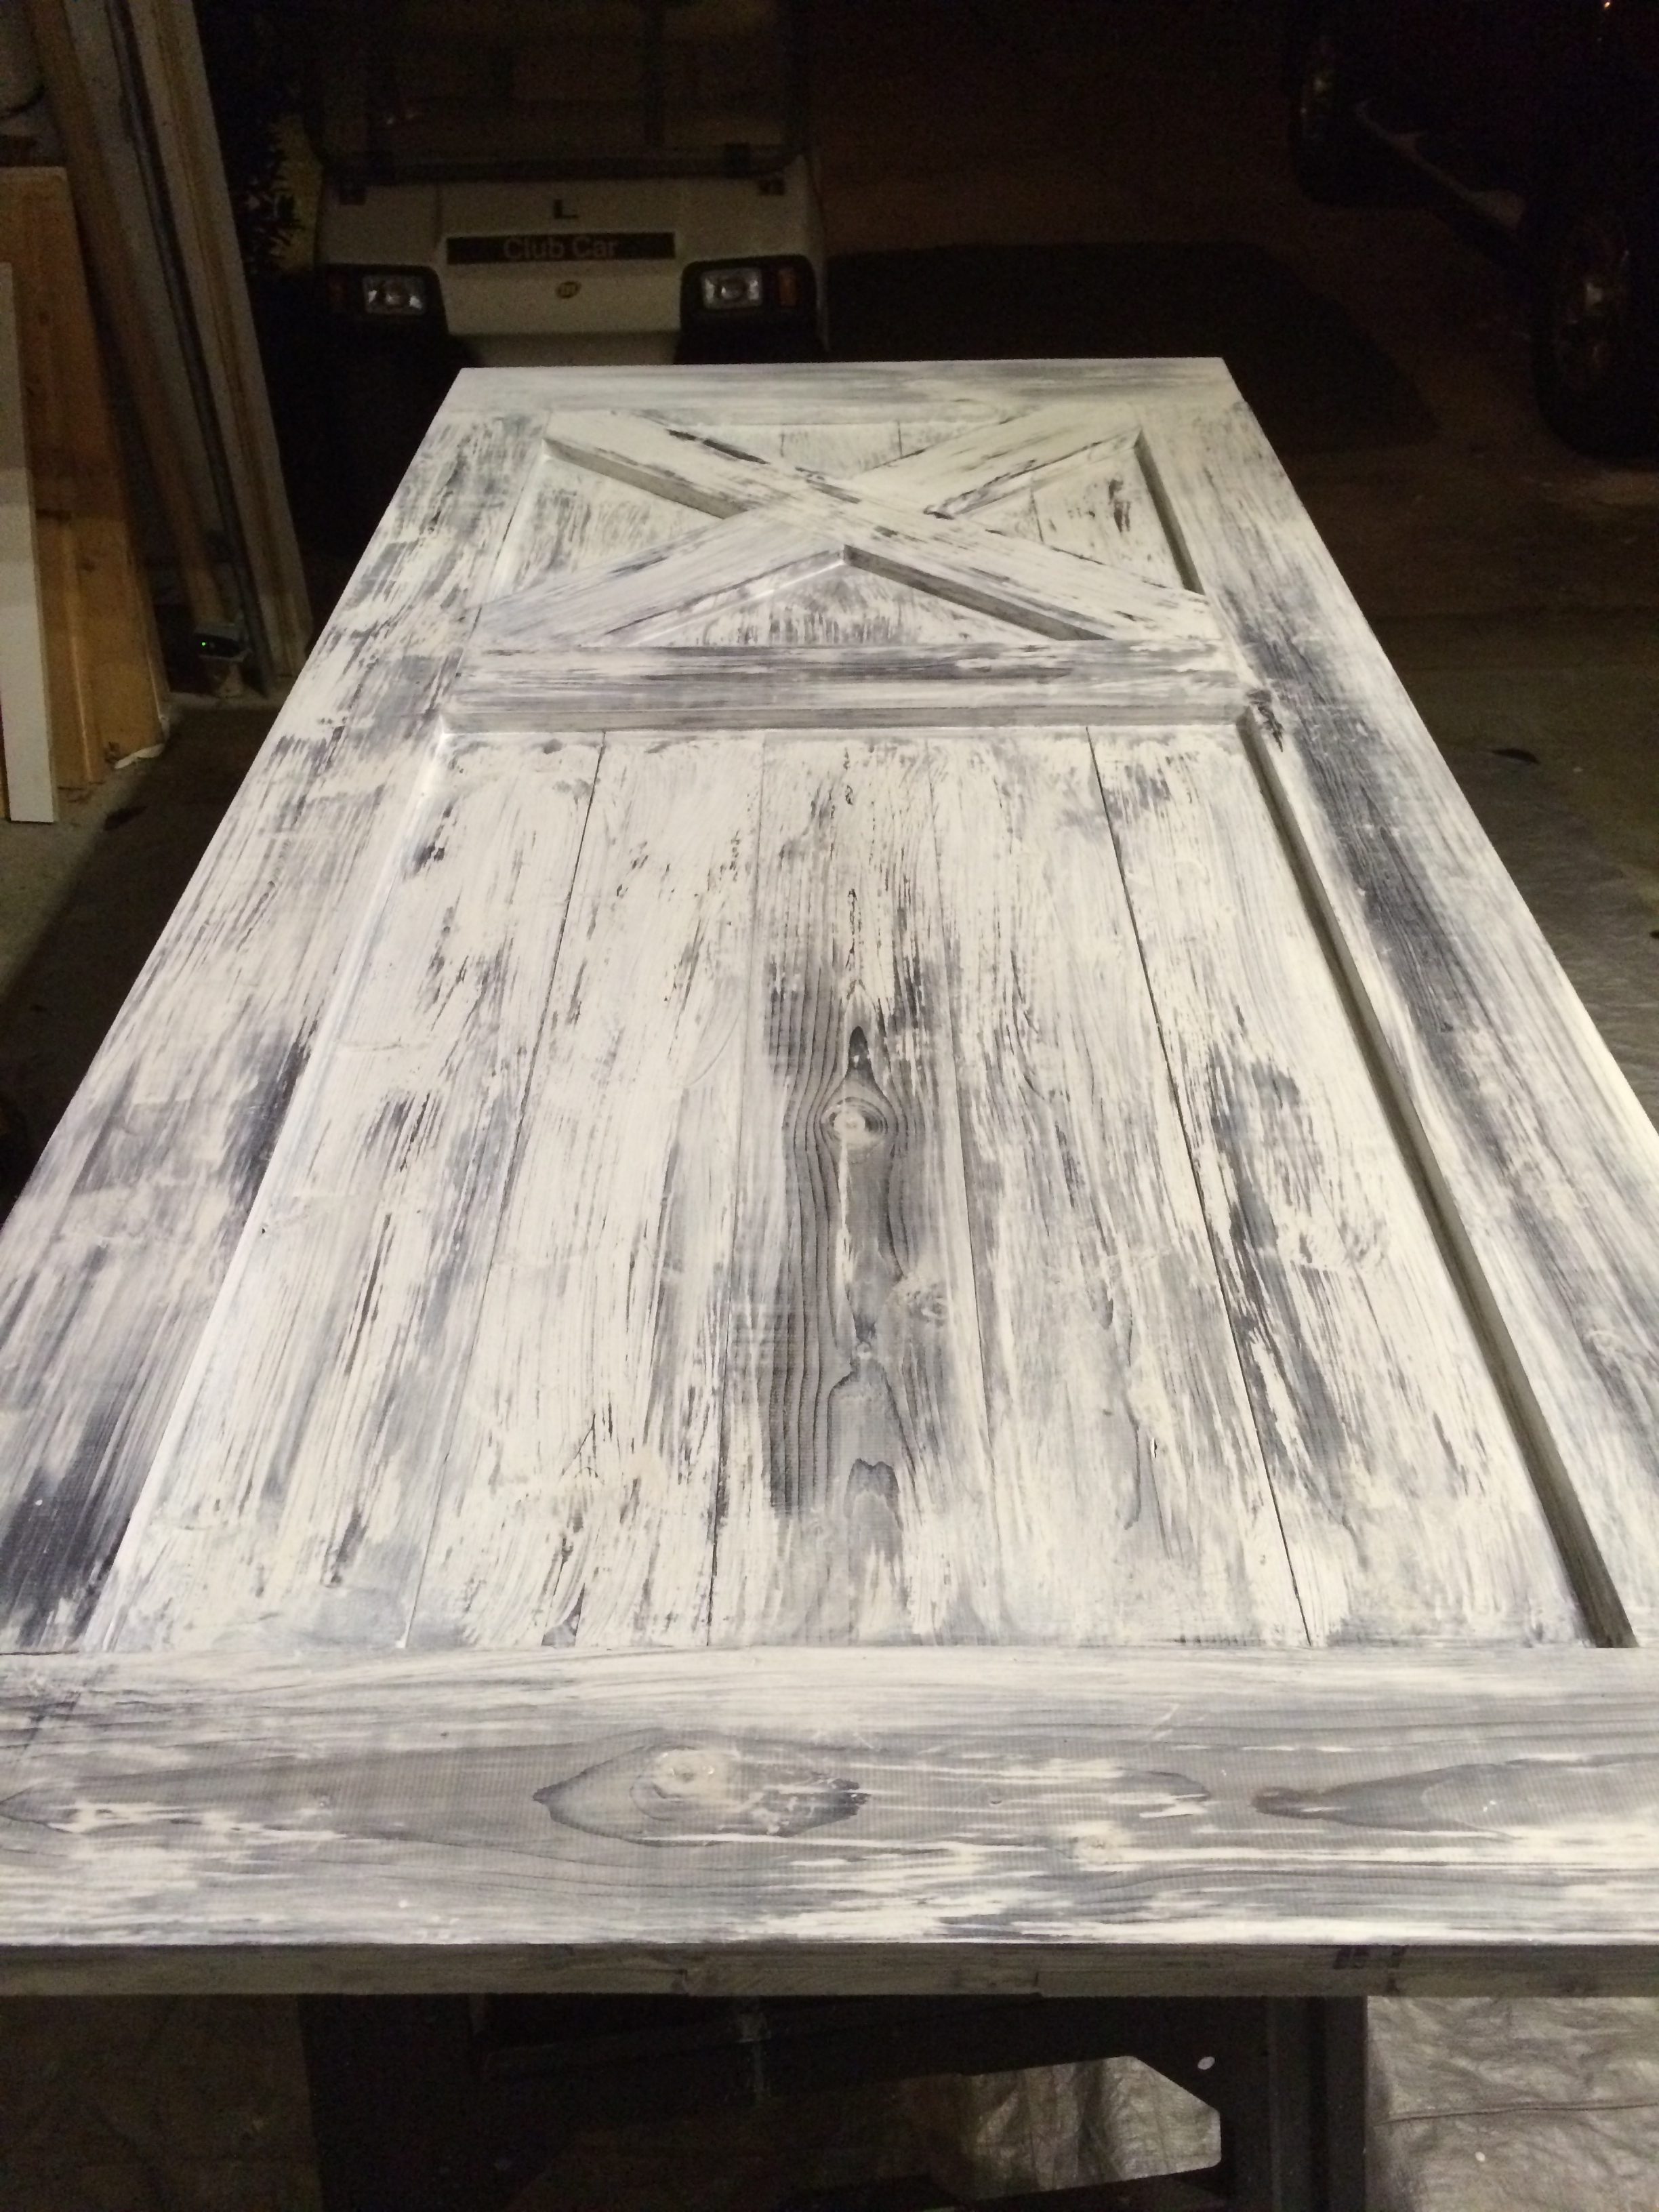
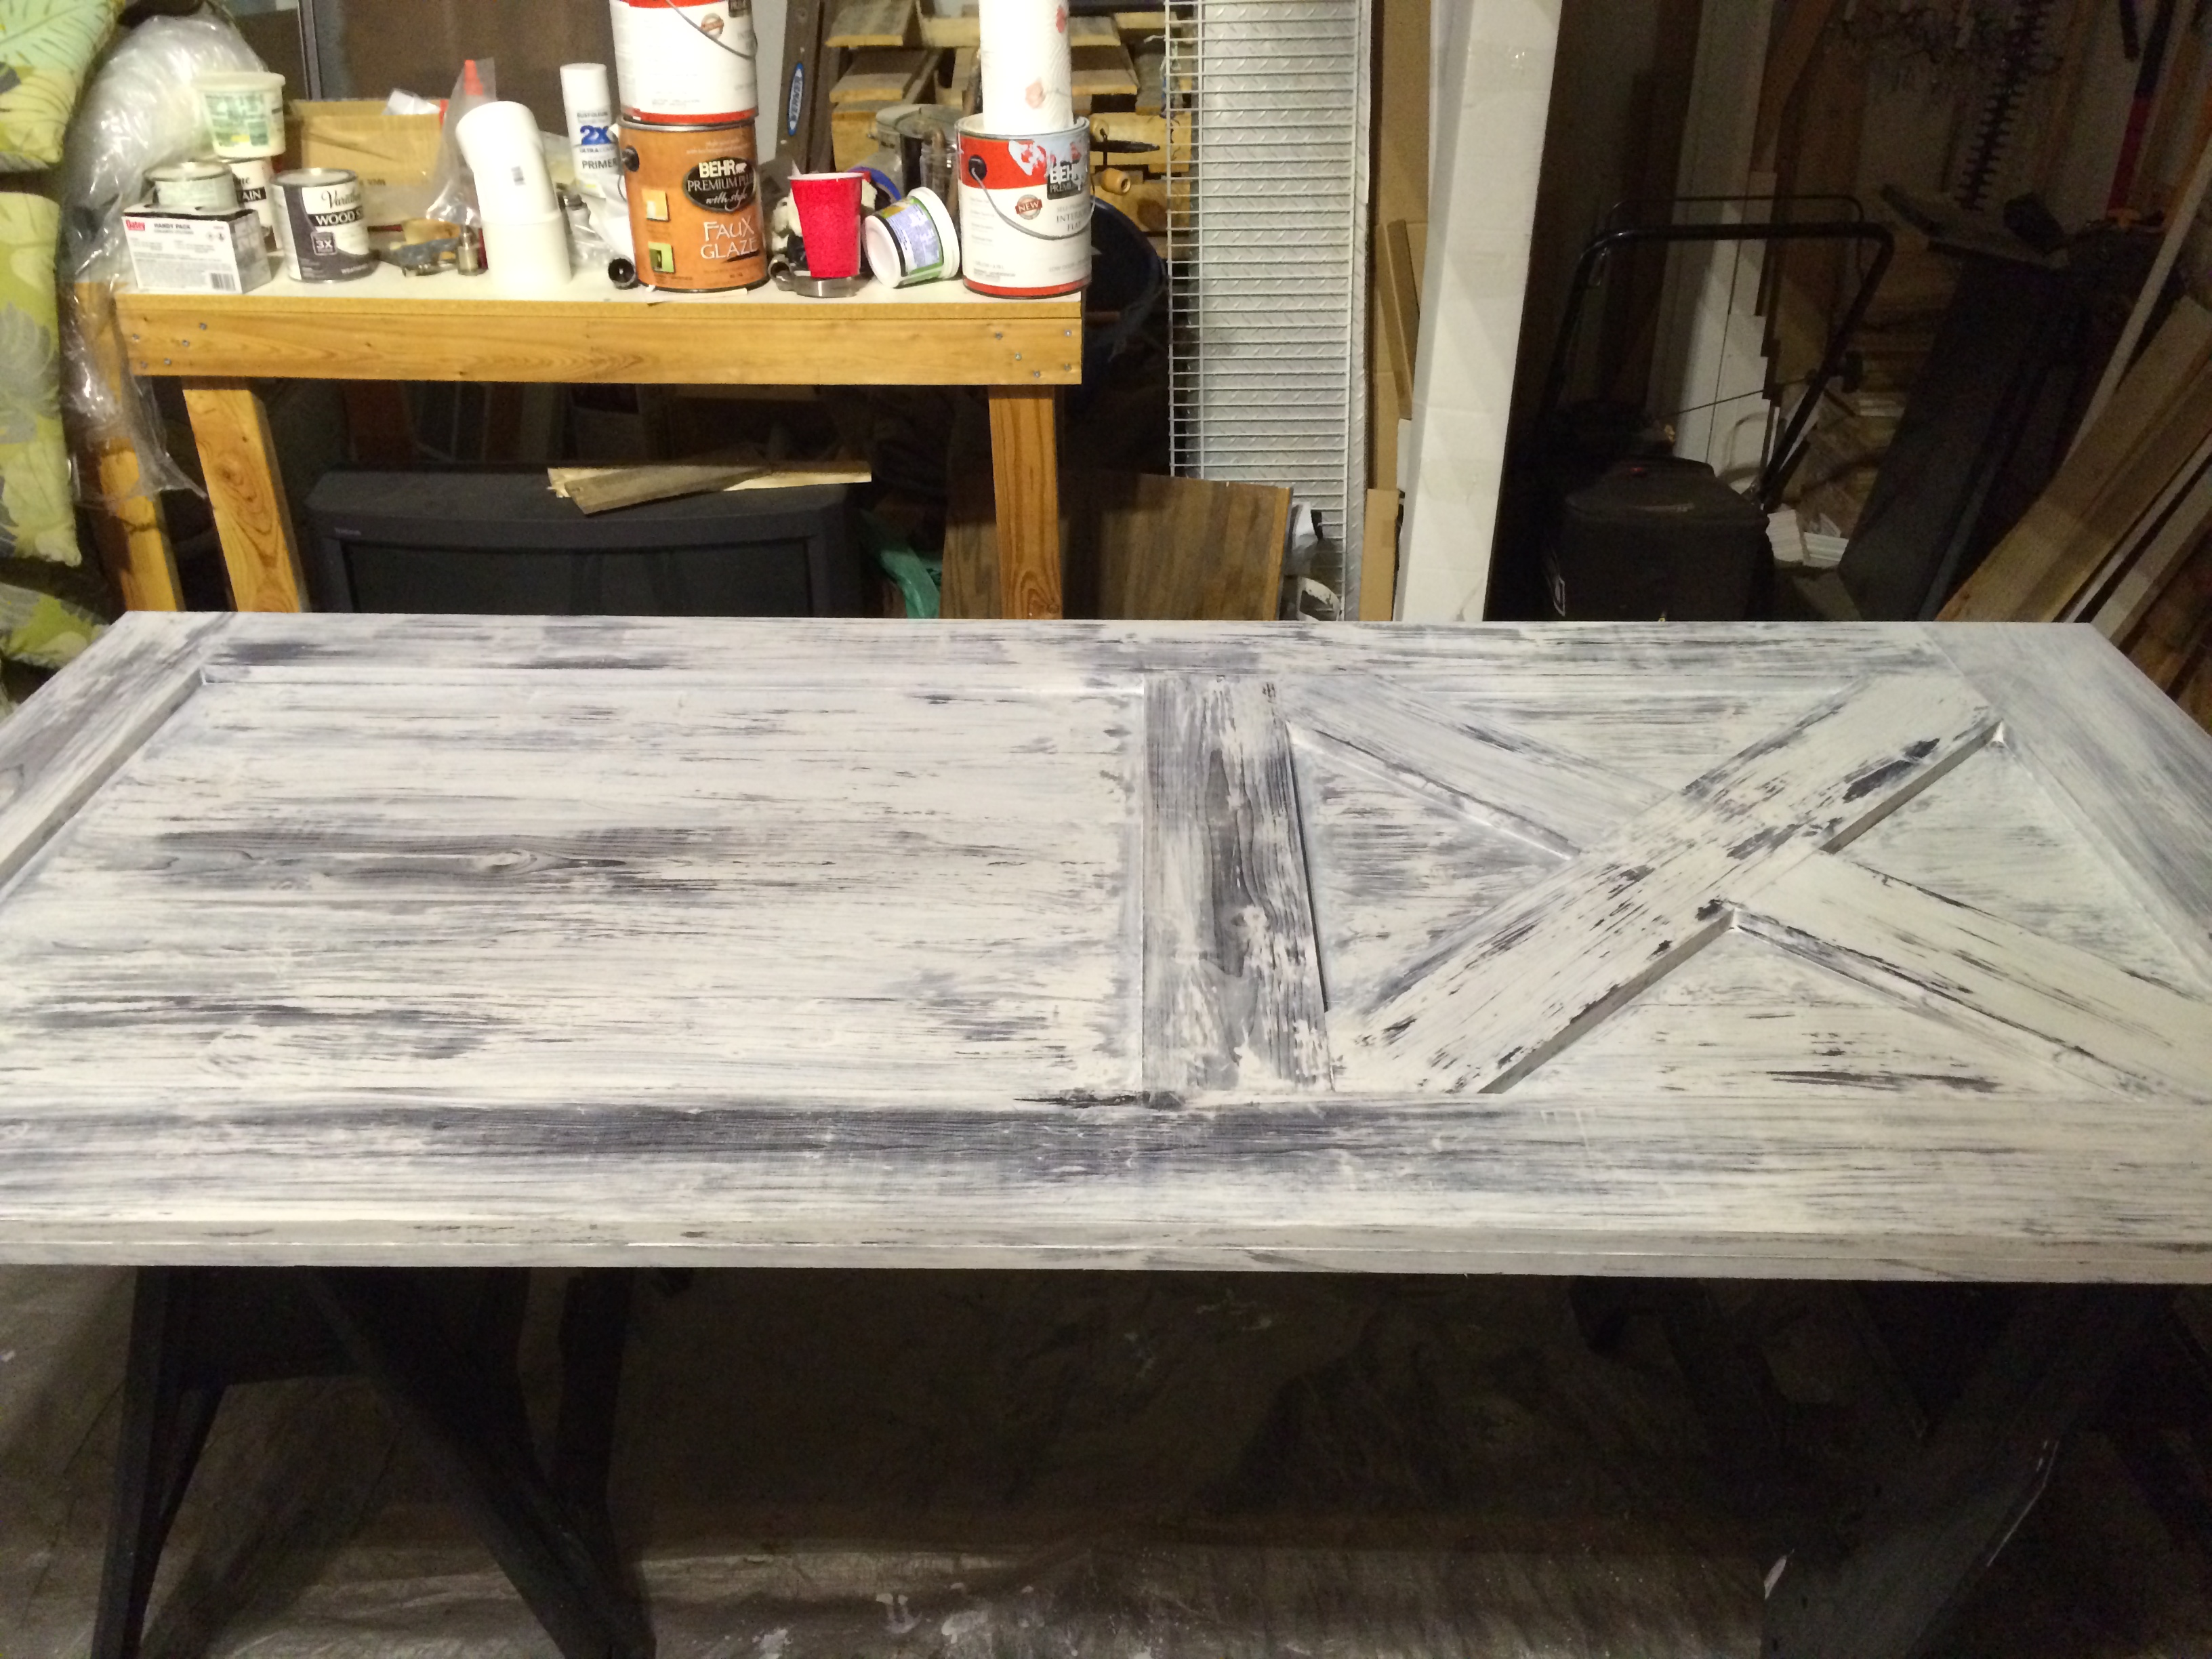
- Place the door back side up again. Using a paintbrush OR shop towel, apply the 50-50 whitewash mixture (paint and water). All visible sides included. If you want a very textured aesthetic, rub it off almost immediately with shop towels and a LOT of force. Scrub-a-dub-dub like you’re from the Mother Goose Club. Let dry for 30-60 min.
- Flip it over and repeat step 1. Let dry another 30-60 min.
- Repeat this process with another coat of whitewash if it’s too dark and not textured enough for your taste. Or consider adding more paint to your whitewash mixture for a heavier coat. If our vibe is too splotchy for your lightly-distressed preference, then don’t rub the paint off at all. After drying, sand it by hand with 220 grit sandpaper until desired texture is reached.
Step 7. Attach sliding hardware to door.
*Confident males specializing in DIYdidYouJustDoThat* – Follow any directions that come with your barn door hardware.
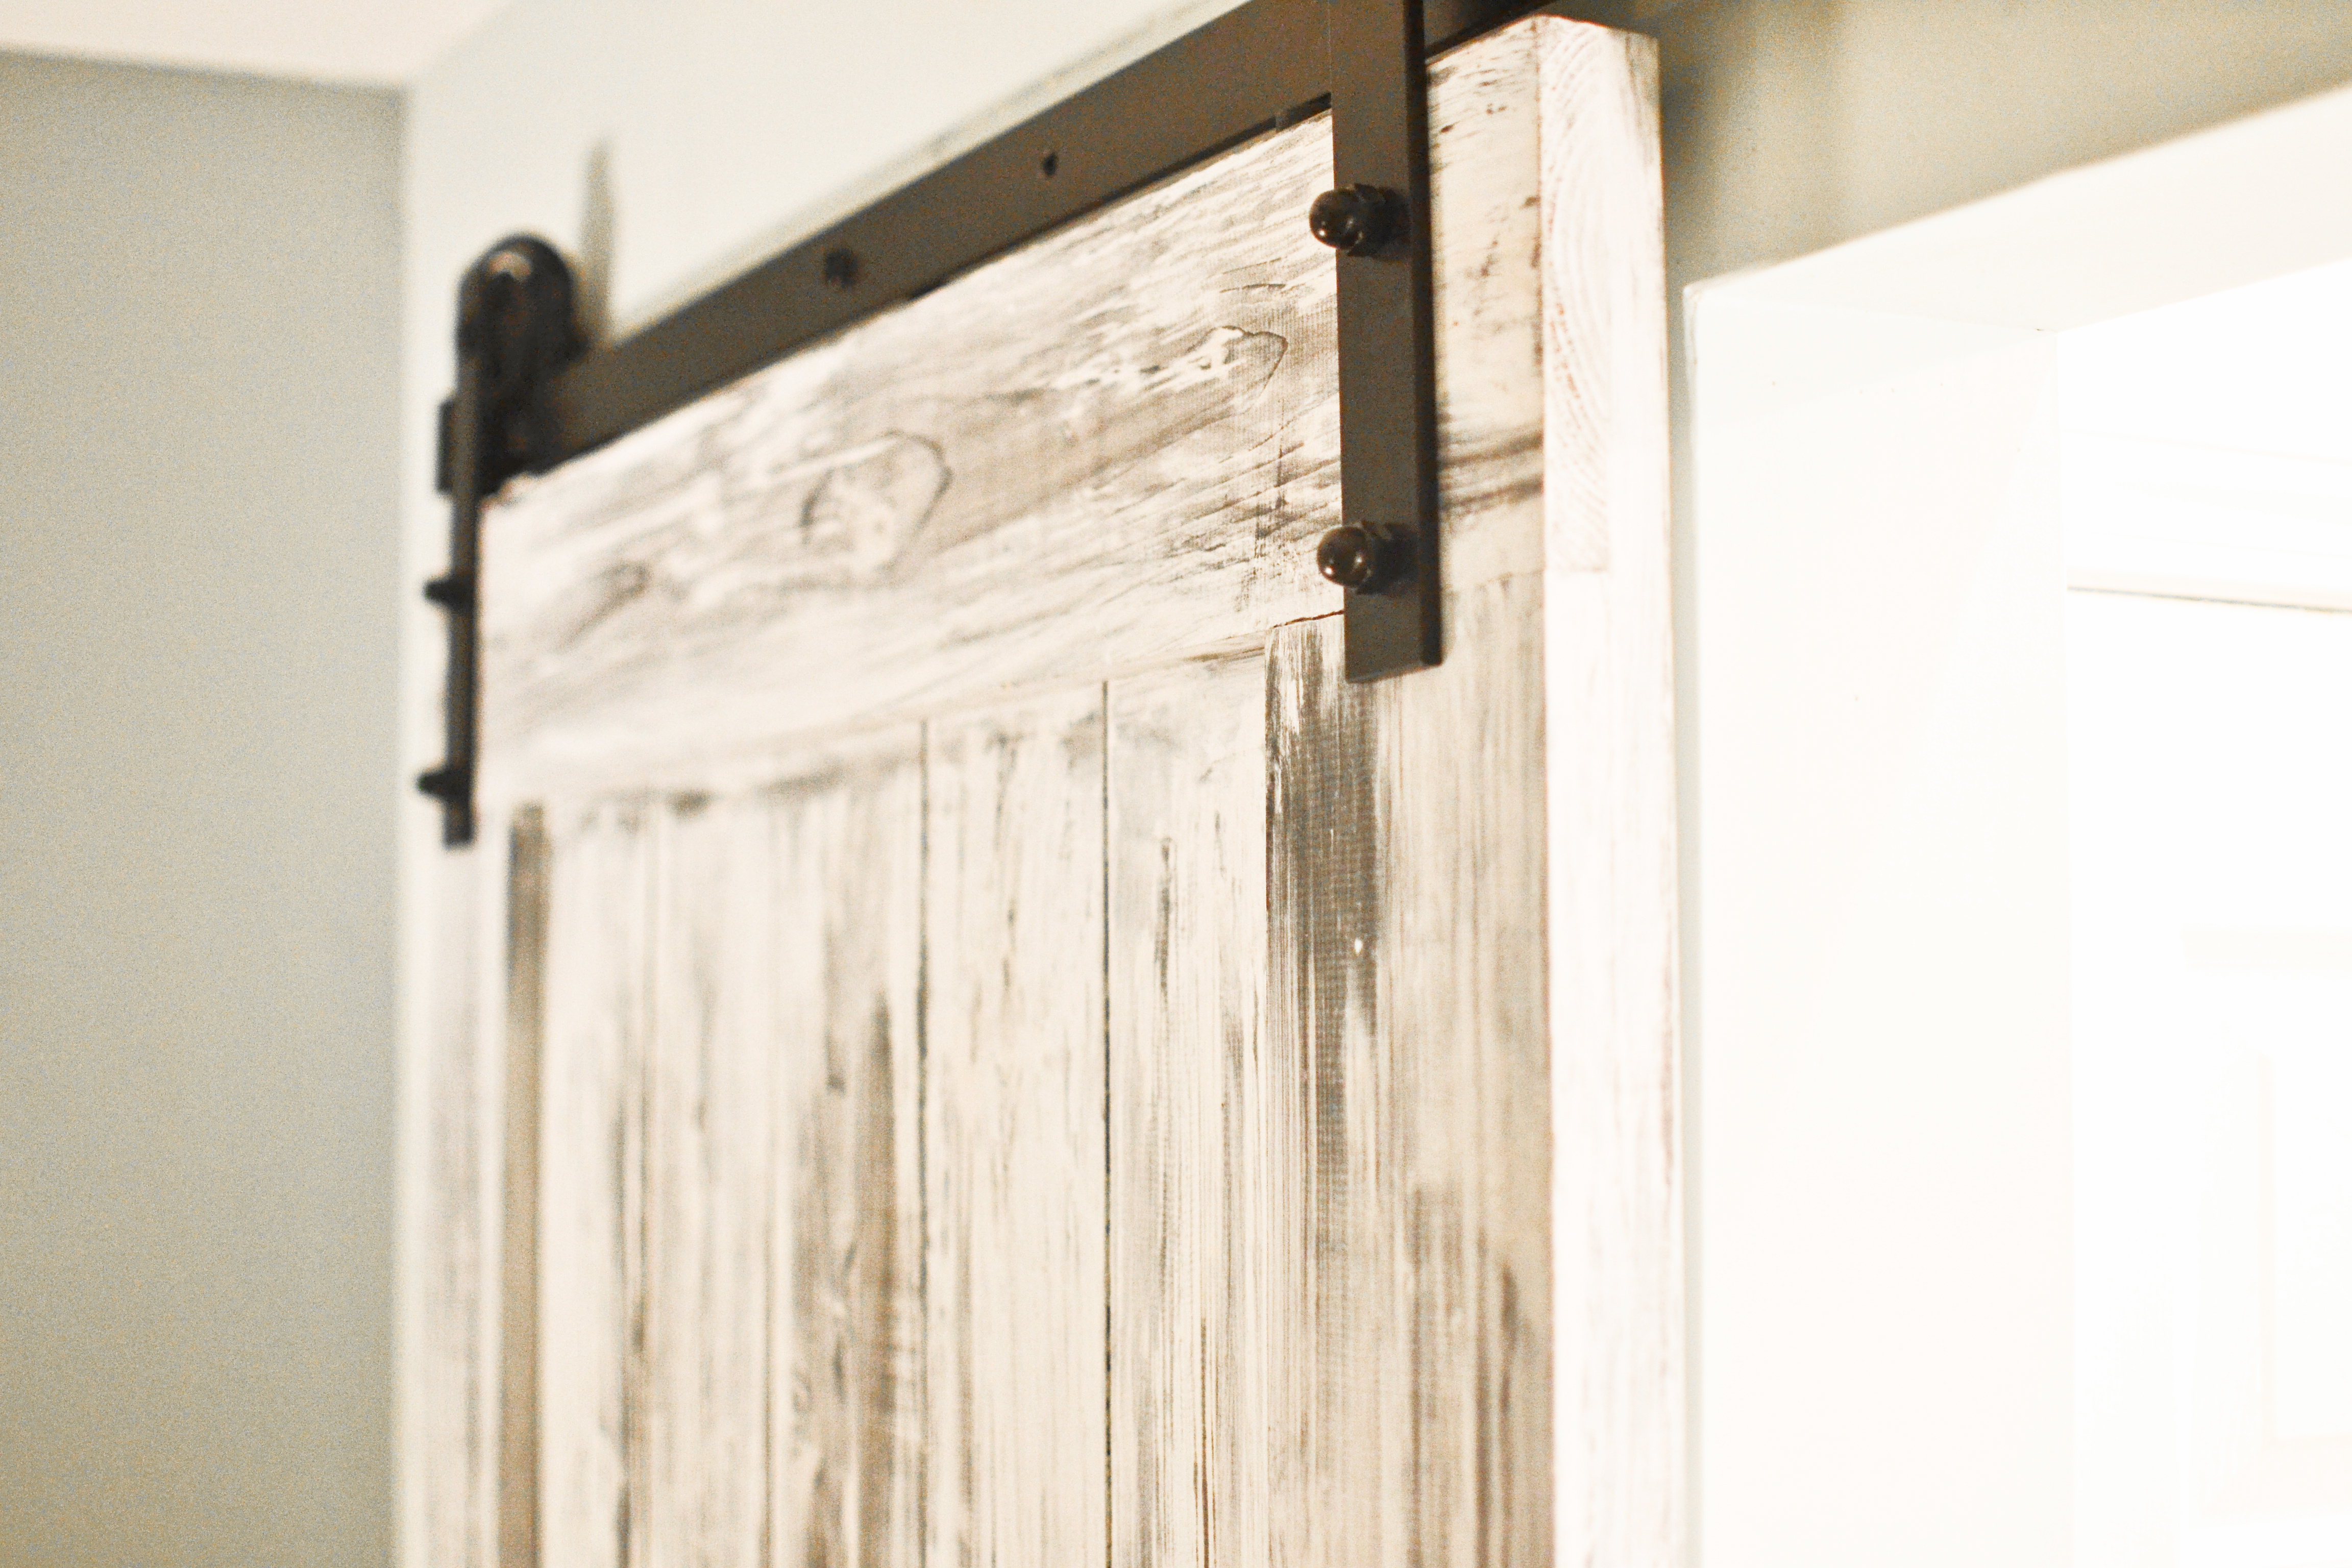
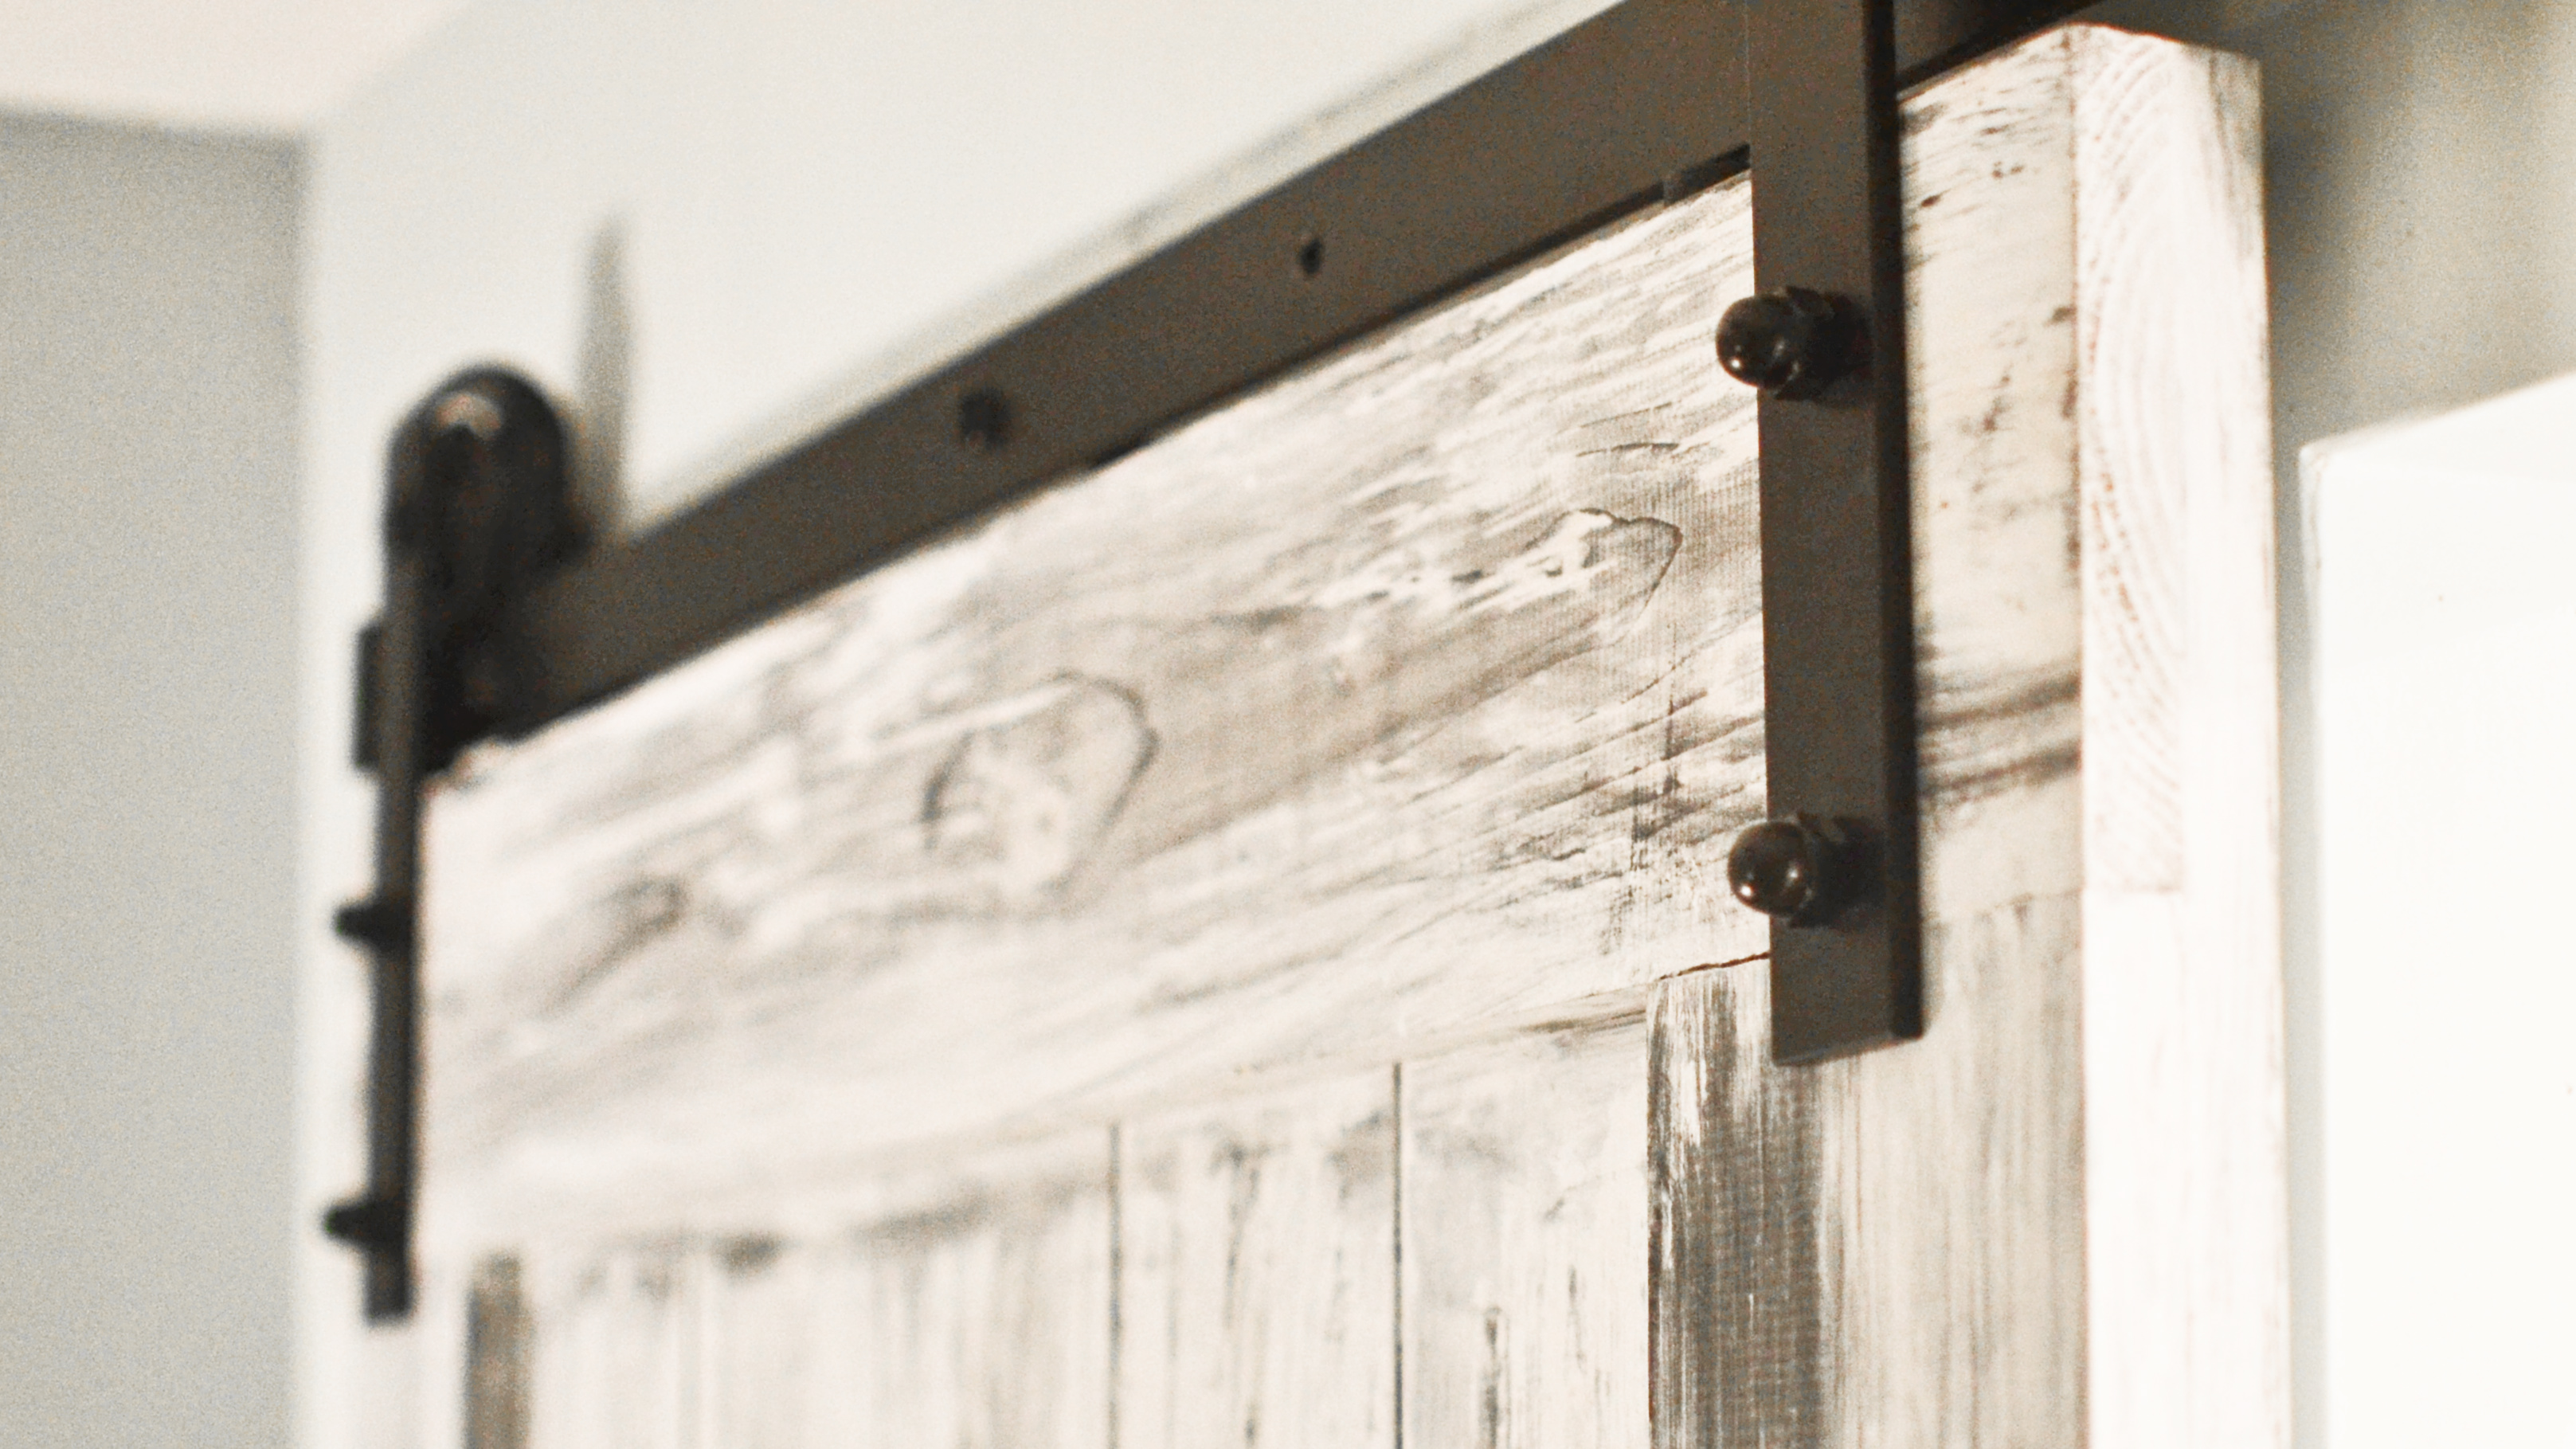
Attach the 2 rollers to the door, centered with the left and right side trim (or to your liking). Dry fit the door in place, covering the doorway/opening by 2 inches on each side. Place a ¼ inch thick spacer underneath the door as a guide. Place the track directly underneath the rollers, apply upward pressure without lifting the door, and place the track on the wall while maintaining pressure. Trace the underside of the track on the wall with a pencil. Set the track and door aside and verify your pencil mark by measuring the distance from the line to the floor. Is it the exact same height as the distance between the roller bottom and the floor minus ¼ inch?
Step 8. Attach track hardware to wall.
*Note: now is the time to assess your need for the “wall mount” 1x4x6 mentioned in Materials #9. Plumb your door, allot the exact distance the track will require the roller to sit off the wall, and assess if your barn door is going to touch the door casing or baseboard or wall or picture frame. If you need it, snag the stud finder and screw the 1×4 into studs using 2 screws per stud.
If you’re pleased with the line height (you traced in step #7 against the bottom of the track), level it using the LOWEST point of the line. Do not go beneath the existing line or you will likely munch the floor. Draw the newly leveled line and use it for track installation. If you don’t level it and your floor isn’t perfectly level, the door will either open or close itself.
If you used a wall mount, mark your dry fit line AFTER installing the mount. Then lag screw (has a massive hex head and a sharp tip) straight through the mount into studs. Follow the remaining written instructions for the 2 door stops, floor guide, nuts, bolts and washers in your hardware kit.
Step 9. Slap the door on the wall.
Throw it on up there. Assess your install by sliding the door completely back and forth. Comment on your stoke level now that you have a custom-built sliding barn door. Questions? Need more clarity? I’d love to hear it.
Real philosophical & crap
You ever thought about the origin of barn doors? The age old symbol of sweaty barnyard animal fragrances saturating the air more than oxygen. The farmer, blue collar, work-your-donkey-off until your hands callous, your cuticles bleed, and food is put on the table through the pain of your cultivation and harvesting perseverance. That’s the kind of barn door I want to rep. Maybe I should’ve stained my door with wet hay-covered turd nuggets instead of a color-suspended solvent. To each their own I guess.
